Appearance

Modifier
WARNING
! ! Note: The effect of hair modifiers cannot be baked to the hair, so make sure 3D Hair Brush is installed.
Overview
Modifier, including Length, Noise, and Clump, allows users to modify the shape of hair Children non-destructively. Different modifiers influence each other by layer stack, and any parameter can be modified at any time as needed, very flexible and controllable.
Getting Started
After 3D Hair Brush is installed, Modifier panel will be found under Children. After enabling Modifier, the modifier panel will get ready.

General parameters
The following three options are provided by every modifier for overall control.

- Influence: Controls the intensity of modifiers. The smaller it is, the less the influence on the hair.
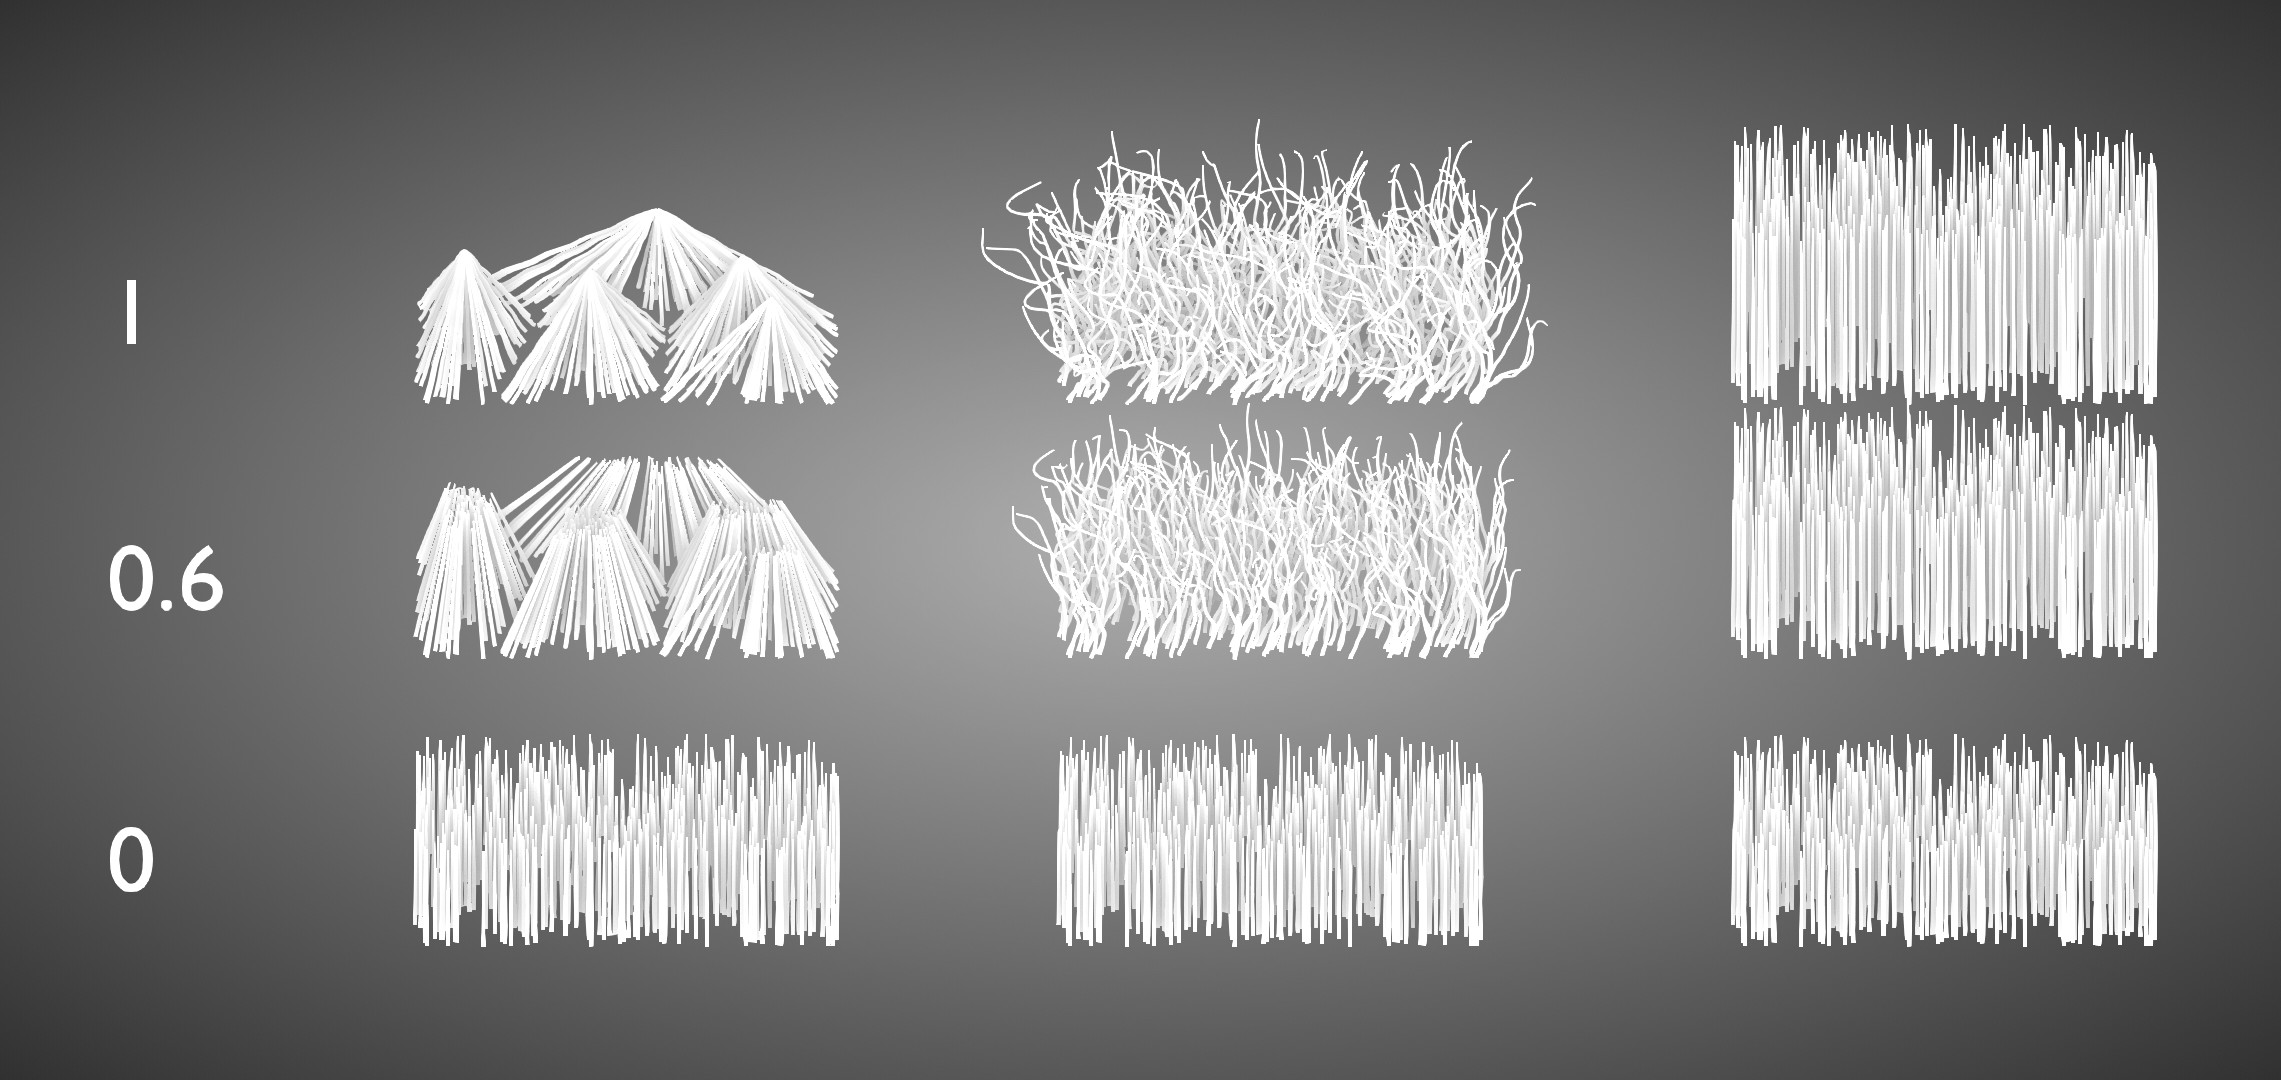
- Seed: Random seed; To make sure it works properly, Clamp and Length modifier requires 'Threshold' checked.
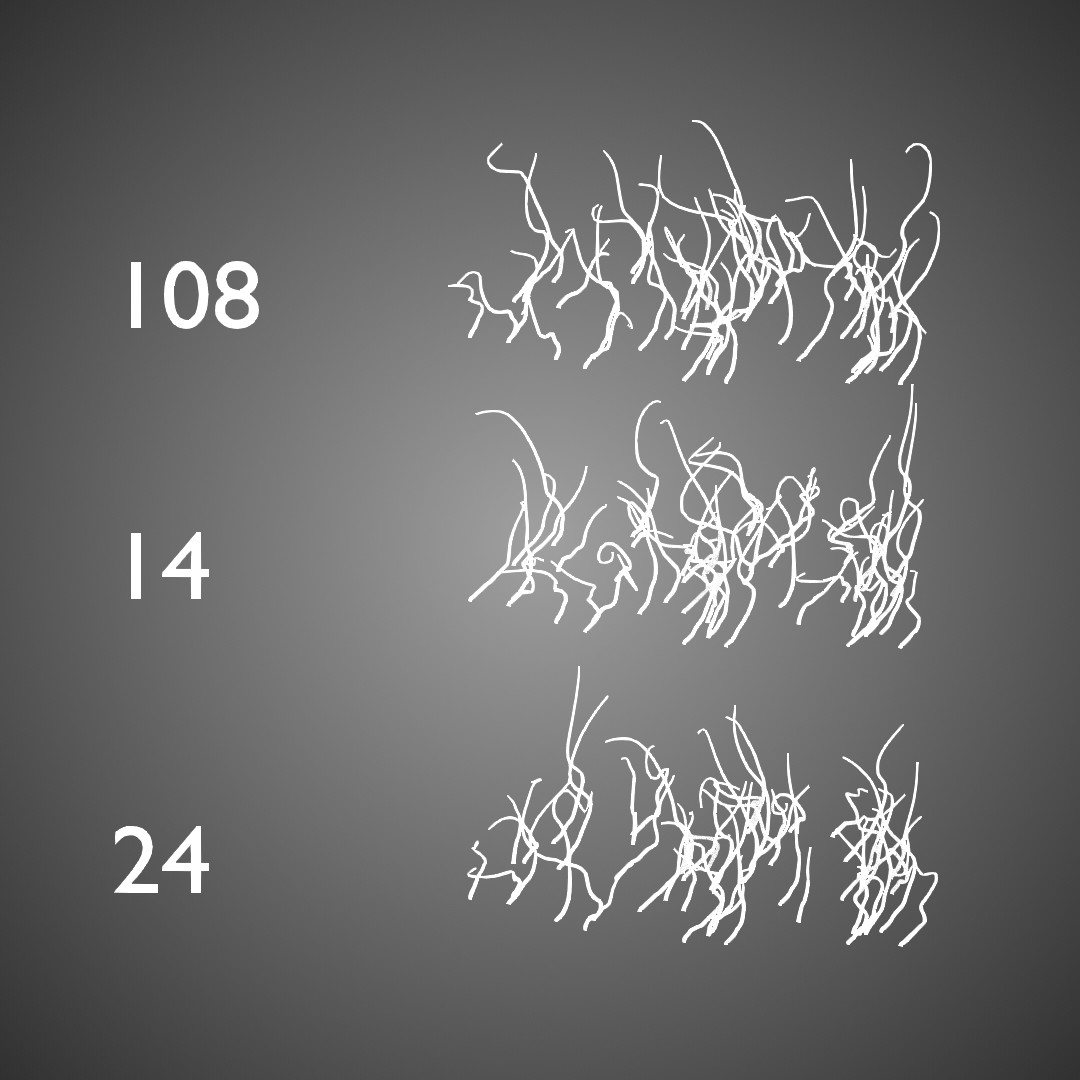
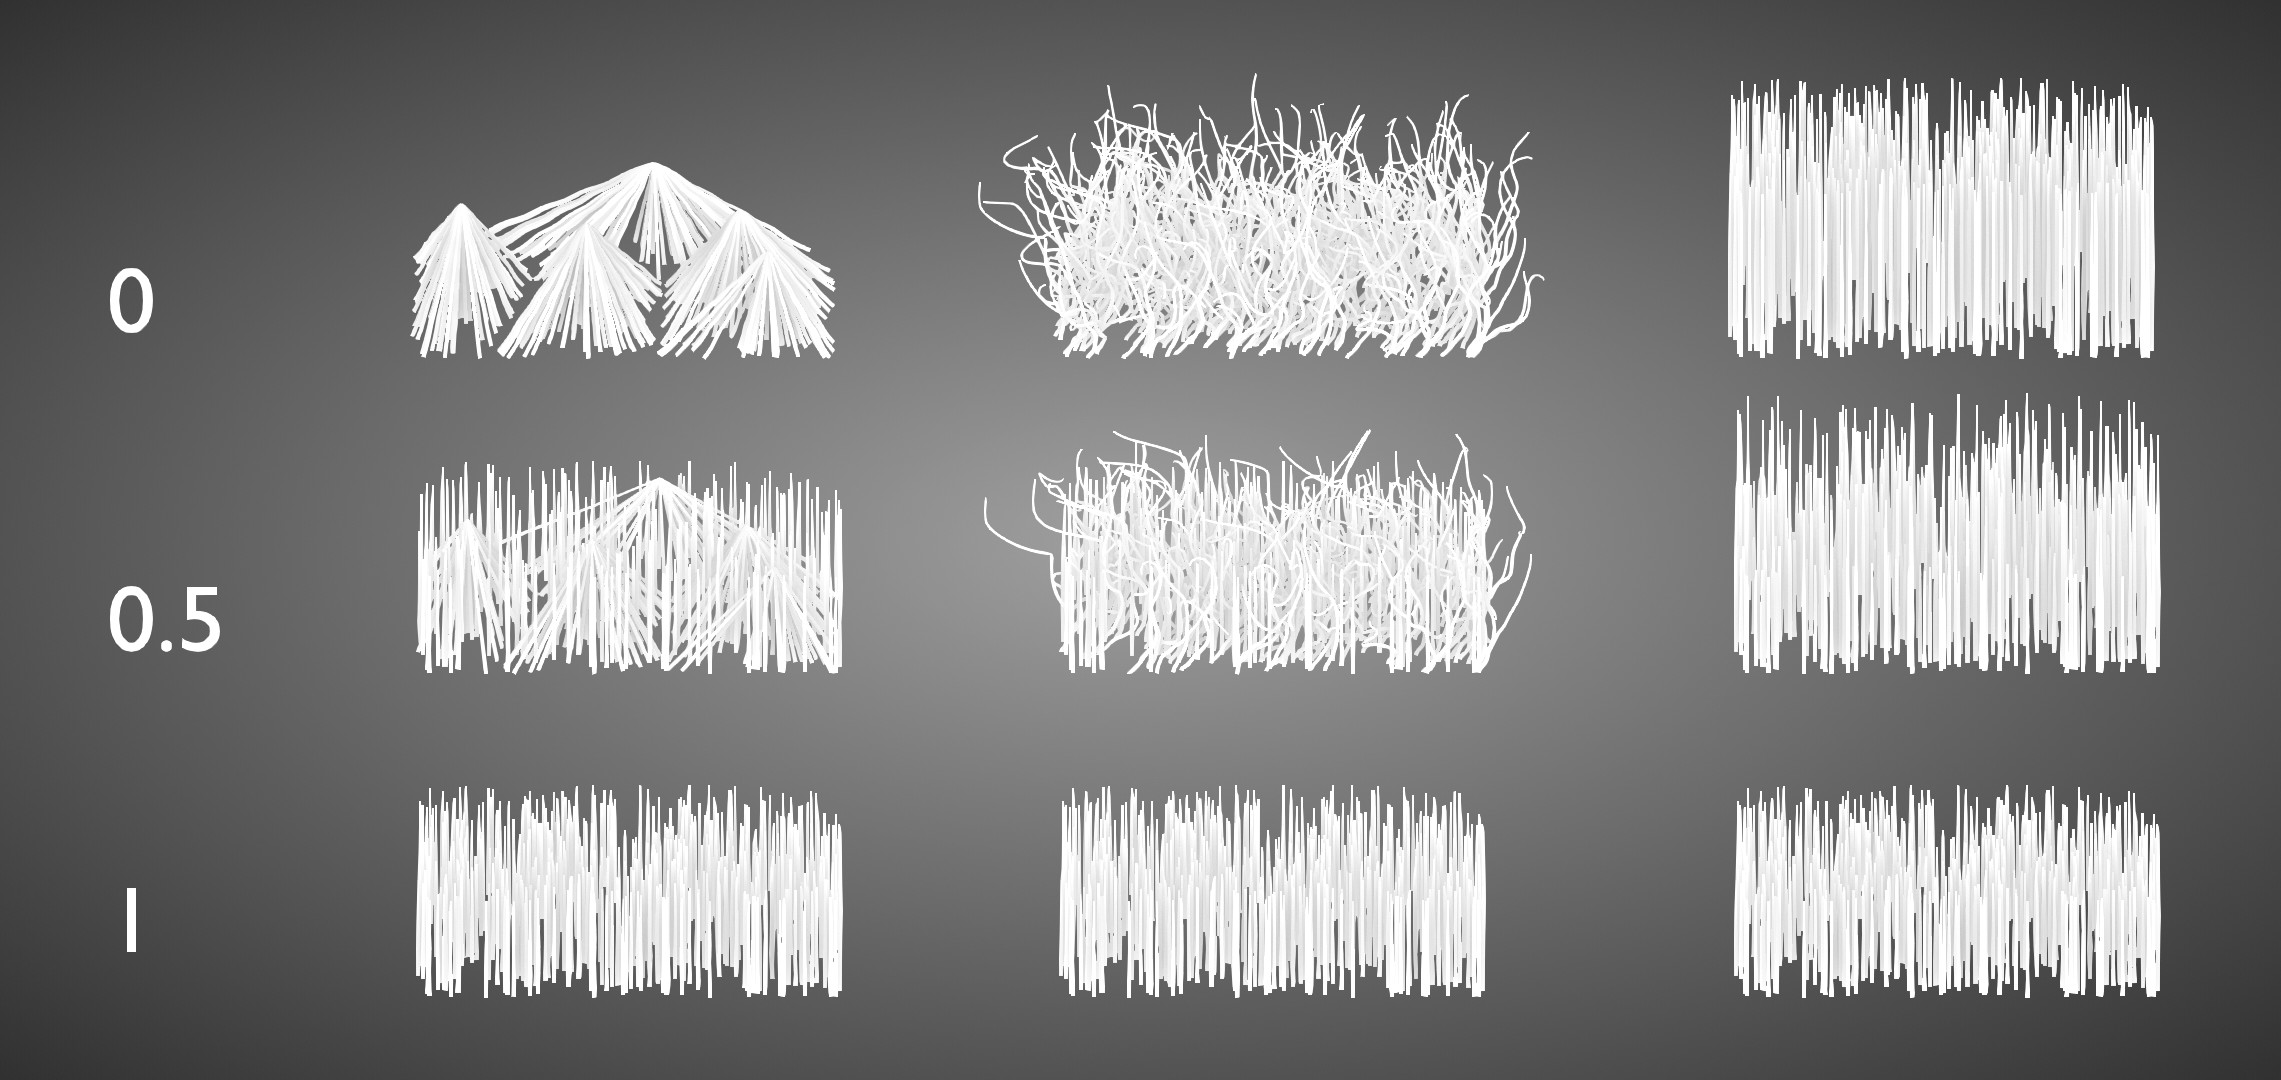
- Threshold: Controls ratio that modifiers don't work on. The larger it is, the more hairs are not affected.
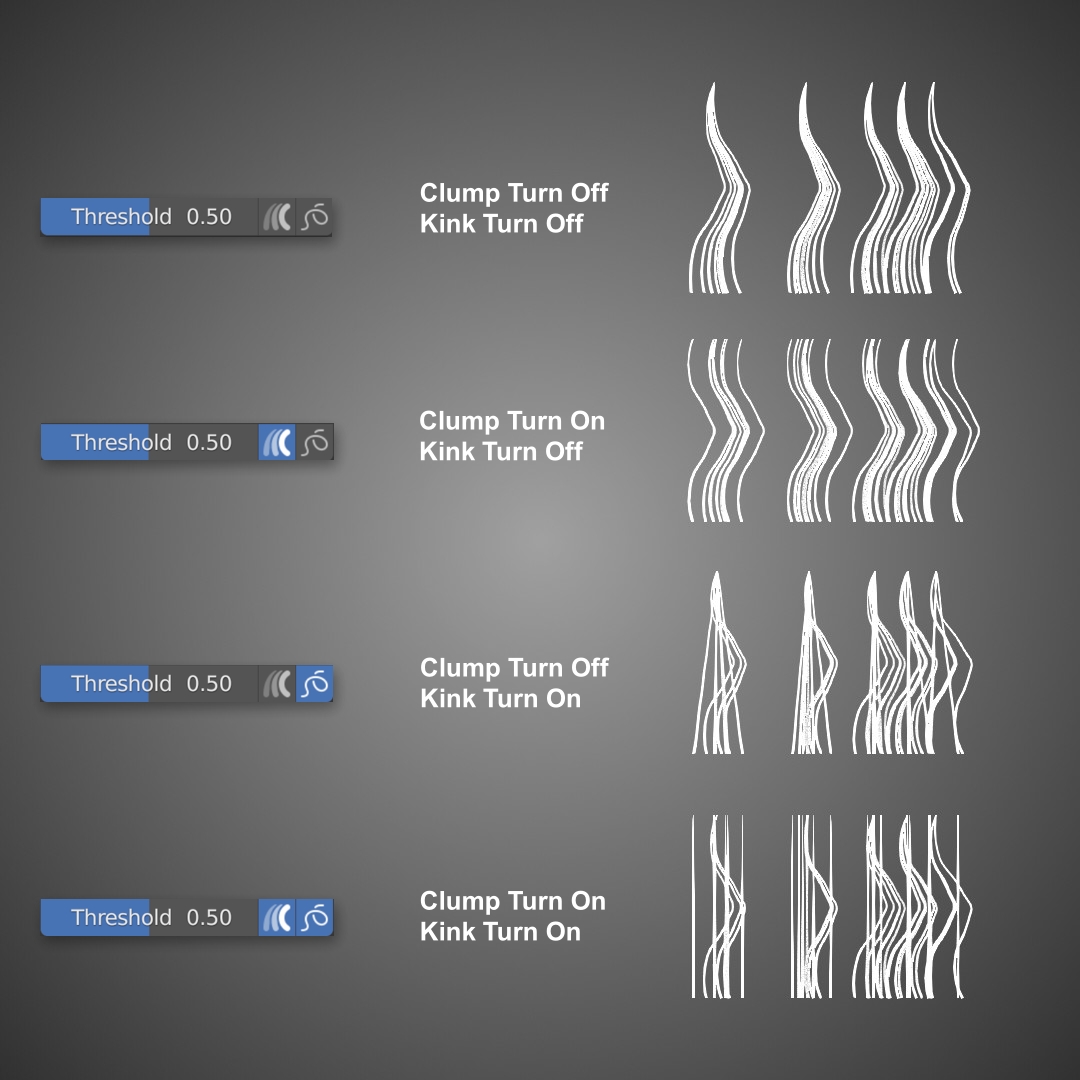
Threshold of Clump modifier provides extra options to control clumping and kink.

 | Influence Clump | The effect of the threshold on clump. |
|---|---|---|
 | Influence Kink | The effect of threshold on kink. |
Usage Tip
Setting the 'Seed' and 'Threshold' to the same value in the different modifiers can make the modifiers work on the same range of hairs.
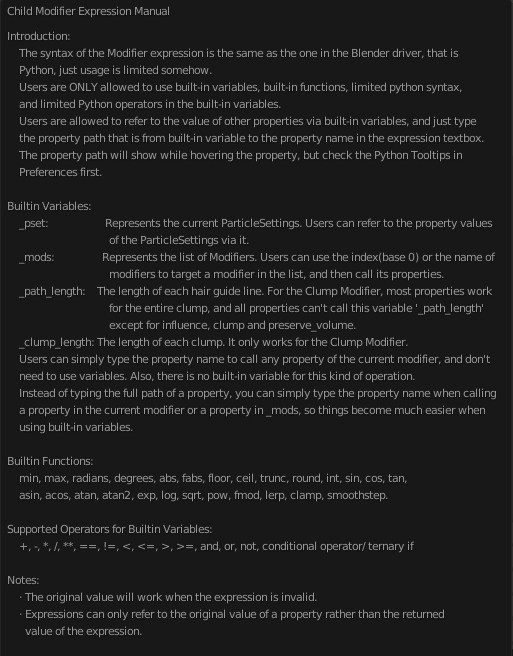
Expression

 | Icon1 | Any option with a button [Icon1] allows users to use expressions. After enabling the button, the text box of expression will get ready. And click the button again to disable expression. |
|---|
Tip 1
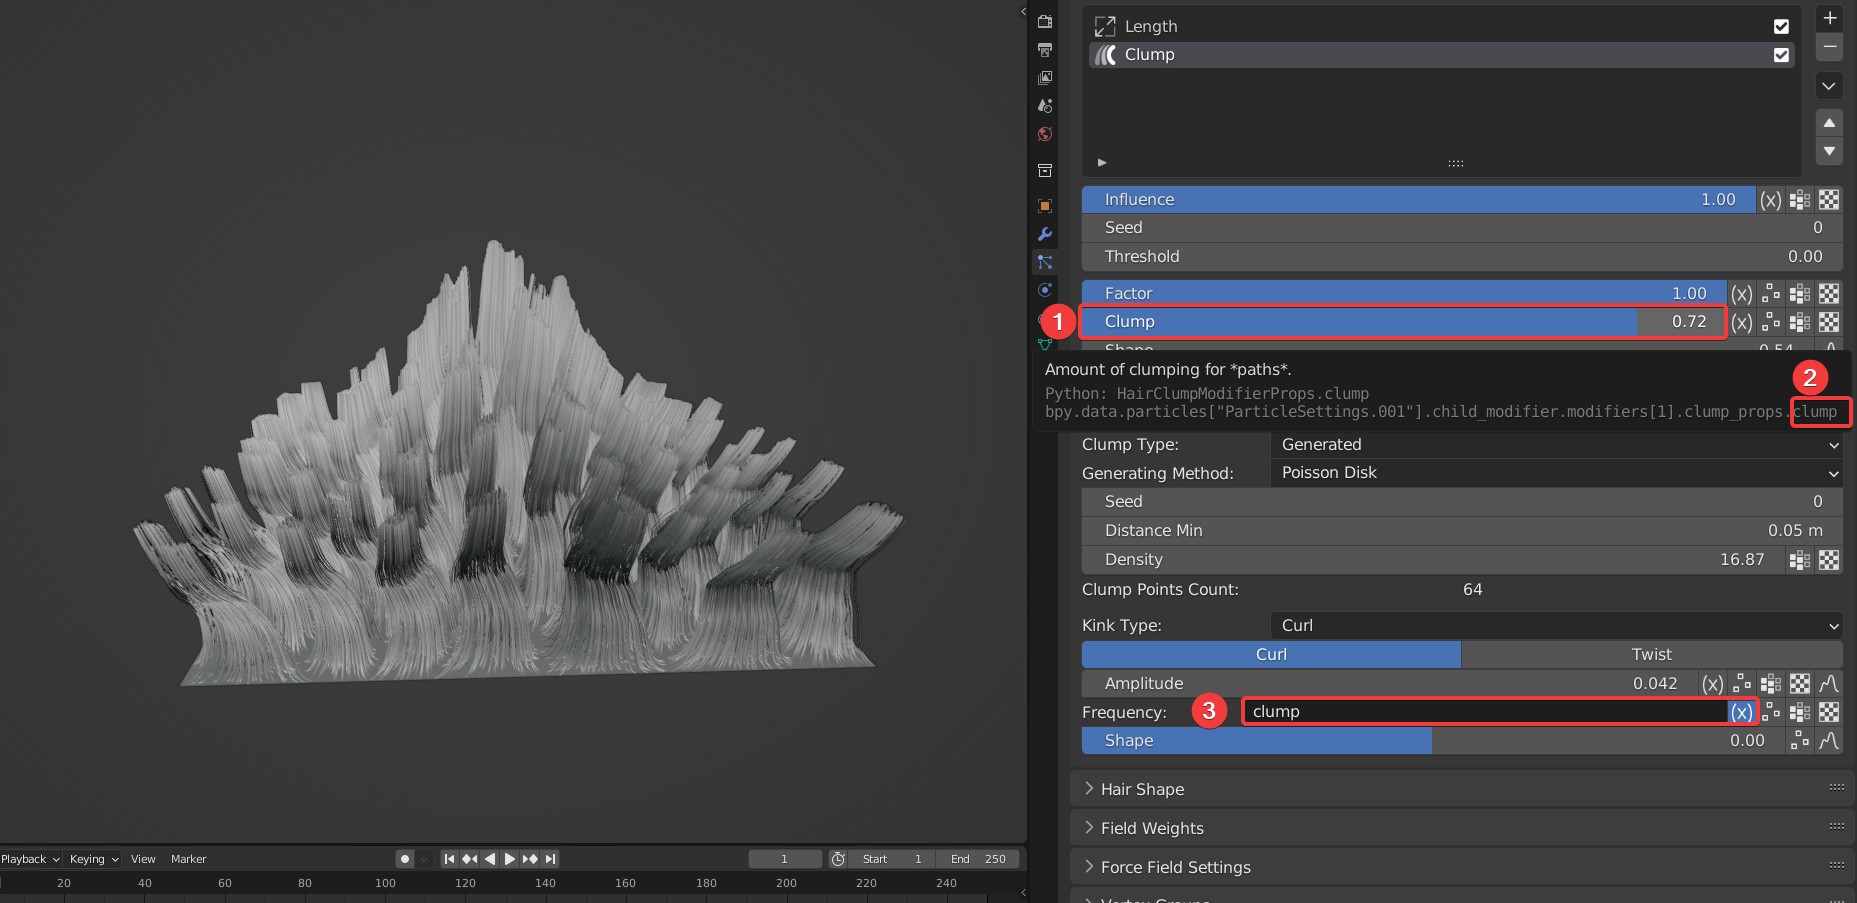
Currently, the expression can only be applied to the current particle system, and can only use the attributes on the current particle settings, including the modifier attributes on the particle settings, the attribute names are in 'Edit>Preferences>Interface. And you can open 'Python Tooltips' to check them.
Tip 2
Expressions only support some common Python commands. They are the same as built-in expressions, which can be found in Blender Manual/animation/drivers/drivers_panel.html#drivers-simple-expressions.
For the sake of editing expression, a button to switch the properties interface is provided on the right upper corner of Modifier panel, click it to switch UI between compact style and loose style.
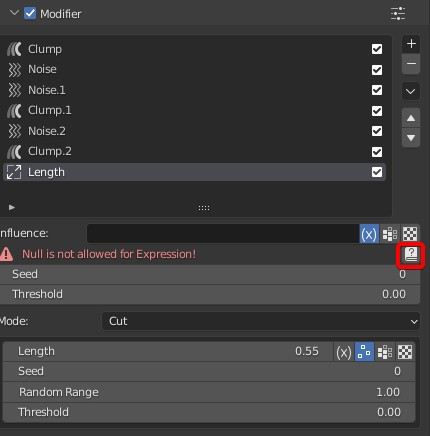
Error
- An error message will be displayed in red text below when there is something wrong.

- Hit the question mark on the right to check expression Manual.
 |  |
|---|
Common Errors
Expression is Null.
There is no returned value, or the value is not compatible with the current attribute.
An unavailable attribute is used in the expression.
An unsupported operator is used in the expressions.
Python syntax error.
Incorrect upper or lower case in the expressions.
Built-in Variables
A few variables are provided, and those are prefixed with _.
How to use the provided variables
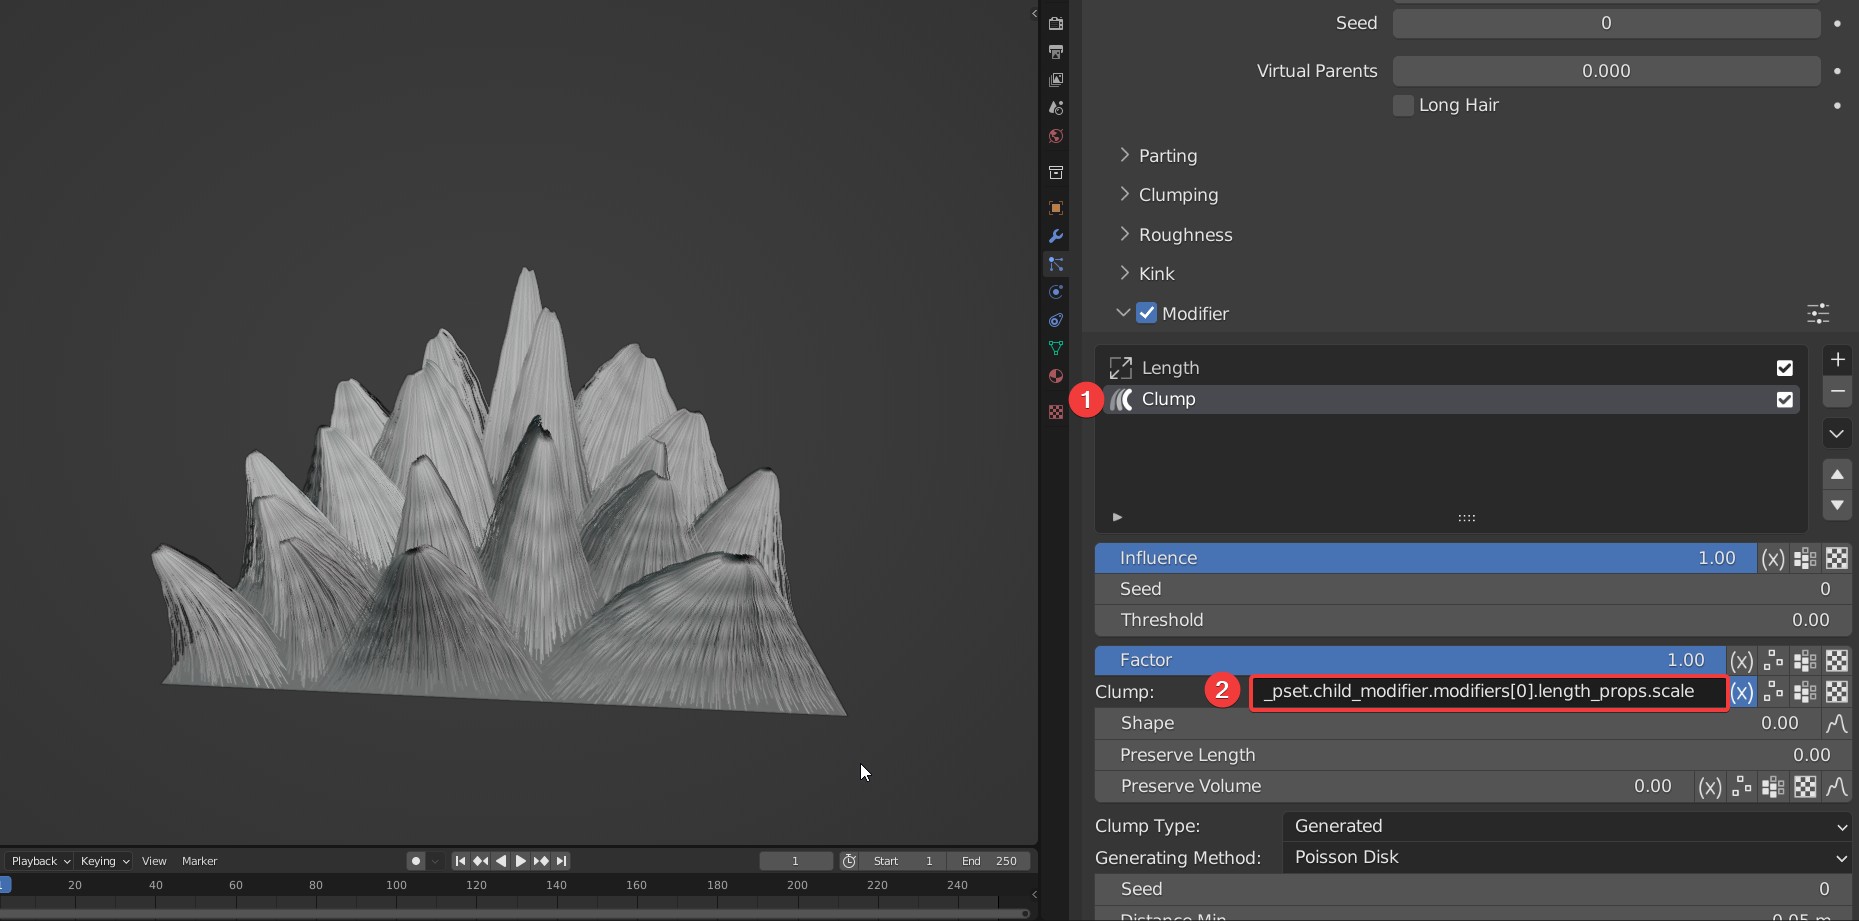
_pset: It represents the current particle setting, and via it, any attribute in the particle settings can be used.
Tip 1
You can type _pset.child_length to call the length of every single hair
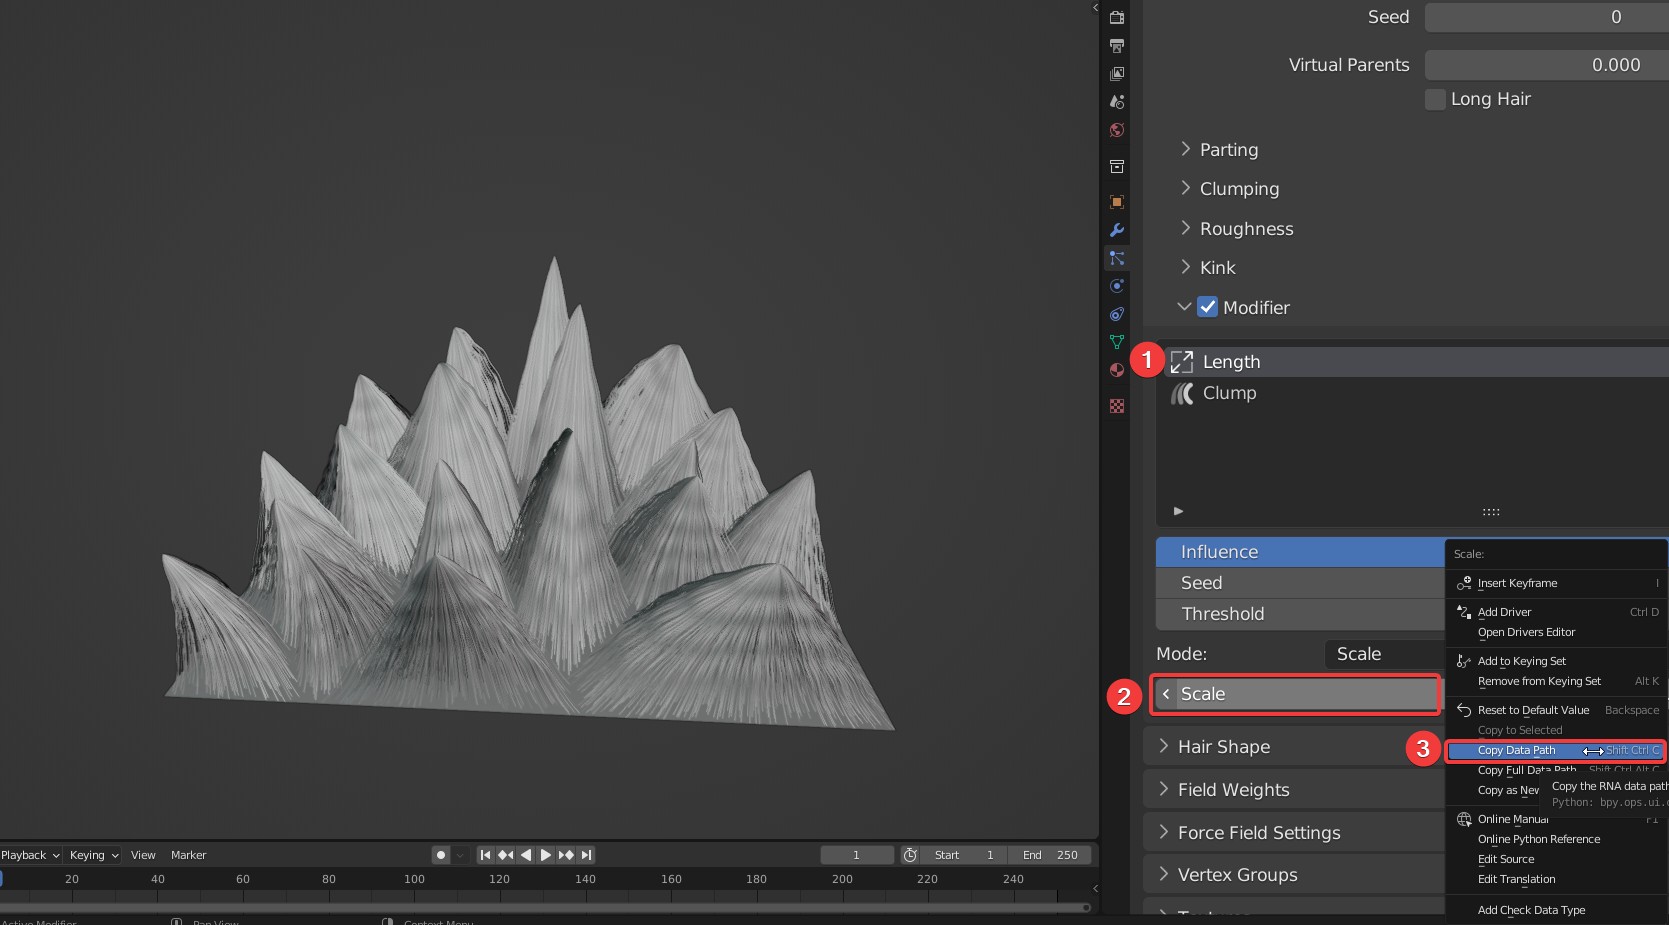
Tip 2
To call the parameters of other hair modifiers, you can right-click on the selected parameters, hit 'Copy Data Path', and then paste it after _pset.
Demo
_mods: Represents a list of modifier sets, which is used to call attribute values of other modifiers.
TIP
_mods is recommended to call attributes in non-current modifiers, because a very long expression will be written if _pset is used. For example: The first modifier in the list is "Length", to call its Scale value, you can directly enter _mods[0].scale or _mods['Length'].scale.
_path_length: It's to call the length of each hair, and this dynamic attribute is changeable based on the length of every single hair.
Comparison with expression and without expression
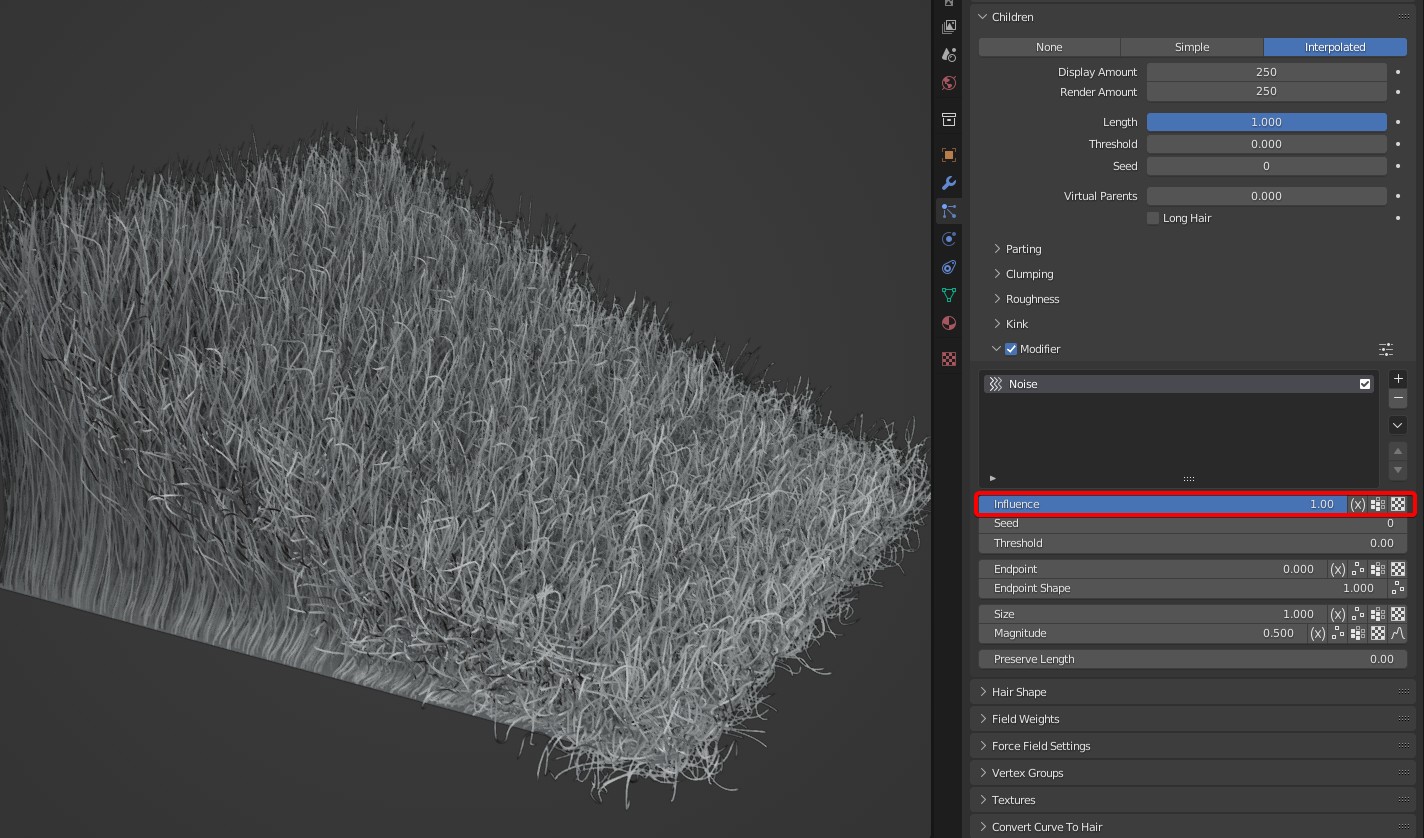
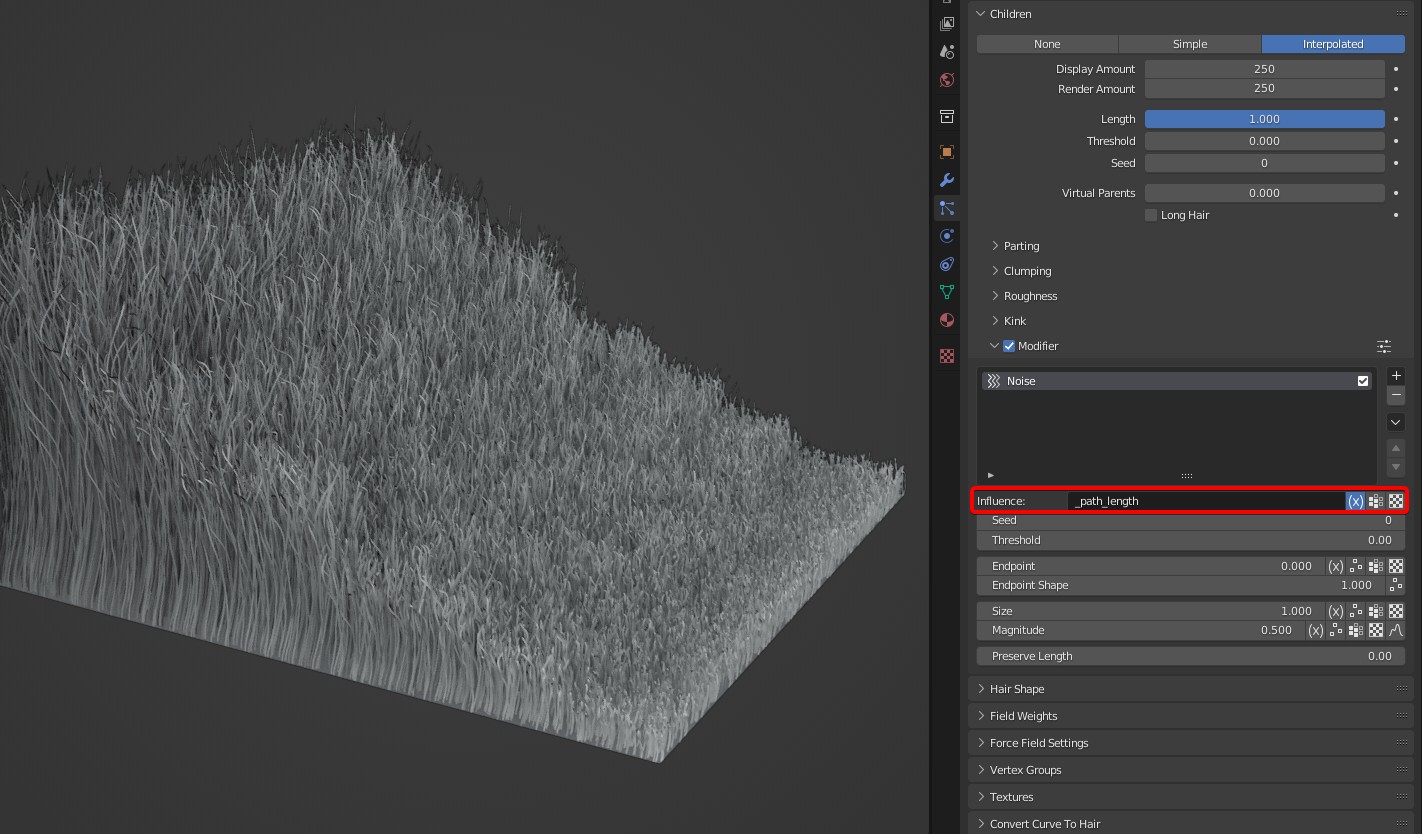
Take the Noise Modifier as an example: The strength of noises is controlled by the length of hair. The longer the hair is, the stronger the noises become.
TIP
The length of each hair is based on the final result of the previous modifier.
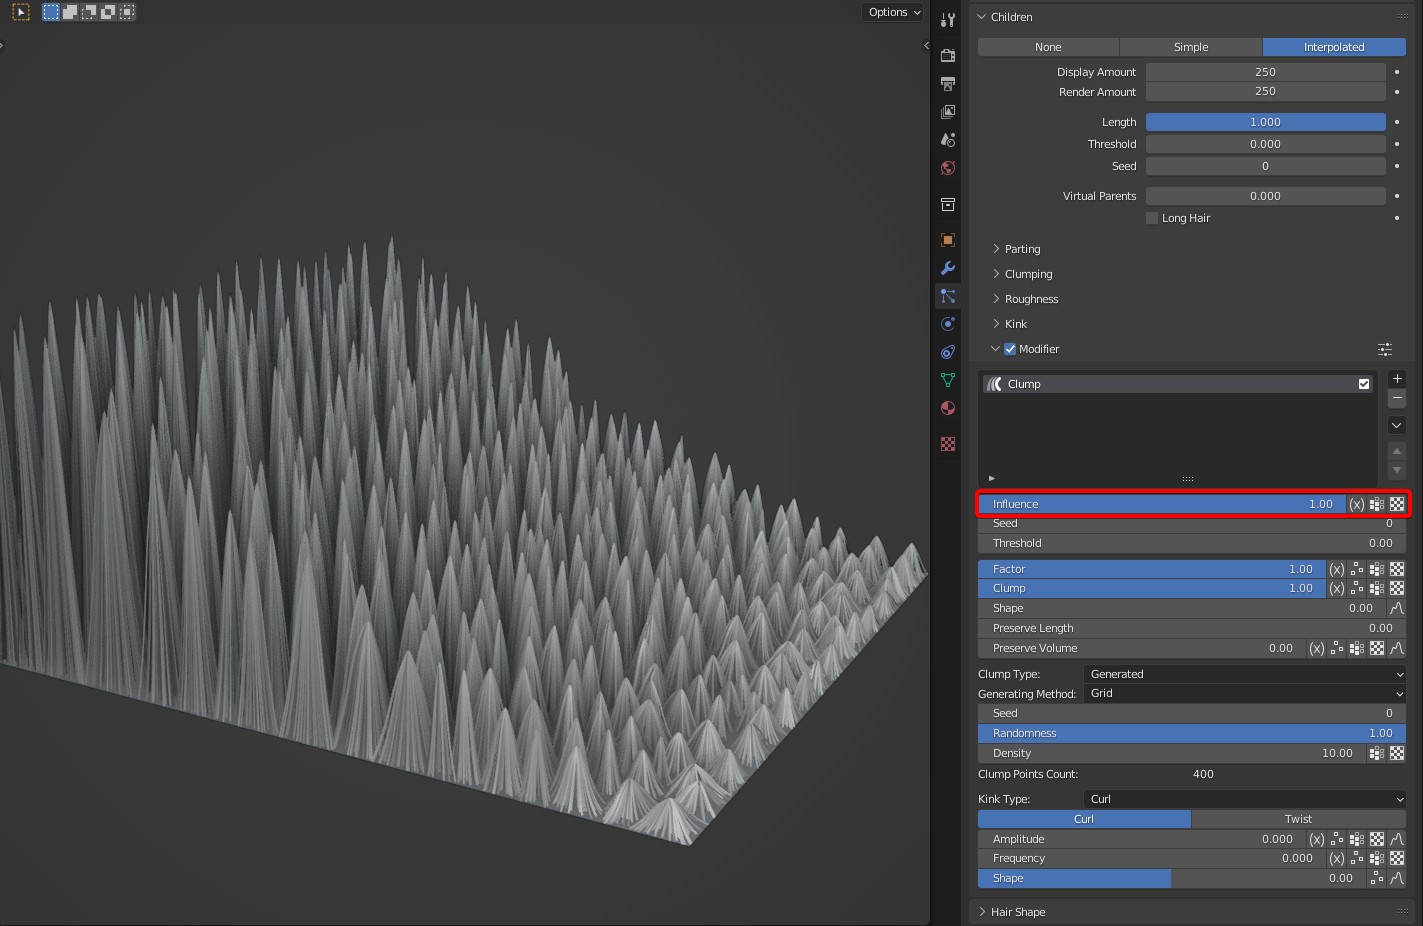
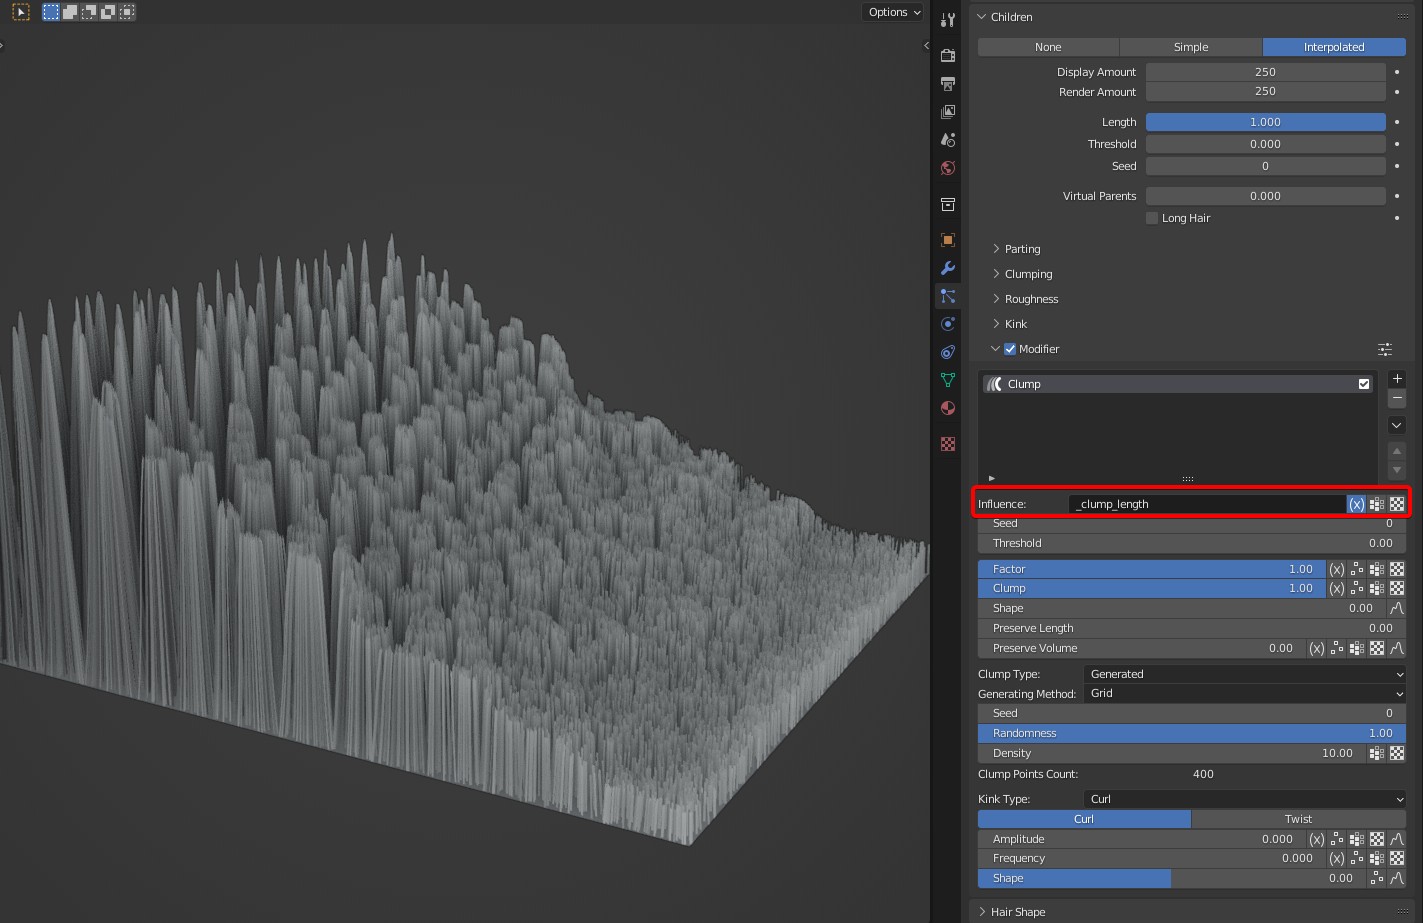
_clump_length: It's to call the length of each clump, and this dynamic attribute is changeable based on the length of every single clump. Refer to_path_lengthfor more details.
Comparison with expression and without expression
TIP
This variable works properly in the clump modifier only, and is not available in other modifiers.
Expression Usage
The attributes of the current modifier can be called directly by typing the attribute name, so no need to use variables.
How to get attribute name: A tooltip will appear when you hover over a parameter. The attribute name is at the end before .. You can right-click on a parameter > Copy Data Path, and delete all the text before the ..
Notes
The dynamic variables
_path_lengthand_clump_lengthis different from their algorithms._path_length: Used to get the length of each hair to achieve dynamic control, and only works properly on the parameterClumpandInfluenceof Clump modifier, and work well in Length and Noise modifier._clump_length: This variable is to control every single clump, so it cannot work properly on every single hair.If the expression is invalid, the original value will be used.
The expression cannot read an attribute with an expression, instead, read the original value of the attribute.
Randomize
 | Icon2 | Any parameter with the button [Icon2] can be randomized. |
|---|
Three extra options will bring up after clicking the button.
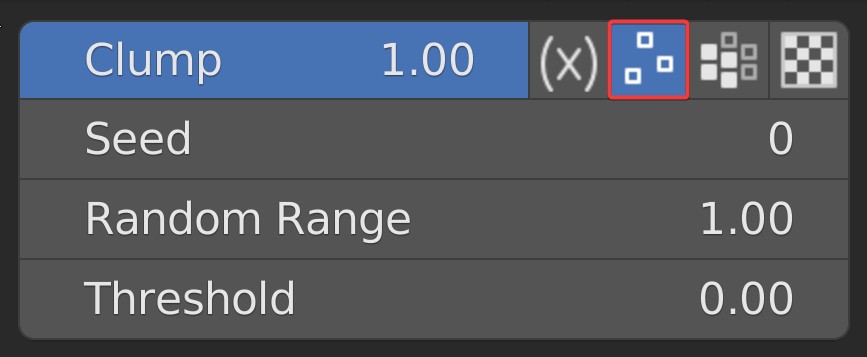
- Seed: random seed
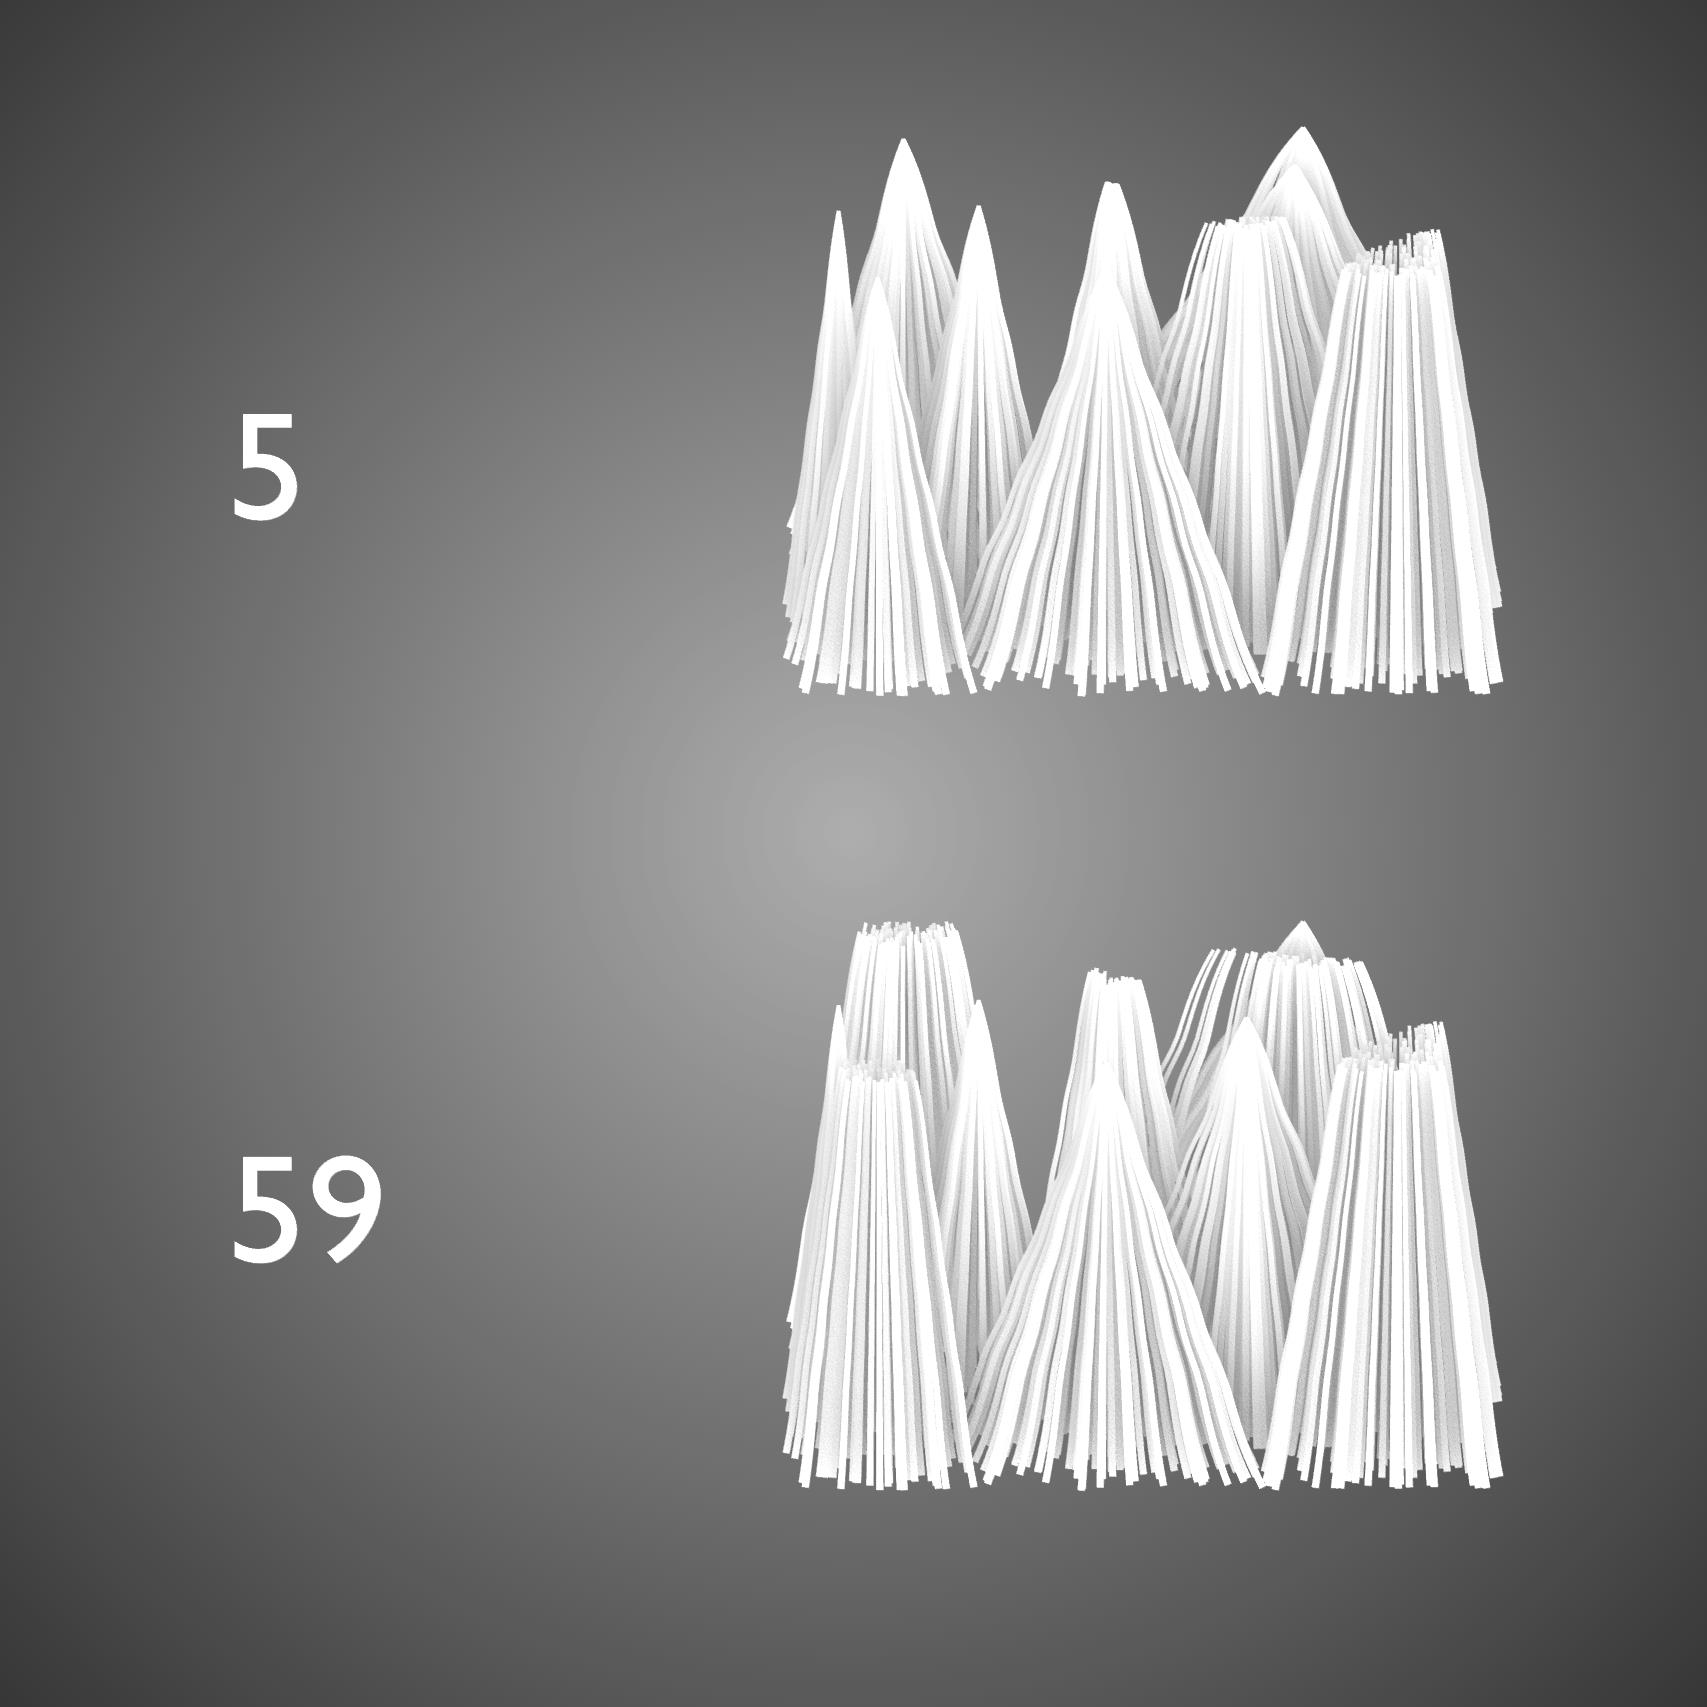
- Random Range: Controls the range of randomness. The input value plus the original value is equal to the maximum random, and the original value minus the input value is equal to the minimum random. When it's 0, there is no randomness.
- Threshold: Controls the percentage of hair without random effect. When the value is 1, all hairs have no random effect.
Vertex Group Control
 | Icon3 | Any option with the button [Icon3] on the right can apply vertex groups to control the influence range. |
|---|
Click the button to select a vertex group.

Clicx the applied vertex group to change a vertex group.
Clicx
×on the right to remove the applied vertex group.Clicx the double-headed arrow on the right to invert the vertex group.
Under the Vertex Group panel, two extra buttons are provided: Rename Vertex Group and Remove Vertex Group.
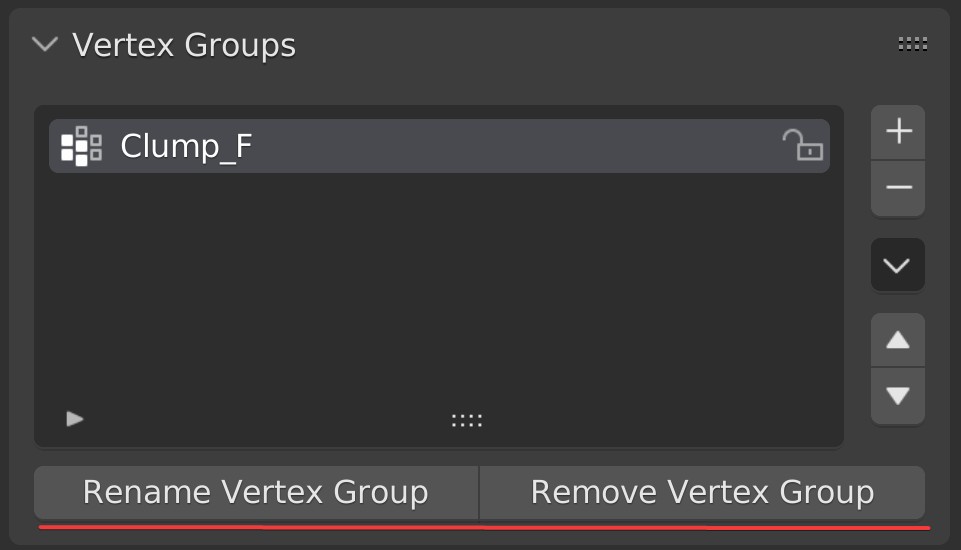
Rename Vertex Group: The vertex groups used in the hair modifiers can be updated automatically when the vertex groups are renamed by this. Please do not rename modifier directly via double-click the name of vertex groups, or the vertex groups cannot be updated or read properly.
Remove Vertex Group: Used to remove vertex groups. The function 'Assign Vertex Group' in hair modifier can be automatically disabled. However, the applied vertex groups will be kept after removed if you delete the vertex groups directly.
Texture Control
 | Icon4 | Any option with the button [Icon4] on the right can be specified a texture as the scope of influence. |
|---|
Hit the button to enable texture control, then texture text box will get ready.


Click on the text box to select an existing texture.
Click
+on the right to create a new texture.Click
×on the right to remove the texture.Click the double-headed arrow on the right to invert the texture weight.
TIP
After clicking + on the right, a black texture will be created, and Blender will enter Texture Paint mode automatically.
 | Icon5 | After a texture is specified, a dialog called Add Texture will pop up when clicking the button [Icon5], which is used to edit the texture options. |
|---|
TIP
The texture preview box in the pop-up box cannot update in real time. To see the texture preview after modifying texture options, please resize the preview box.
 | Icon6 | You can directly click the button [Icon6] to start to paint texture when the texture is an image. |
|---|
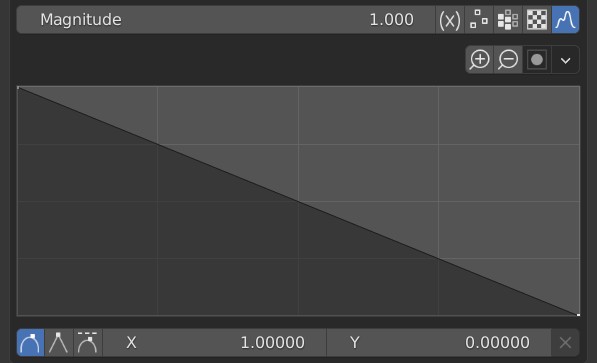
Curve Control
 | Icon7 | Any option with the button [Icon7] on the right can be applied a curve to control the influence. |
|---|
After you click the button, a curve gadget will appear.
Notes
- "Use Texture" is available only when UV is unwrapped, or an error message will appear.

It is recommended to set the image texture color space to raw for an accurate result. The default color space of the new image is raw.
When both "Assign Vertex Group" and "Use Texture" are used, they will be multiplied by default as the result.
Every modifier can be enabled/disabled individually, adjusted the order in the modifier list, and be duplicated.
- Curve control cannot be isolated when particle settings is isolated. "Make Curve Single" is for isolating Curve Control.
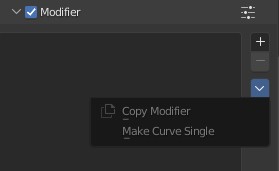
- All modifiers do not modify the position of hair root.