Appearance

3D Brushes
Snake
Snake: Used to drag guides to generate trails of brush movement.
Brush Type
Snake only works properly in 2D mode, and doesn't work in 3D mode.
Brush Options

Two algorithms are available: Sphere and Projected
Sphere: In this mode, Snake brush works in 3D space based on its own size.
Projected: In this mode, Snake works in 2D mode based on its own size.
Curve: Snake doesn't work obviously when brush strength is very low, so a slightly high Brush Strength is better. In the sphere mode, Snake doesn't work obviously when the curve is sharp. An inverted curve is better.
Case Demonstration
Orient
Orient works on the orientation of the guides without modifying their shapes.
Brush Type
Orient supports 2D and 3D mode, and supports 2D/3D switching.
Options

Strength-3D
The strength of the brush: No falloff. The larger it is, the stronger it works. No work when it's 0.
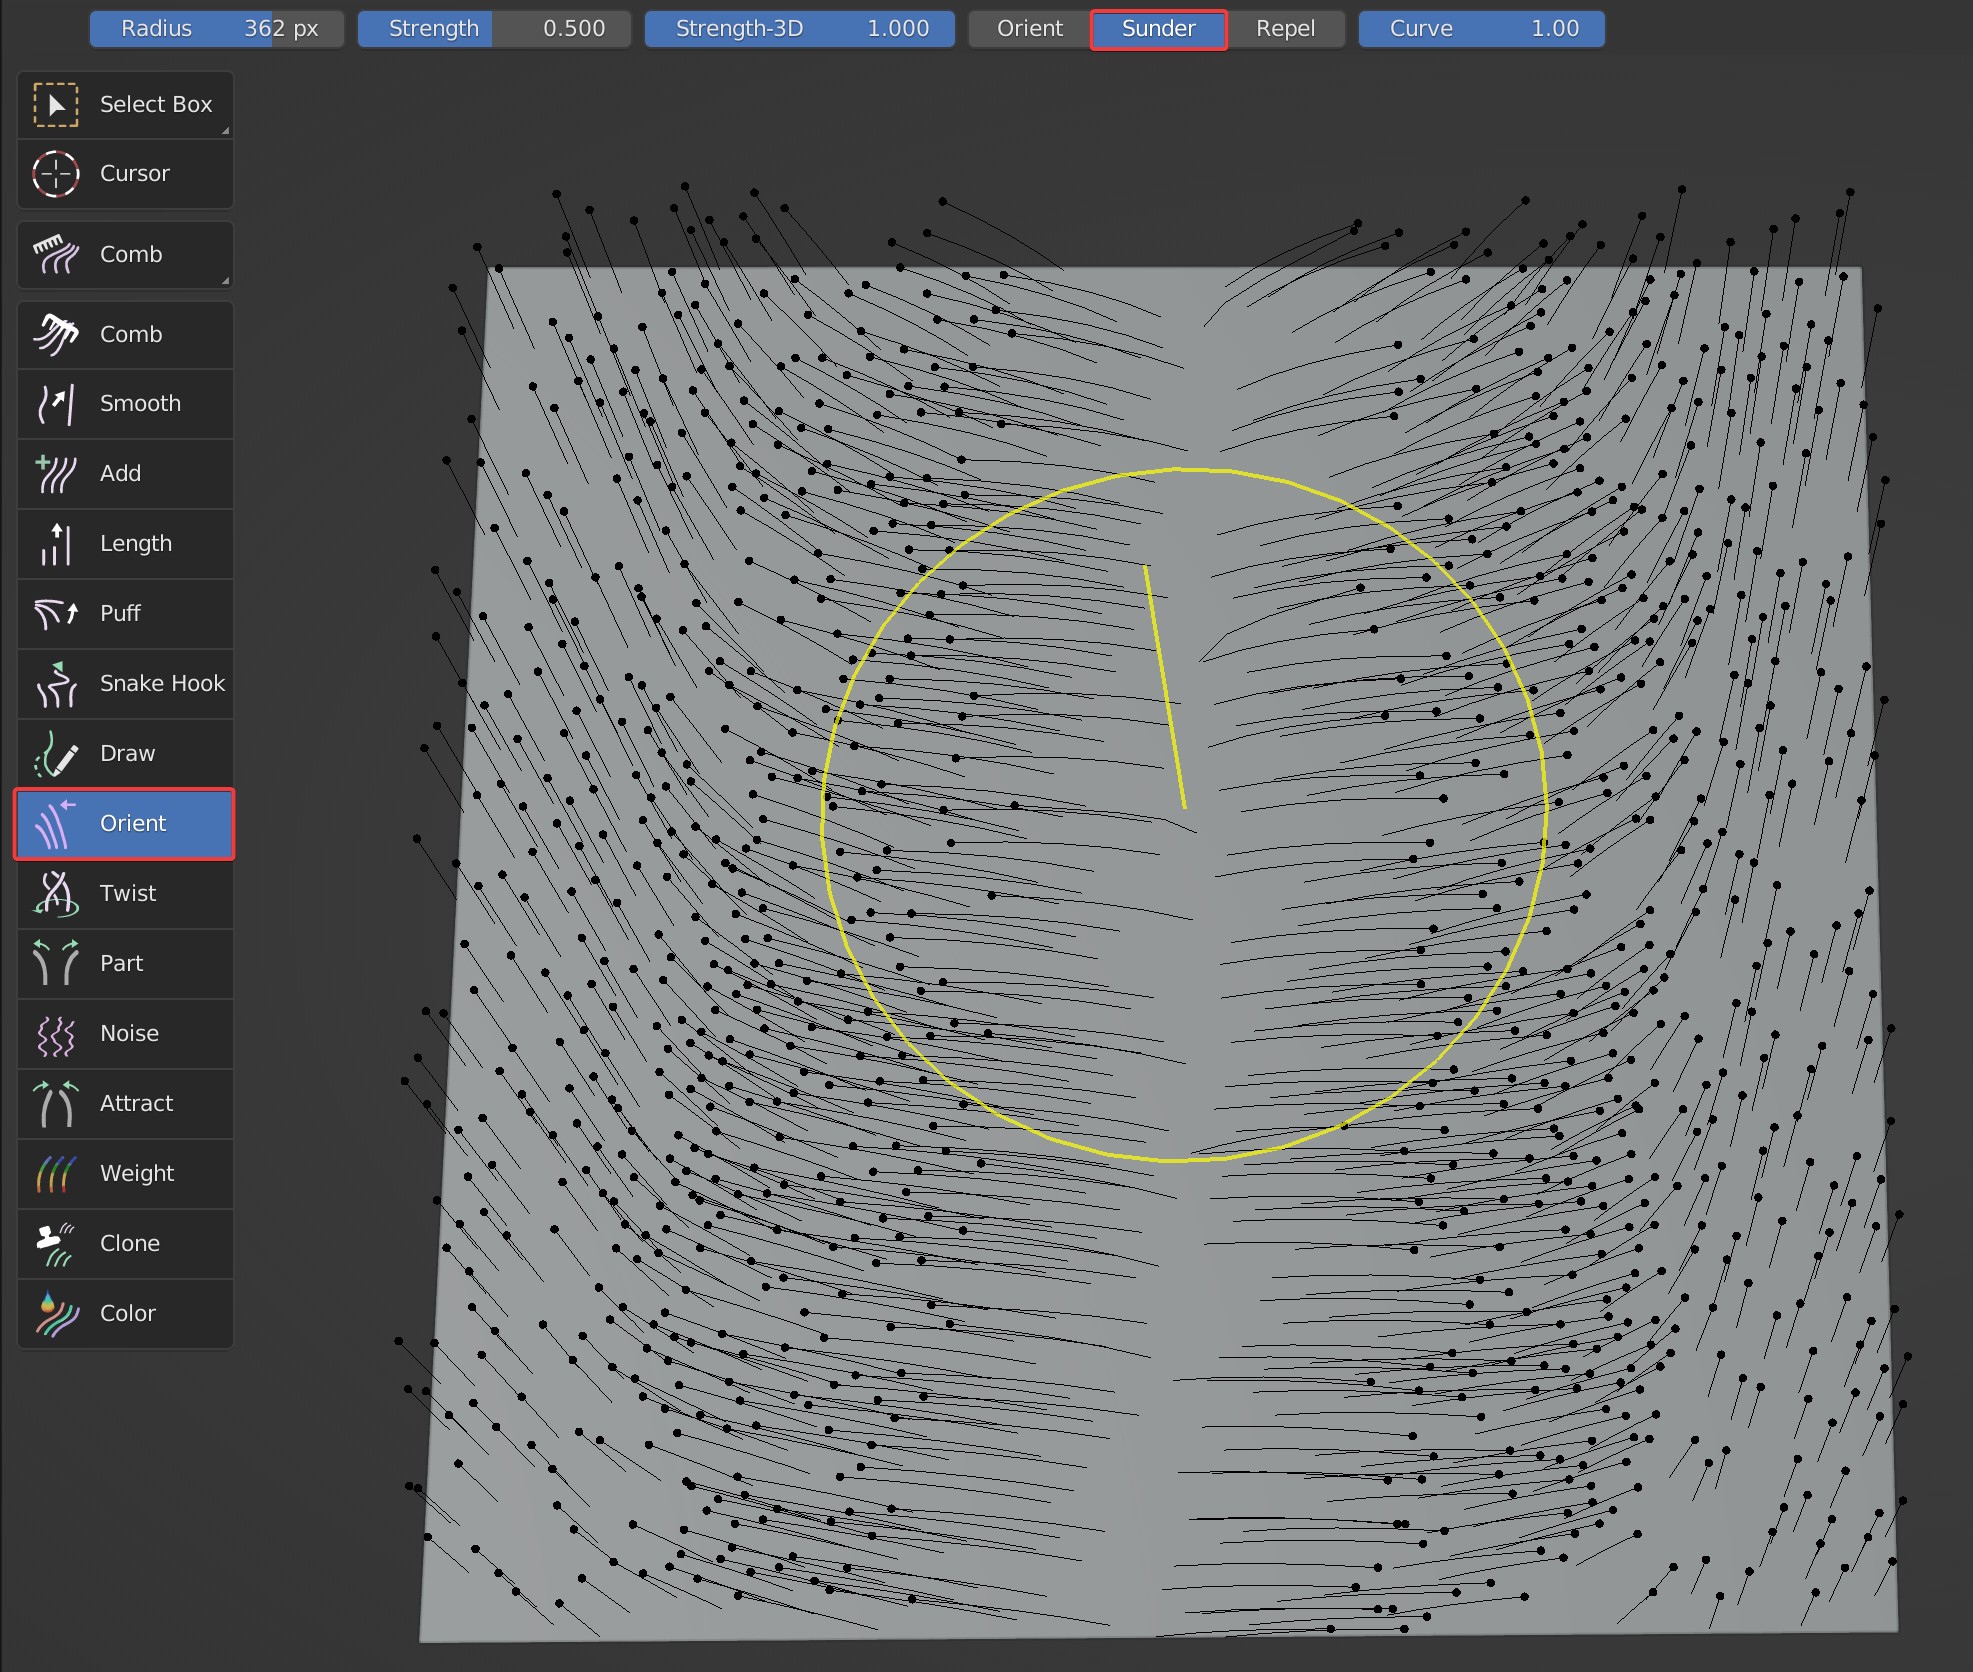
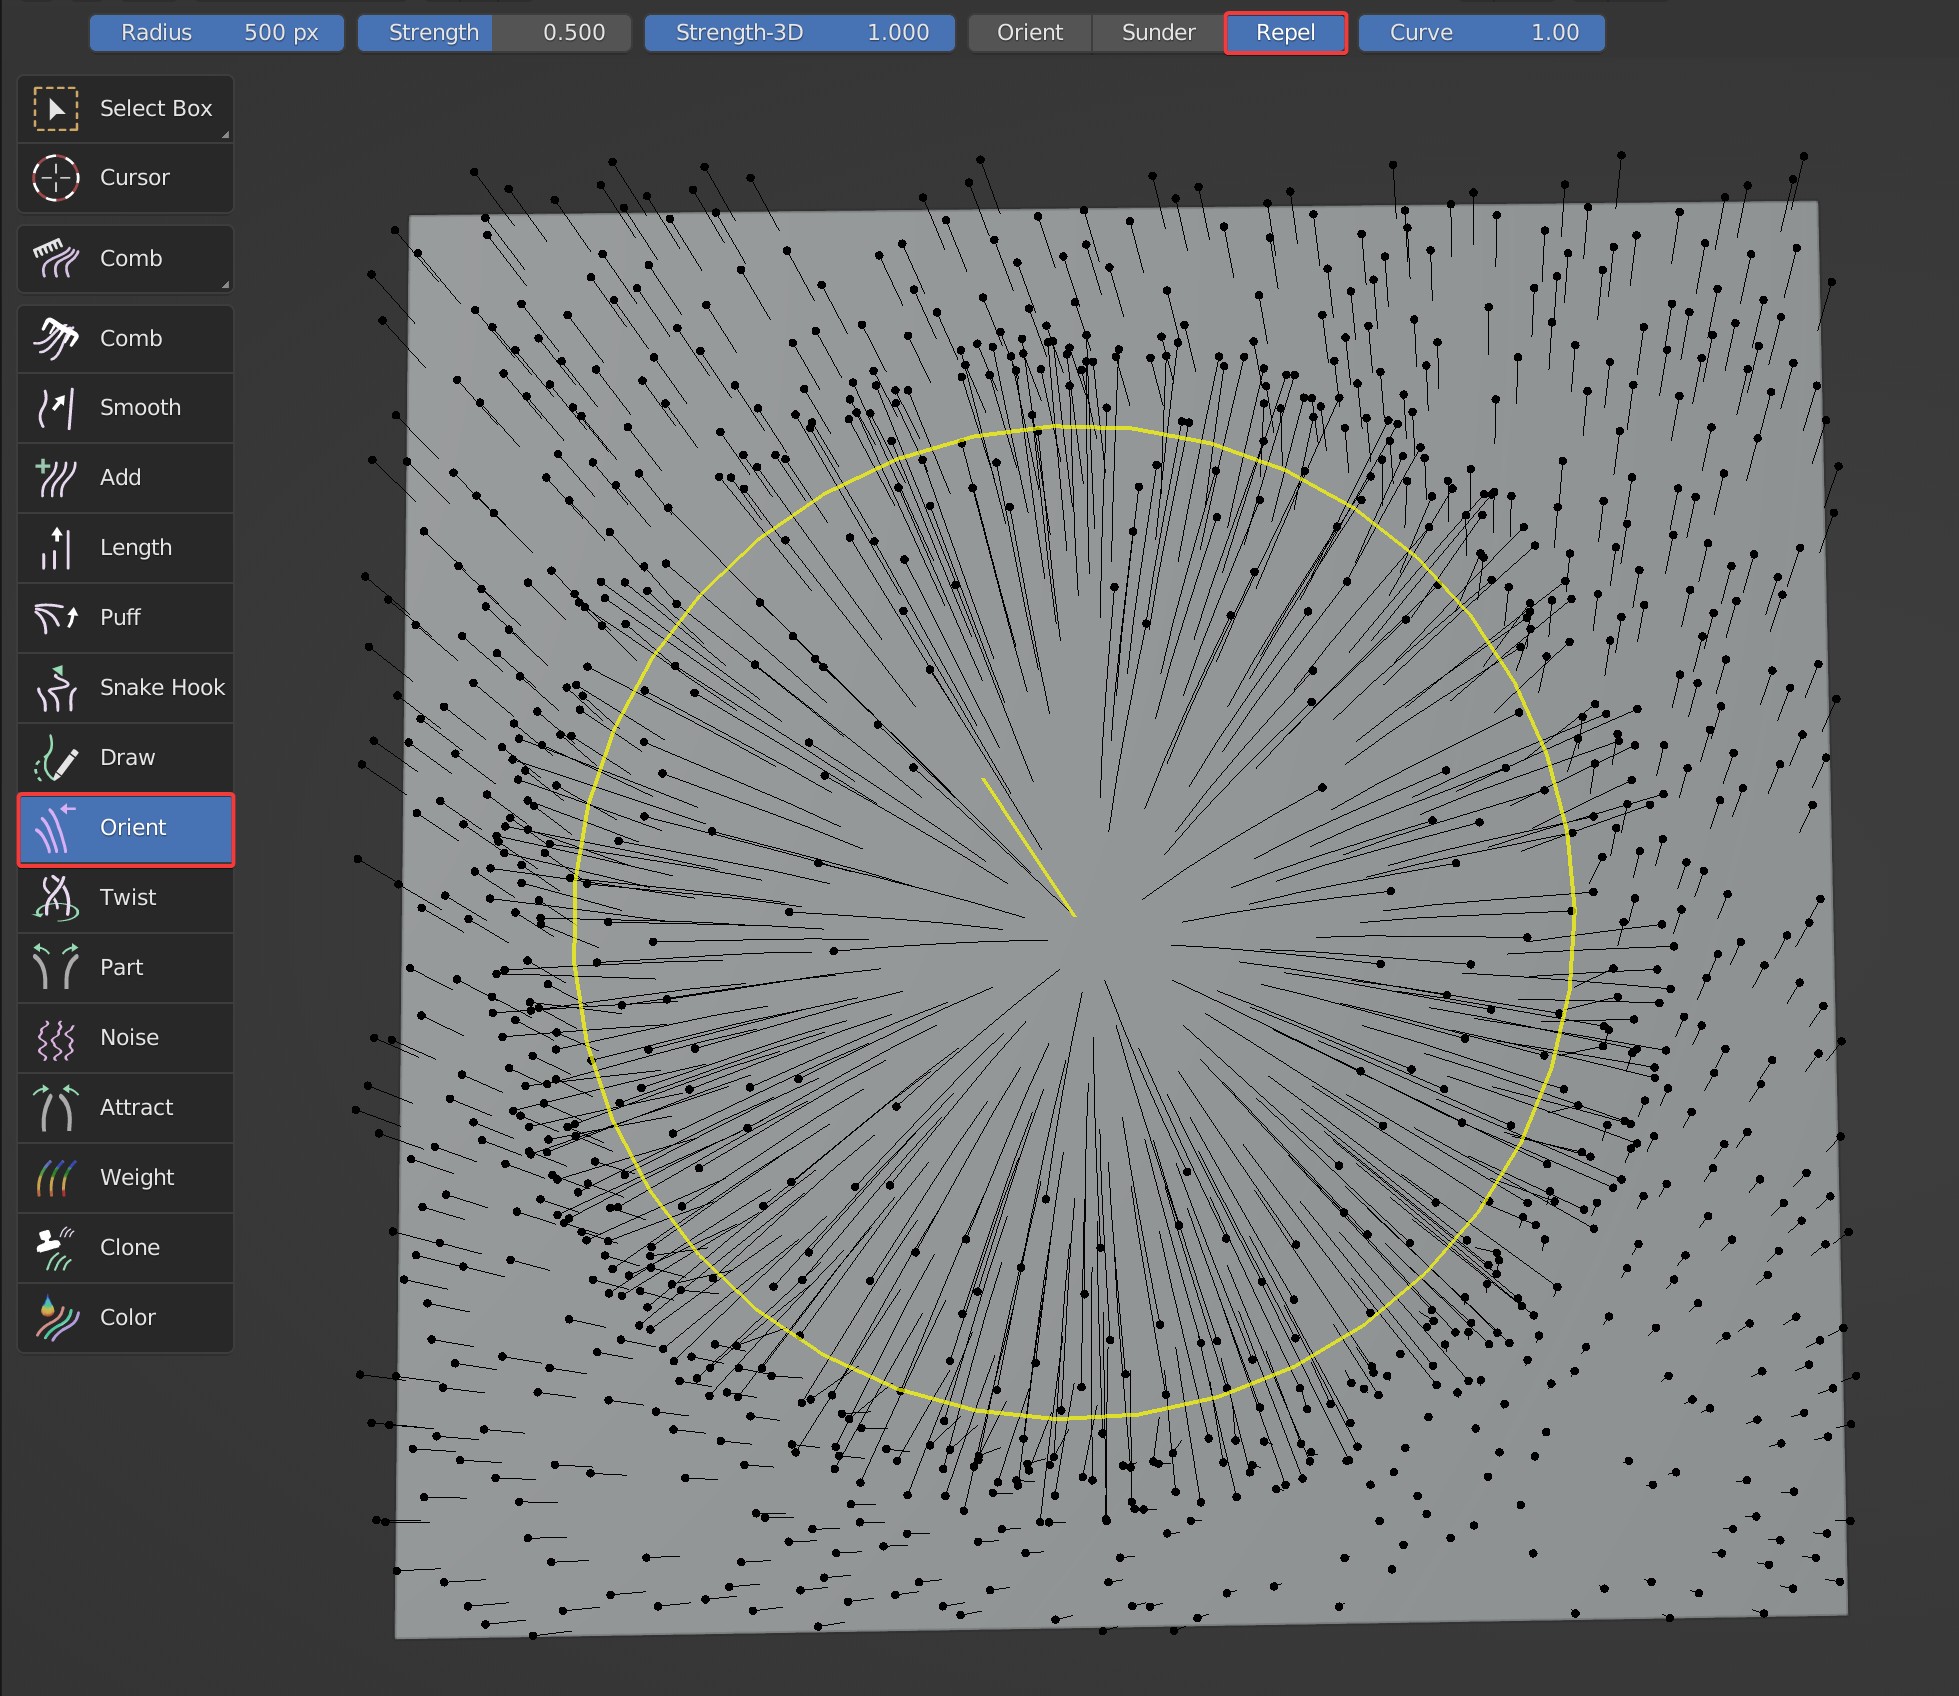
Three effects are available: Orient, Sunder, Repel.
- Orient: Guides follow the direction of brush completely.

- Sunder: Guides are pulled to both sides along the movement track of brush.
- Repel: Guides are radially pulled along the movement track of brush.
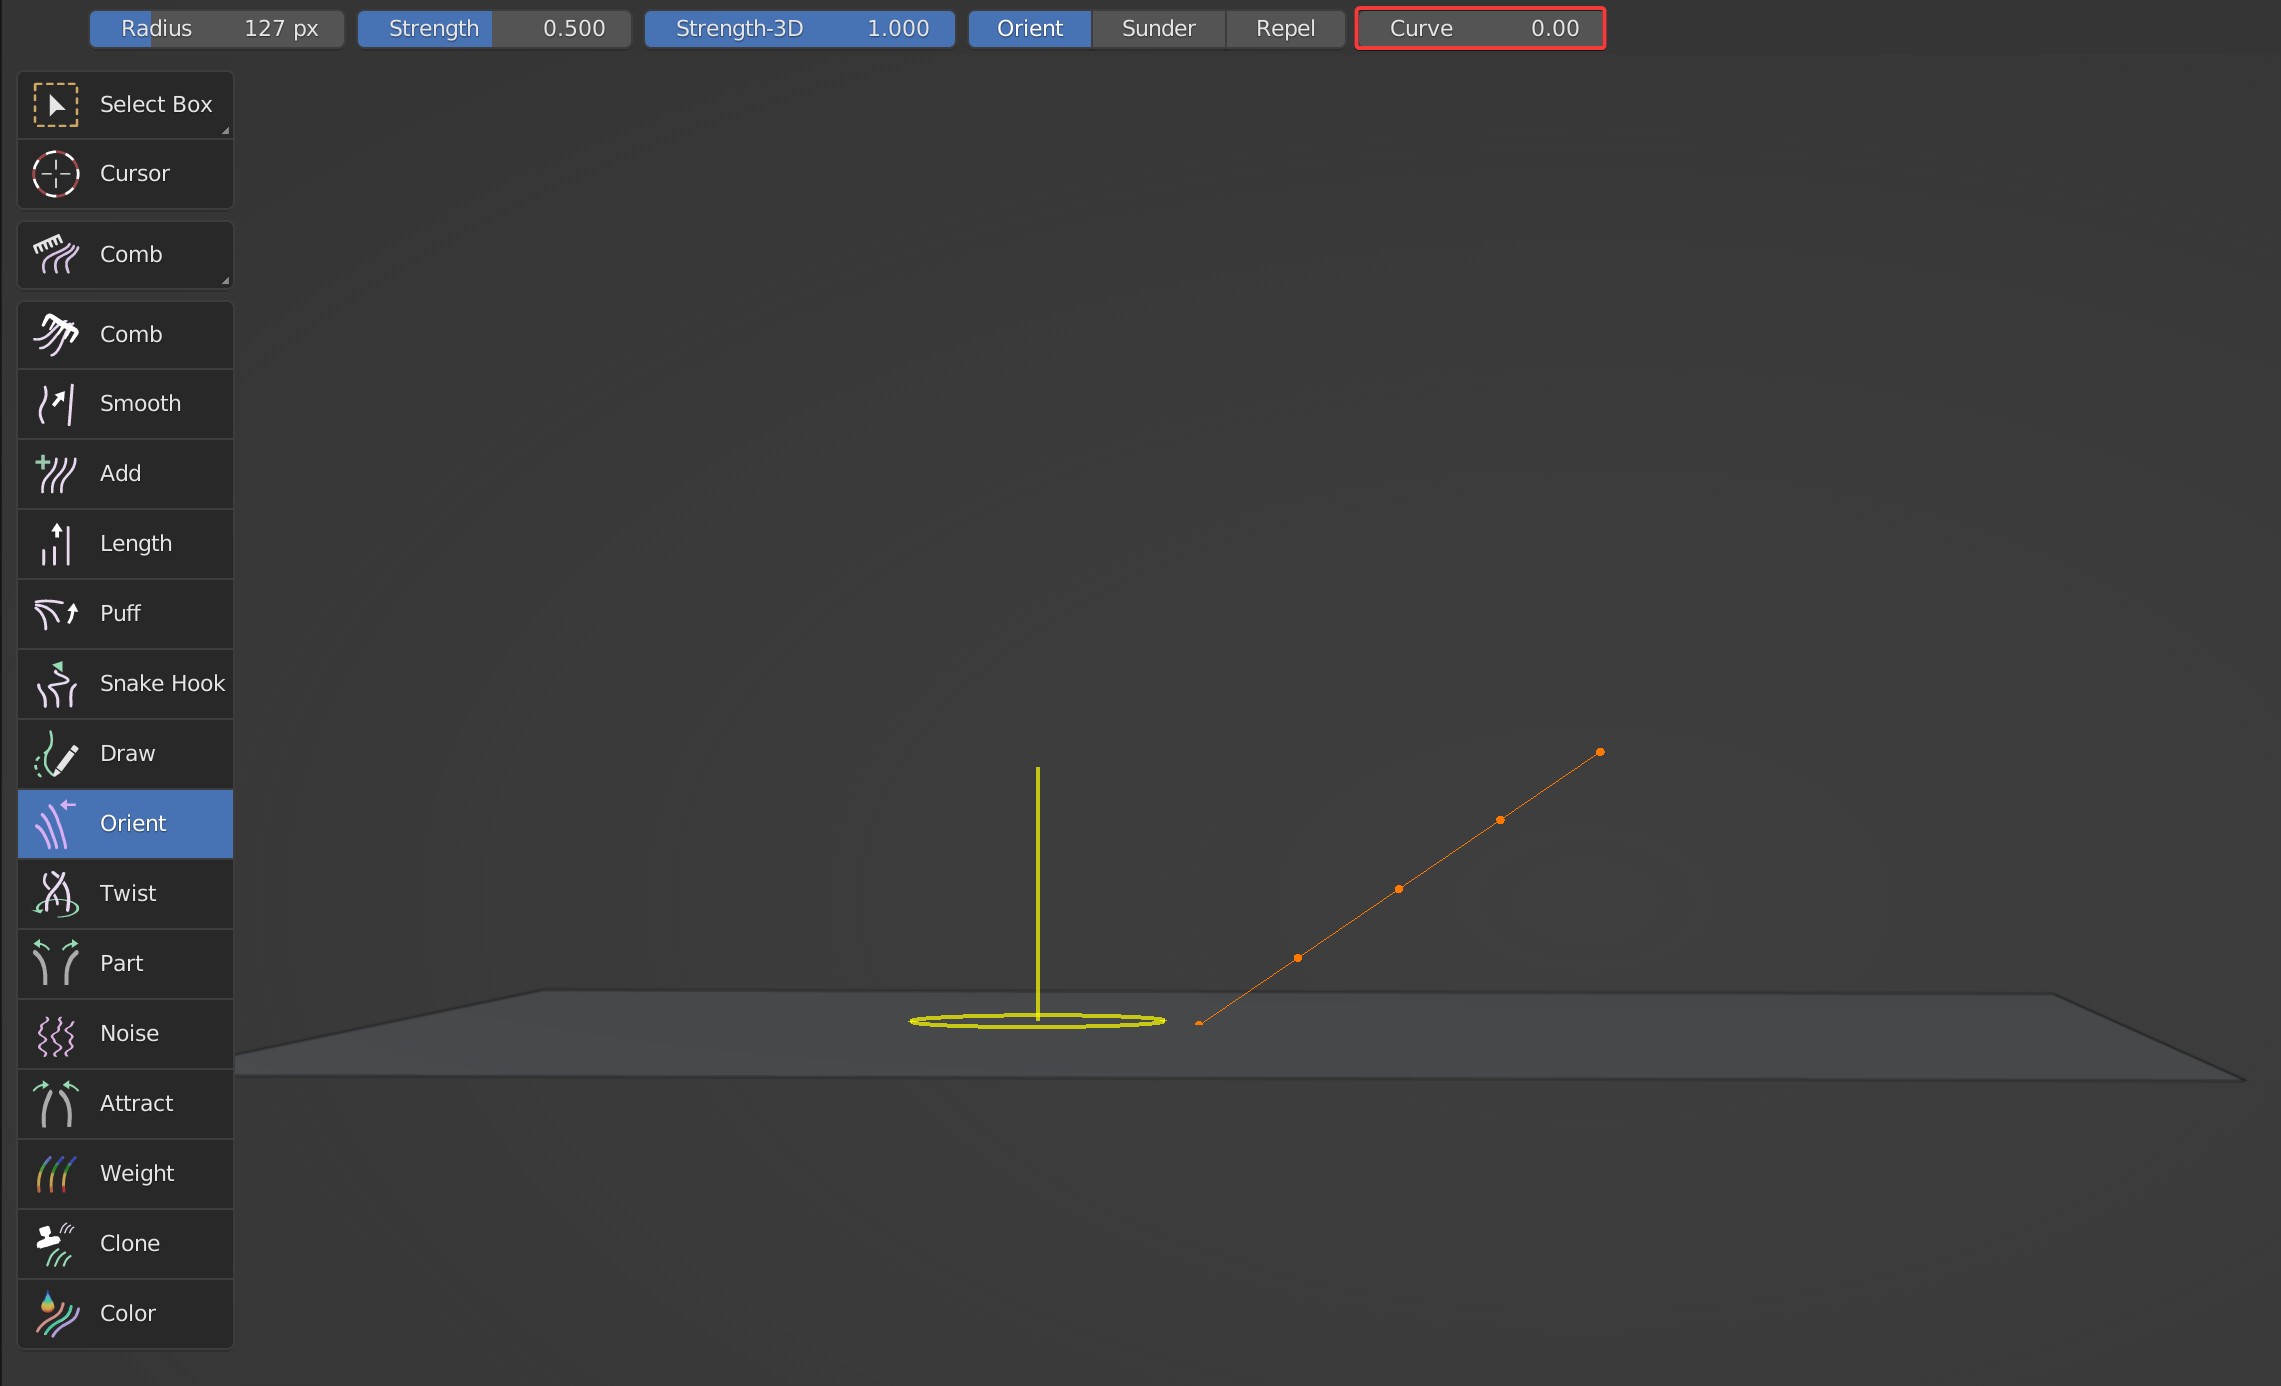
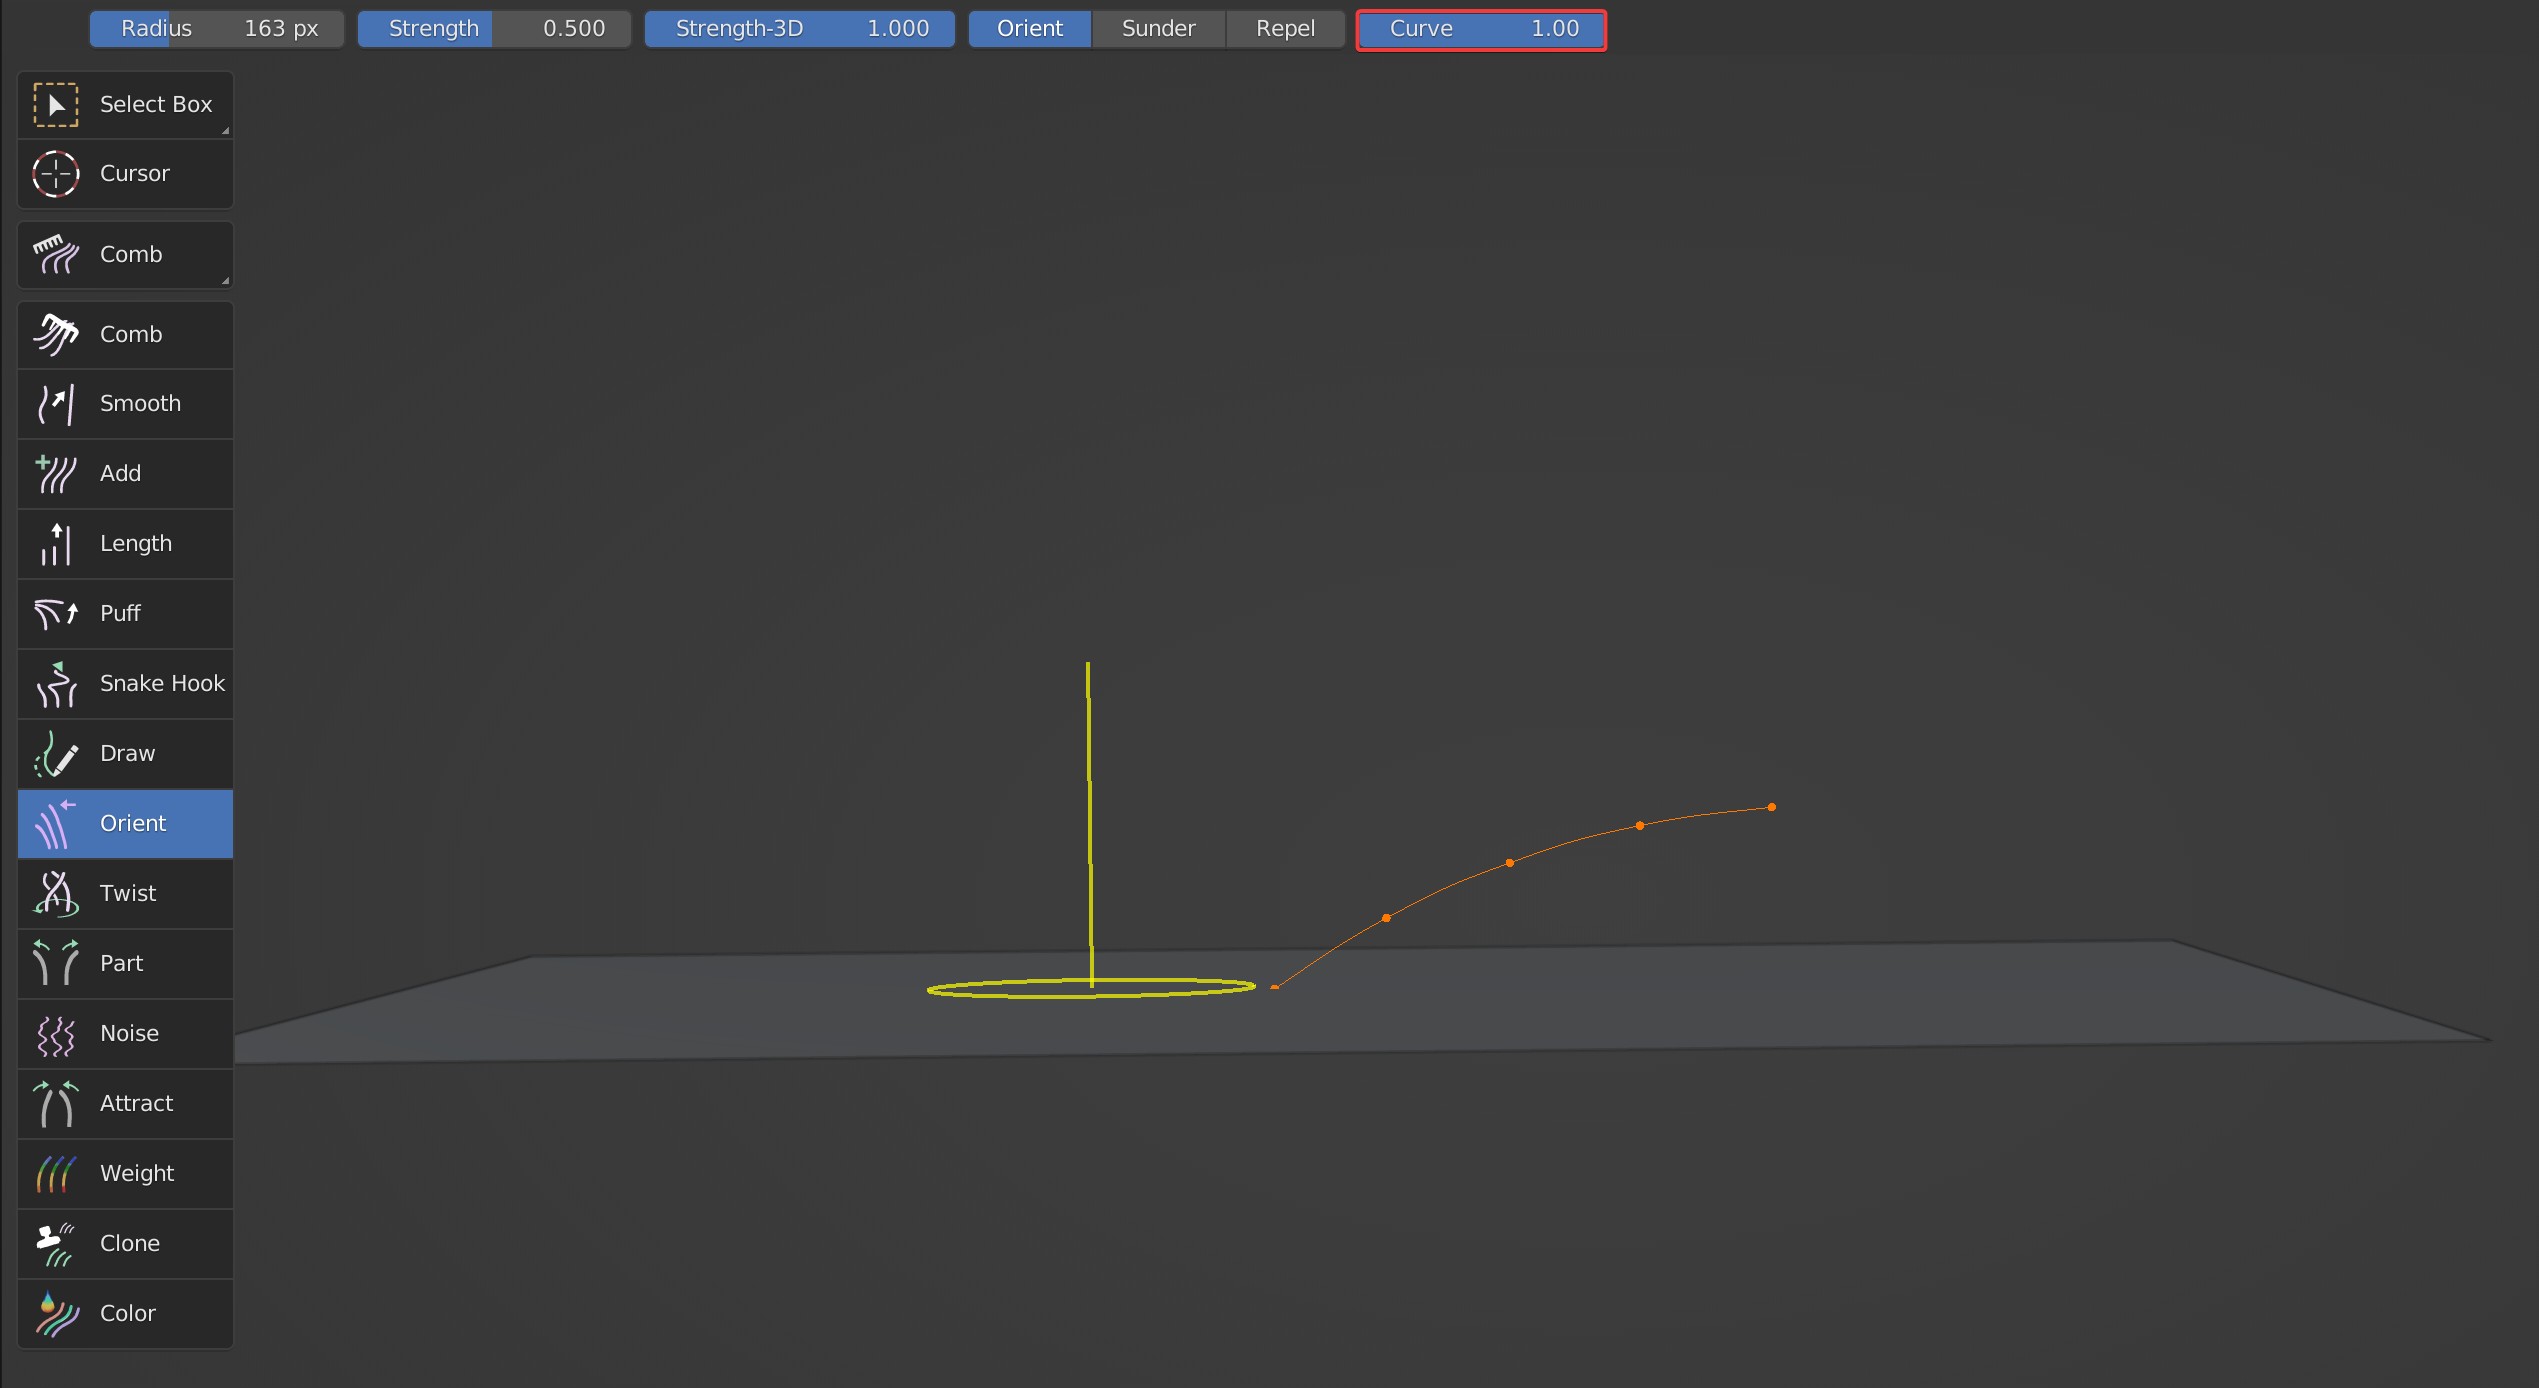
Curve
It controls the degree of bending of the guides. When the parameter is 0, there is no bend of hair.
Curve is 0
Curve is 1
Case Demonstration
Twist
Used to twist guides centered on the brush position.
Brush Type
Twist brush only works properly in 3D mode without the support for 2D mode.
Brush Options

Strength-3D
The brush controls the overall strength without any falloff. When it is 0, the brush has no effect; It can be used with 'Strength'.
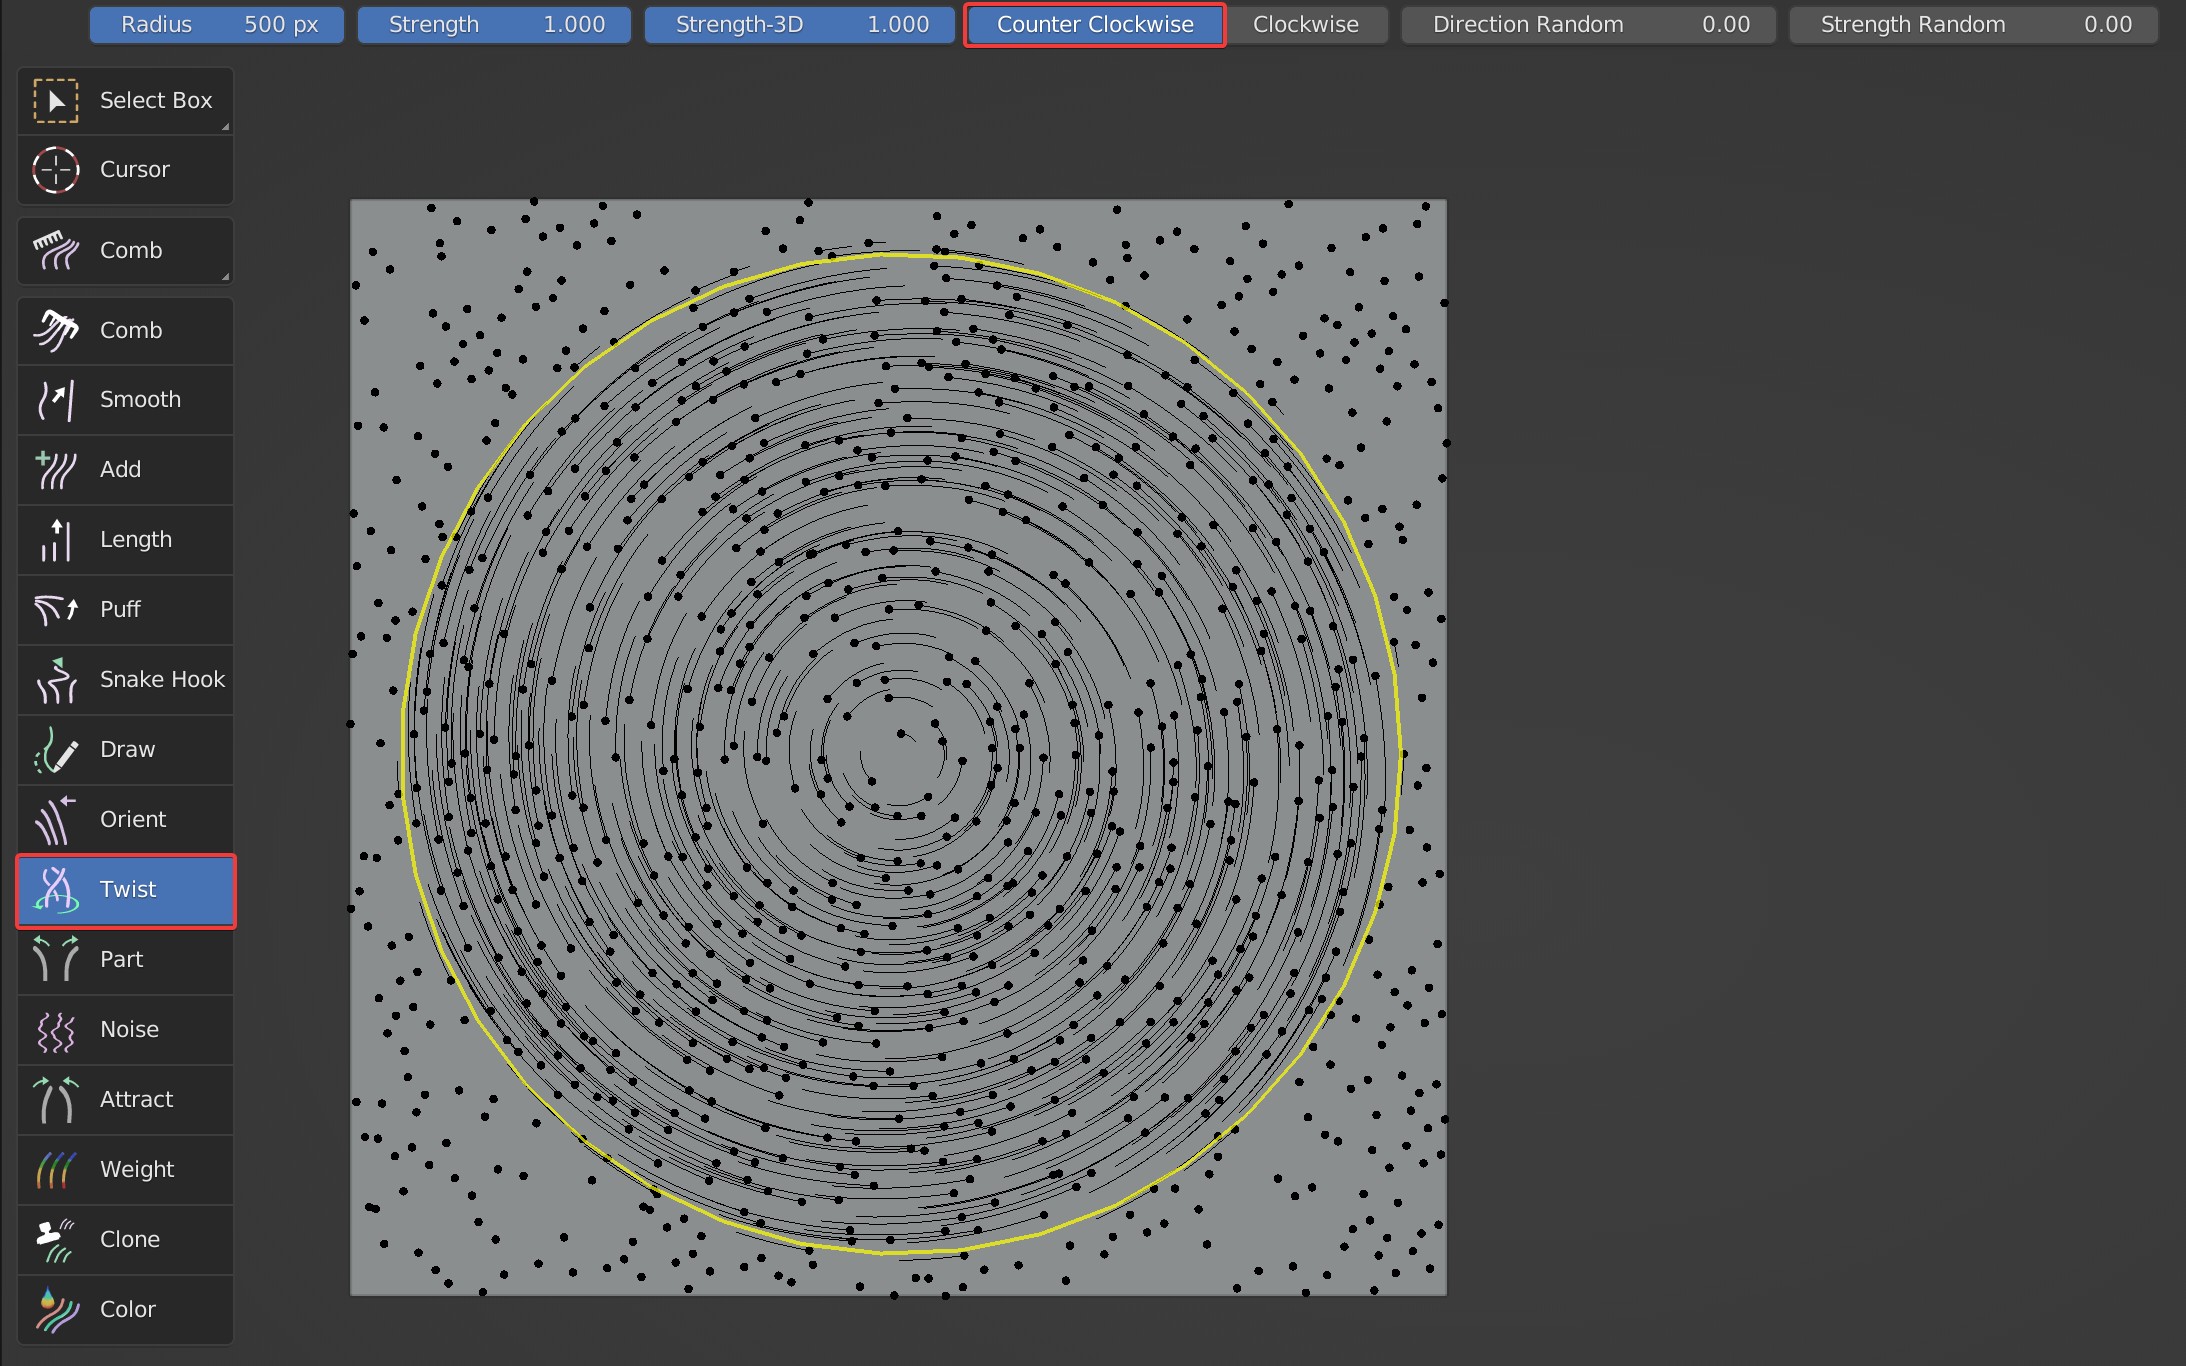
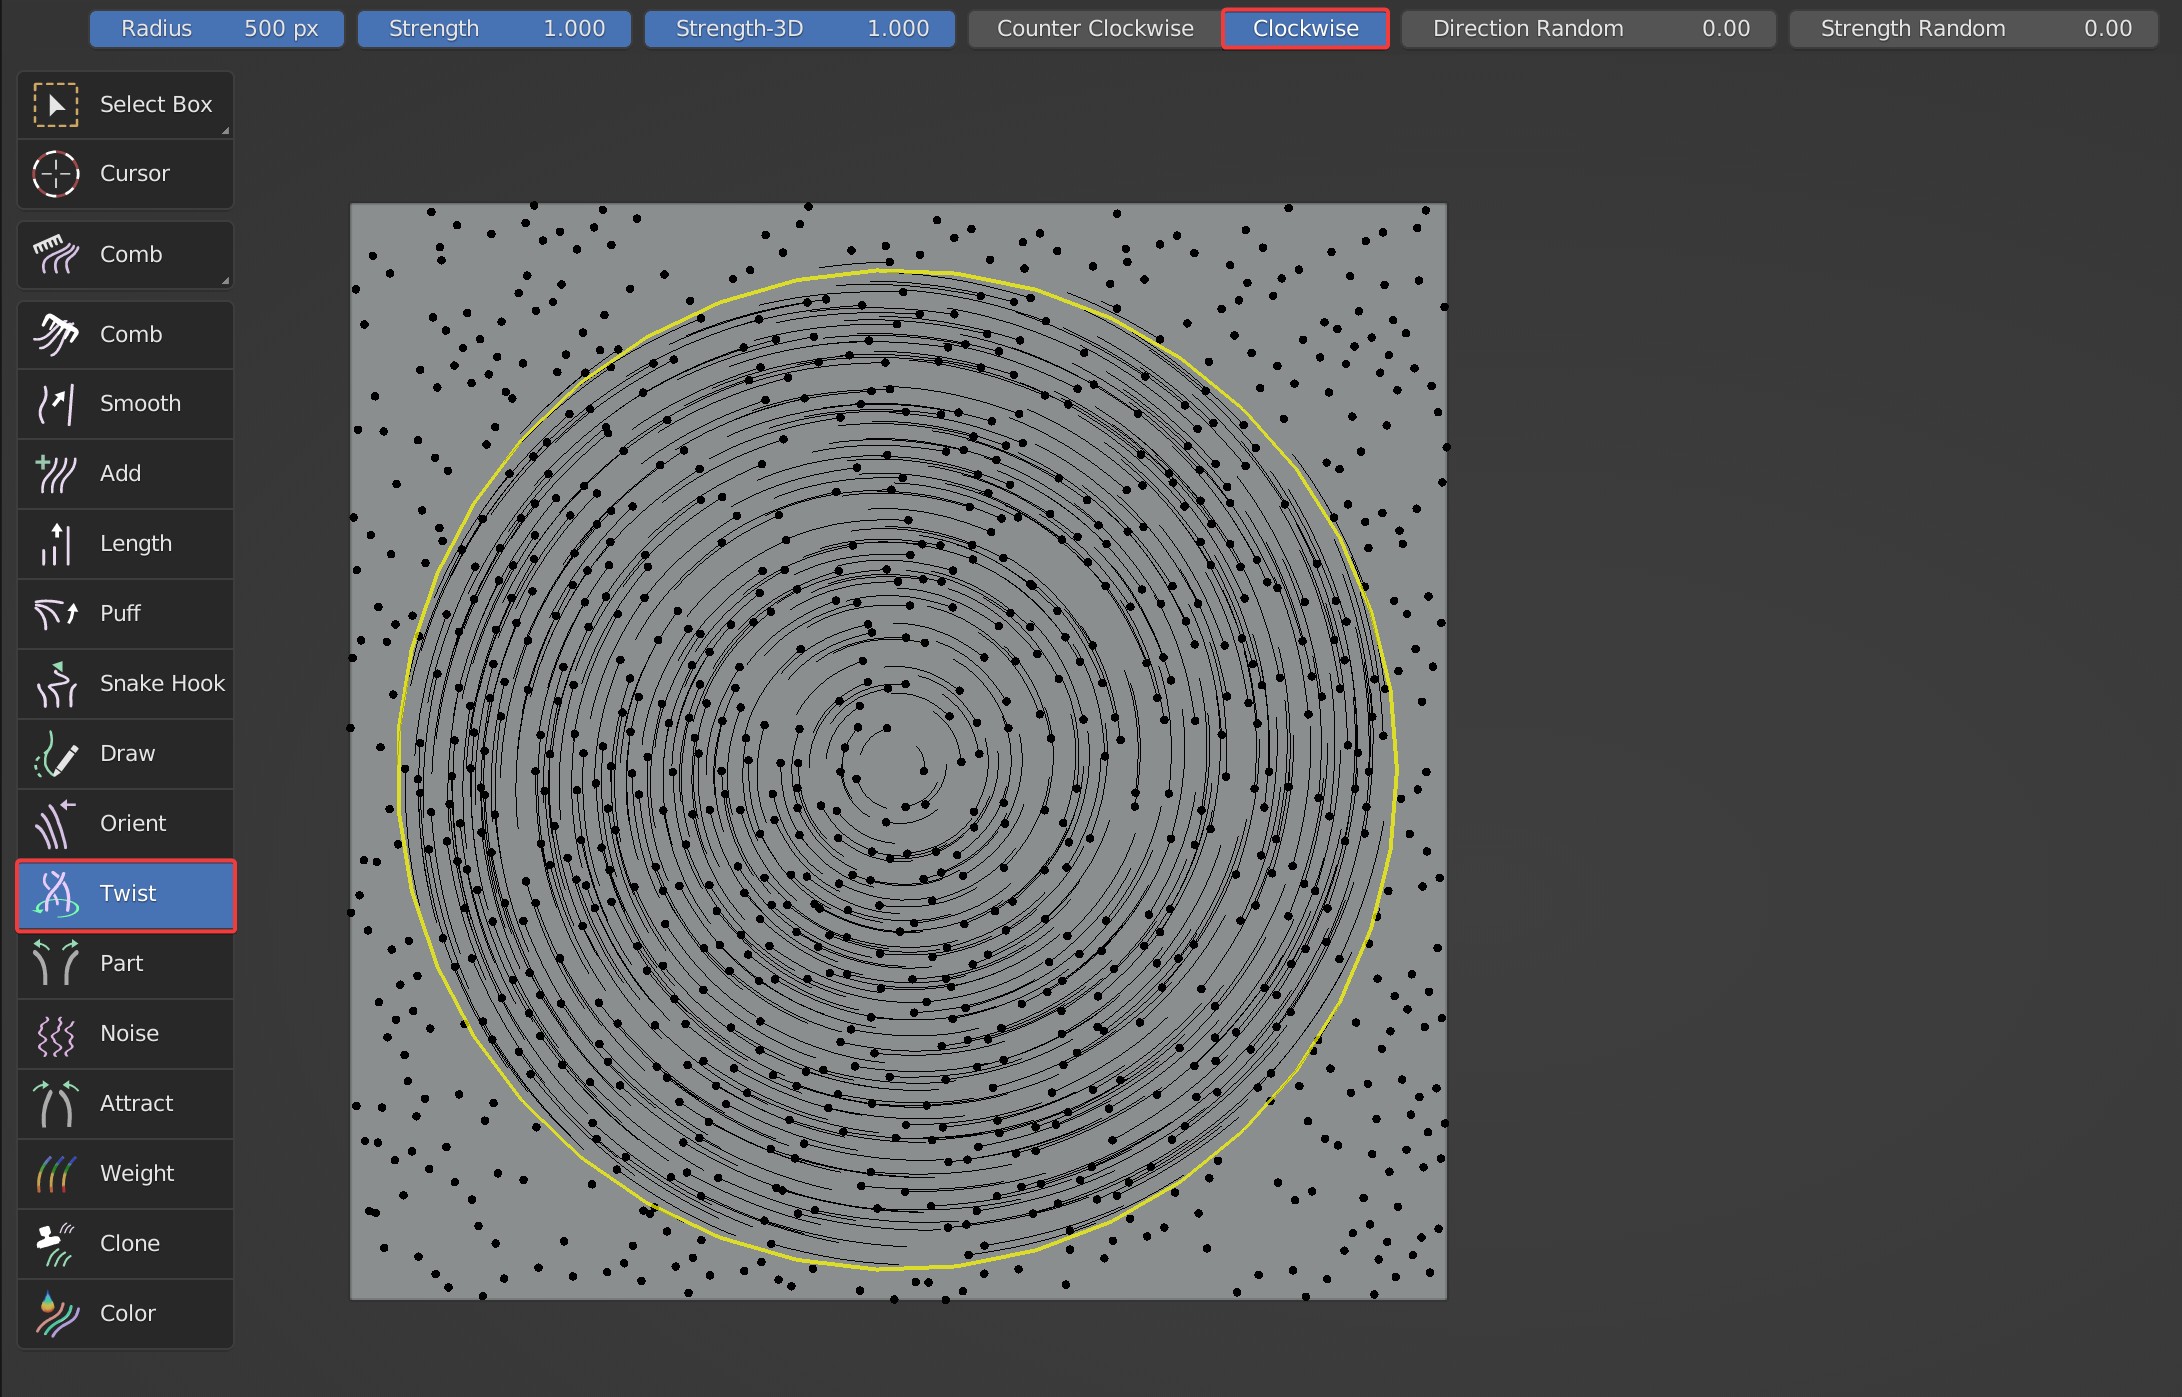
Counter Clockwise, Clockwise
Counterclockwise and clockwise; Reverse the twist direction with Shift held.
- Counter Clockwise
- Clockwise
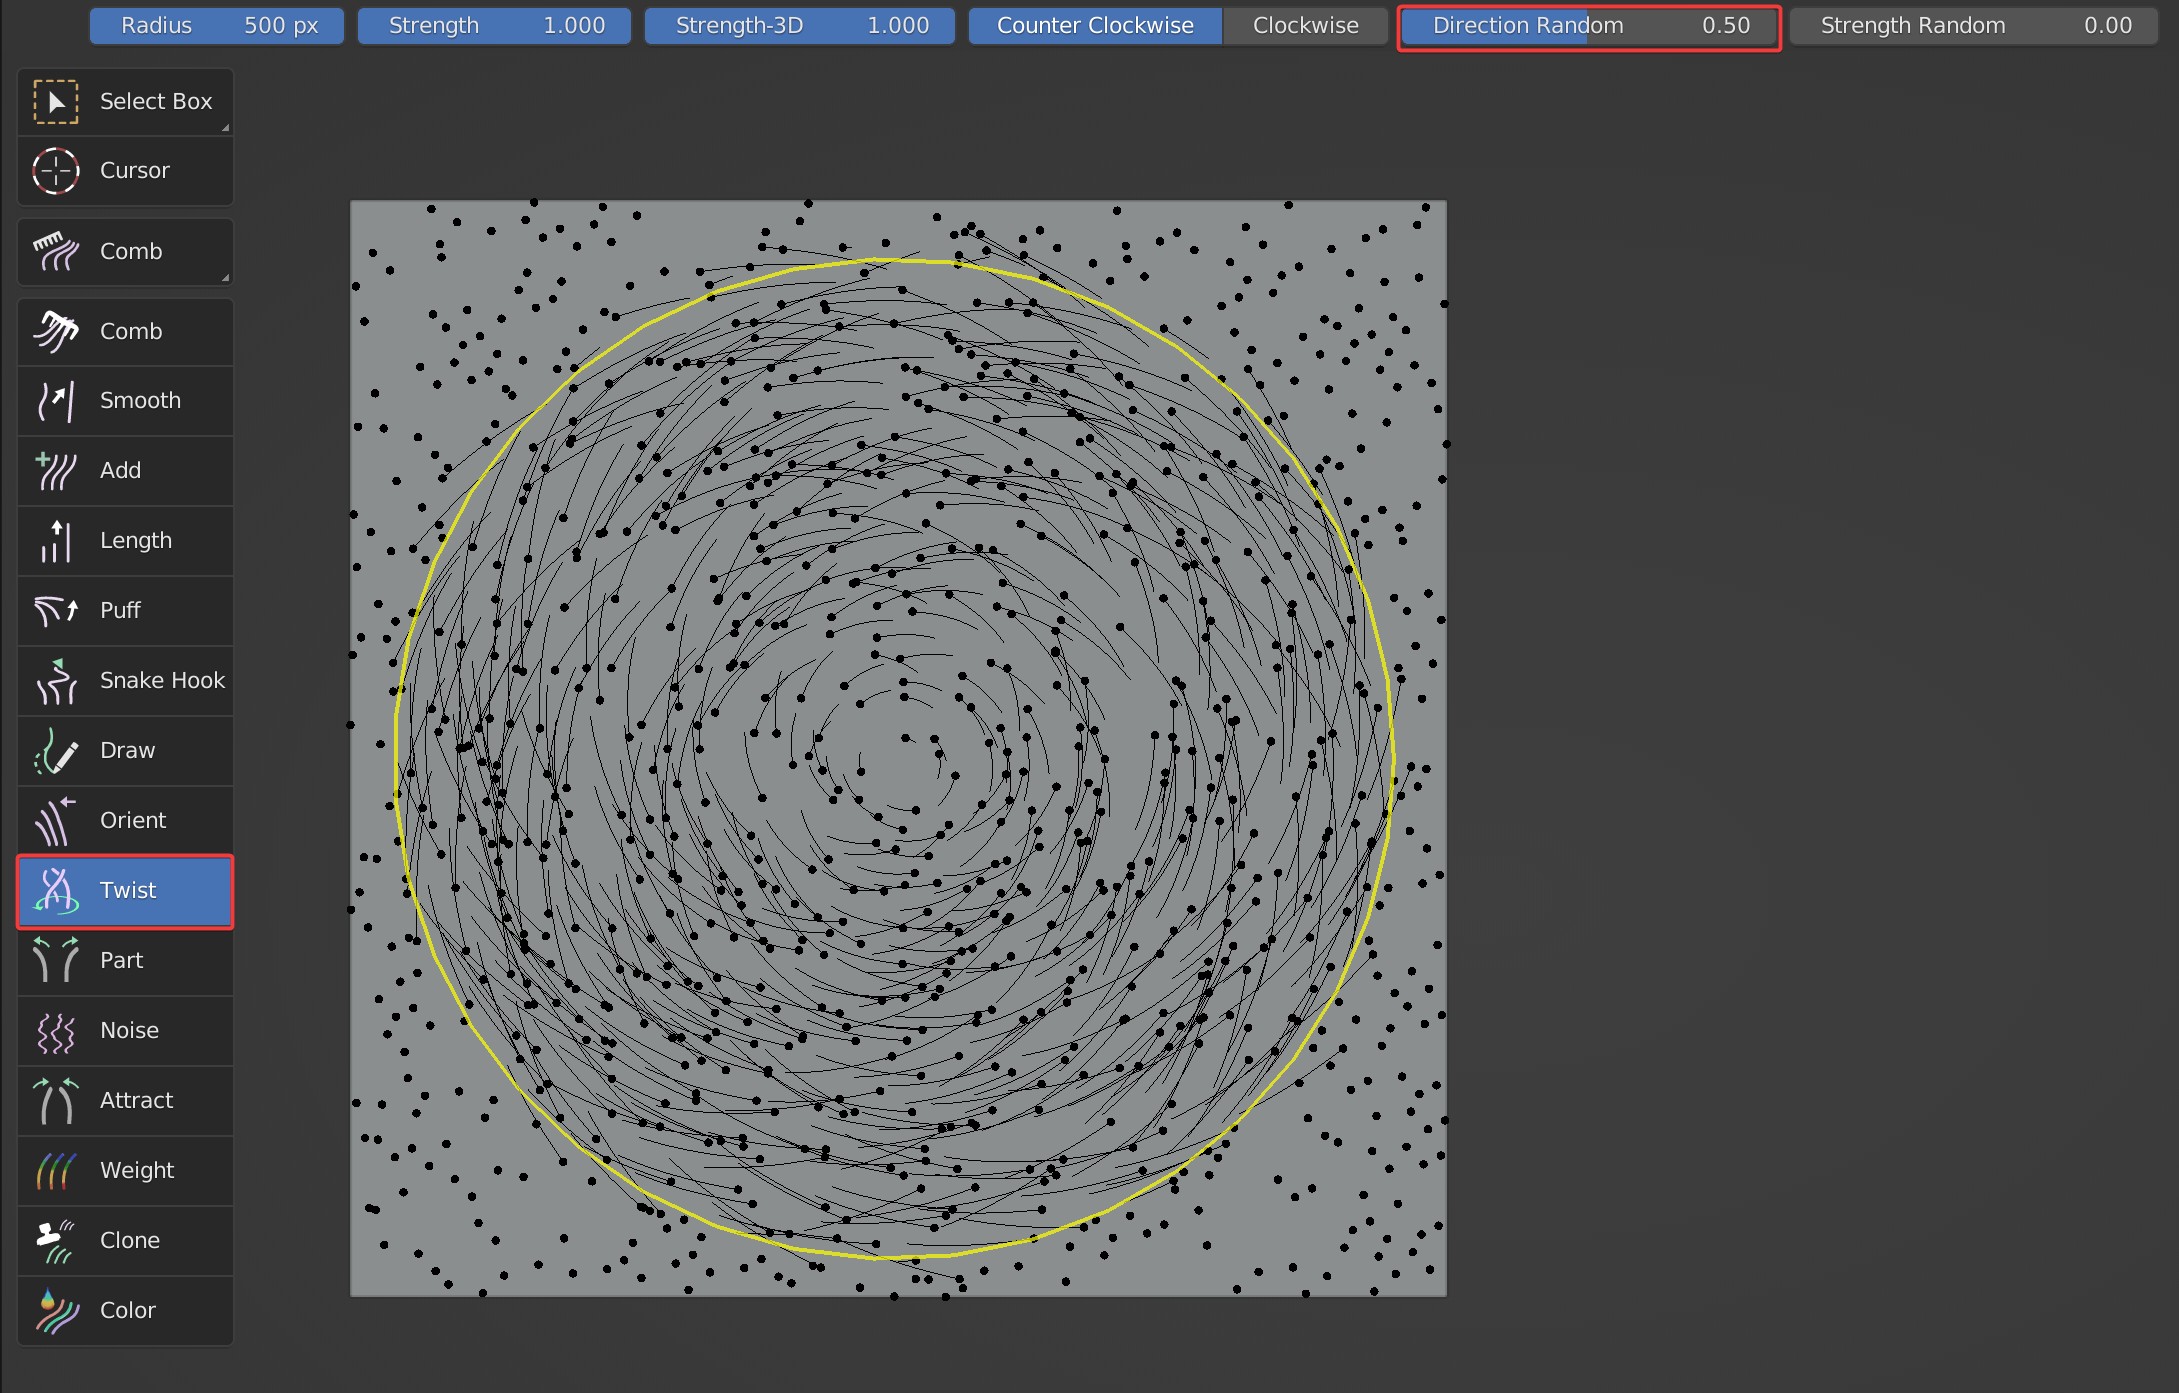
Direction Random, Strength Random
Randomize the direction of hair when Twist brush is used.
- Direction Random: Random on the XY axis.
Direction Random: 0 VS 0.5

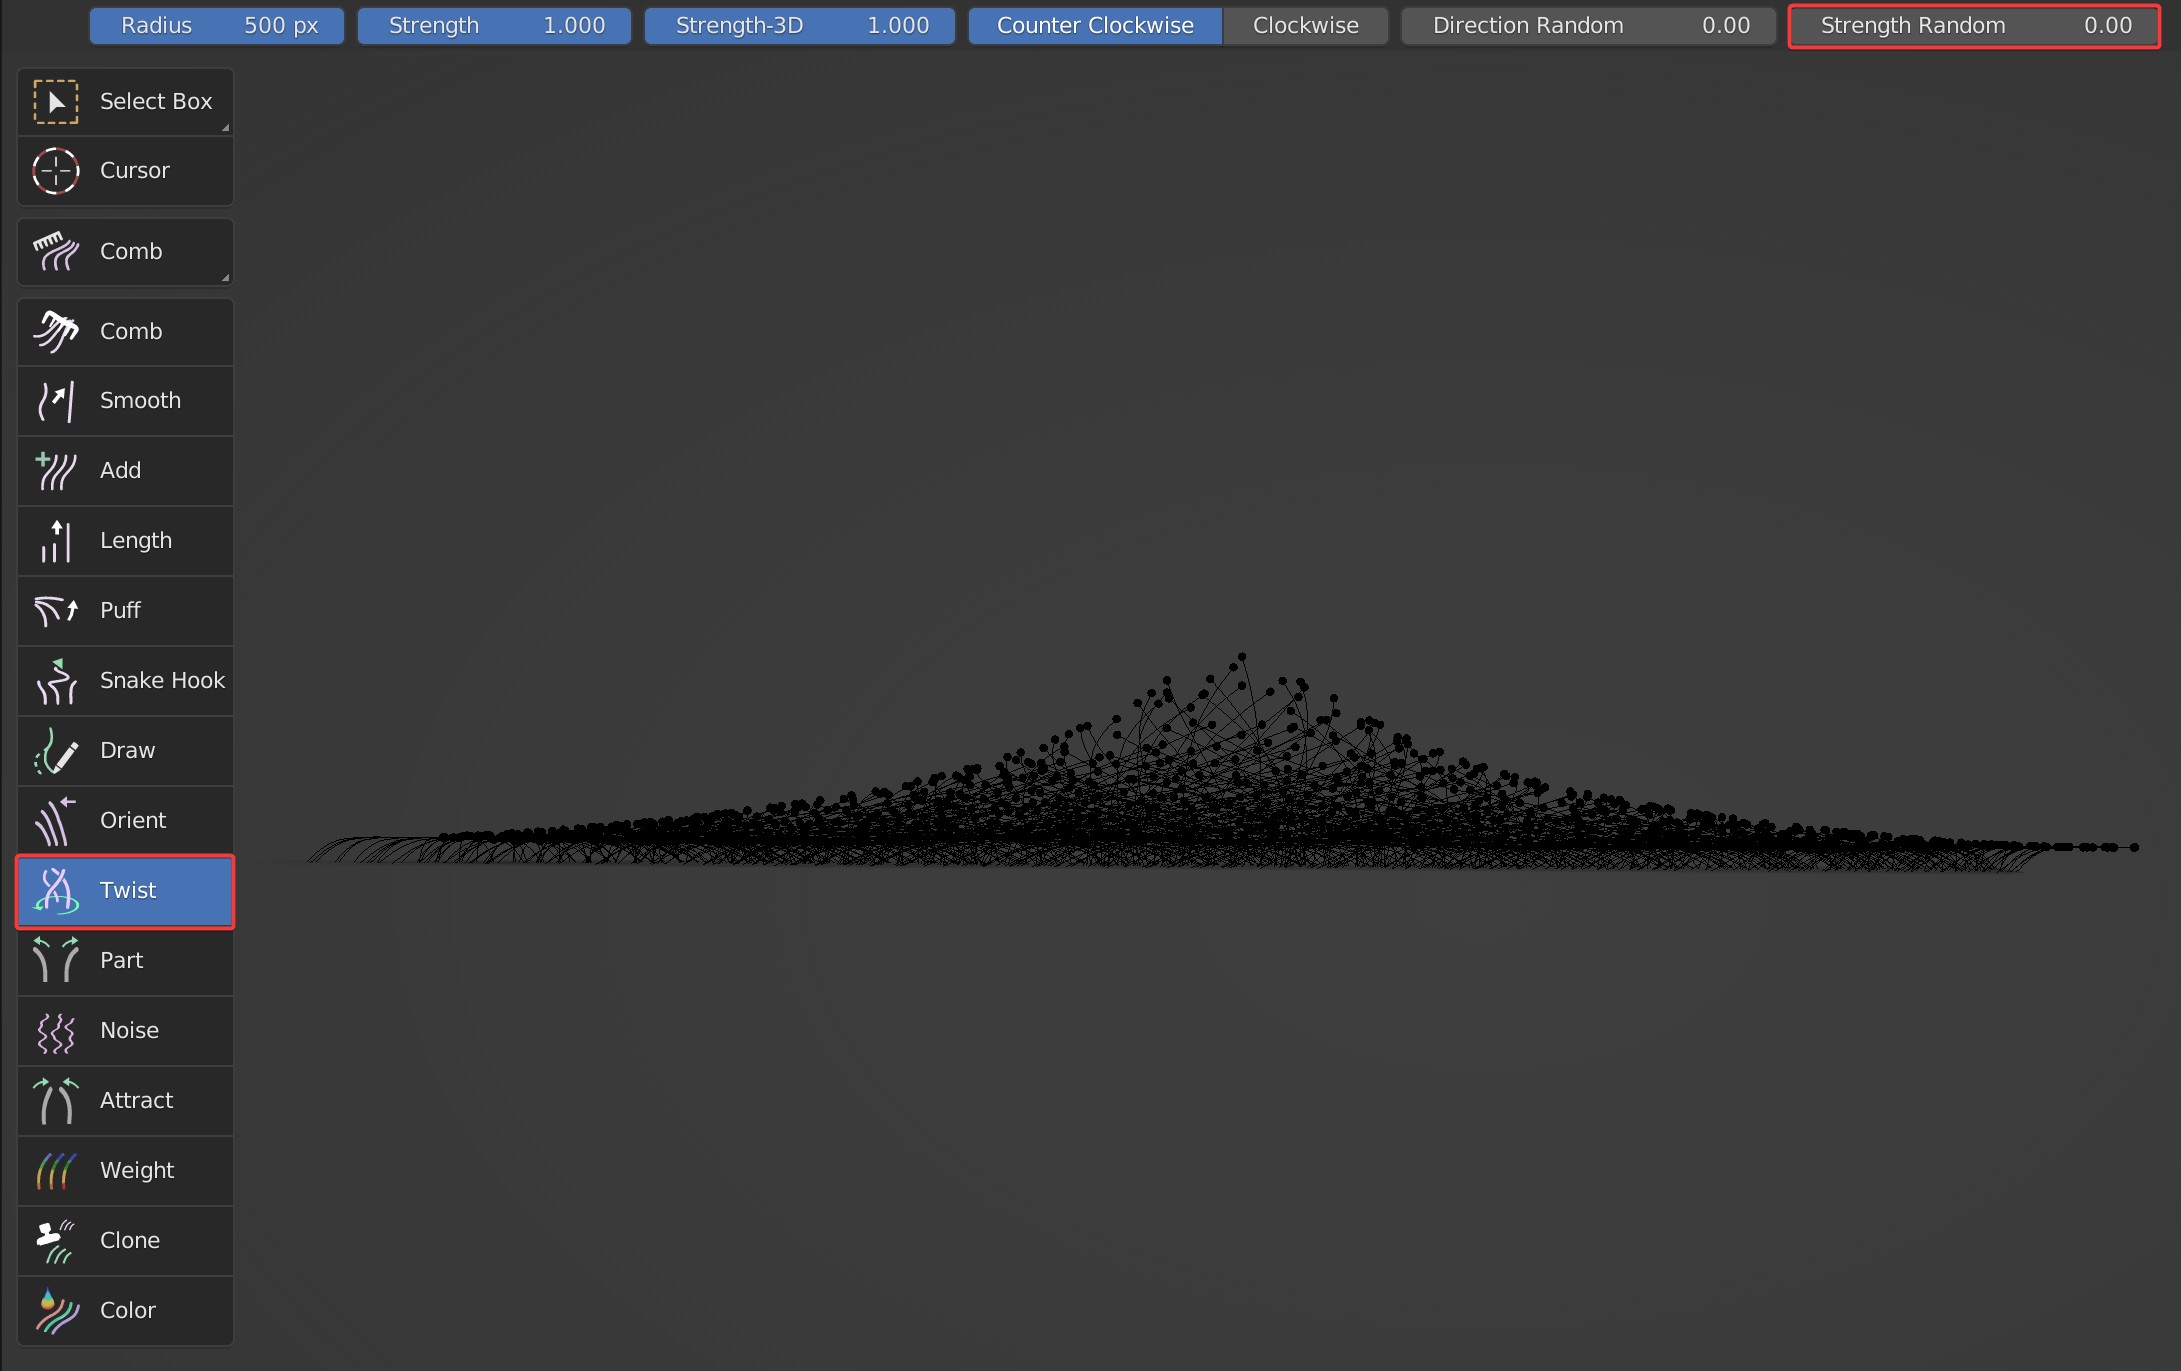
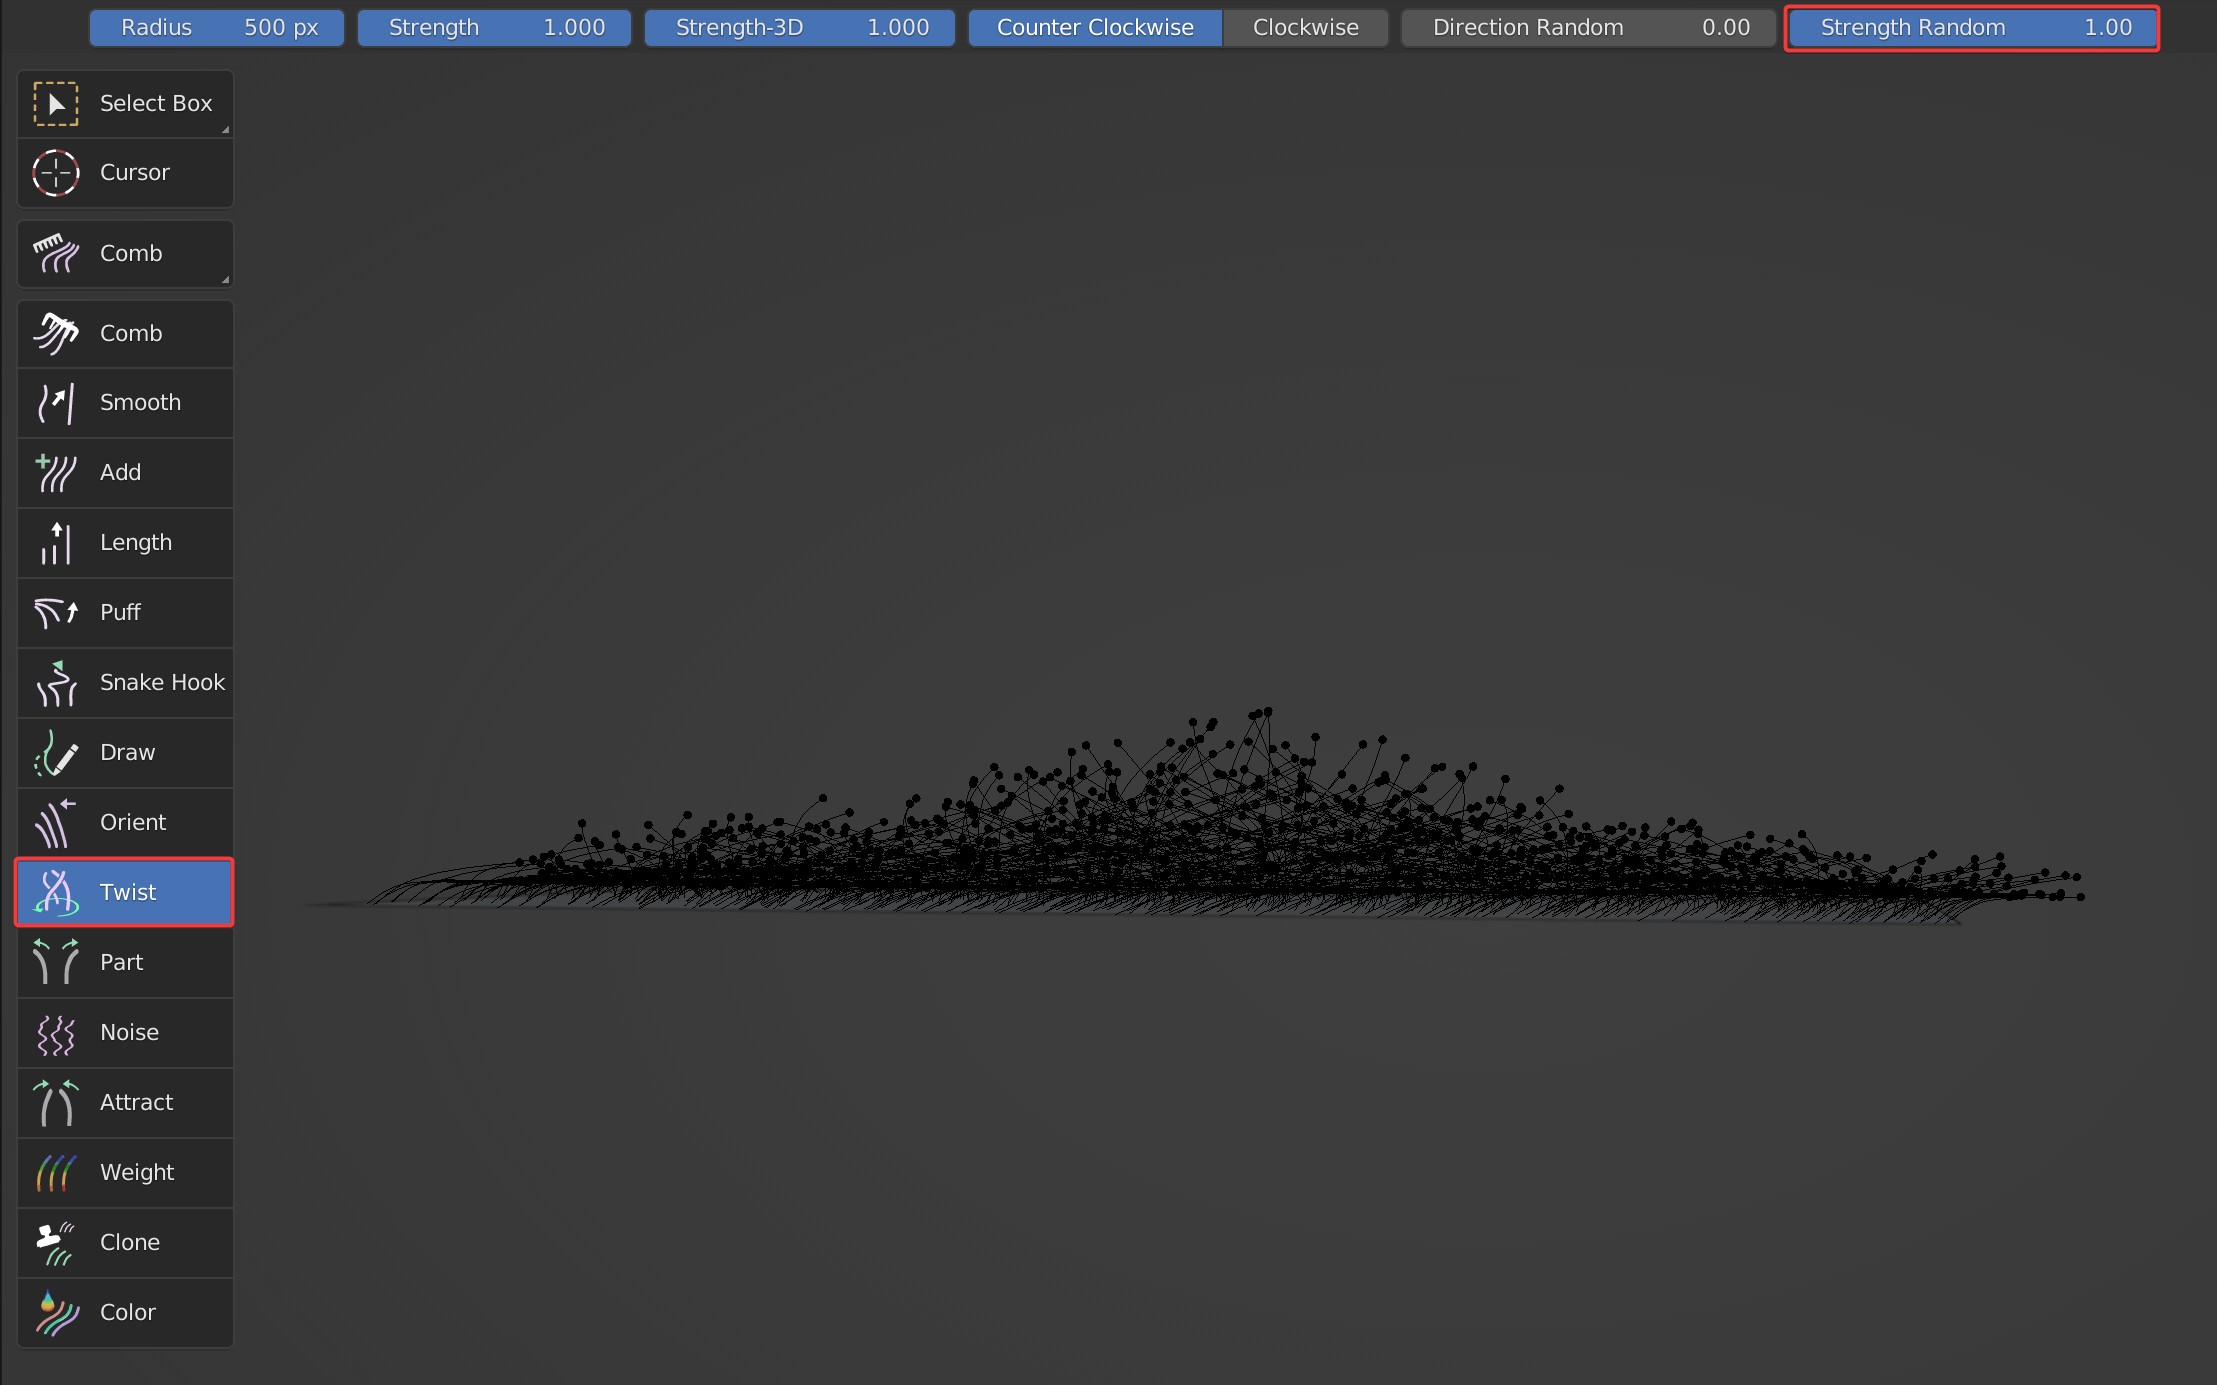
- Strength Random: Random on the Z axis. Guides go up and down somewhat when Strength Random is enabled.
Strength Random is 0 and 1
Case Demonstration
Part
Part brush is to pull guides to both sides along the movement track of brush.

Brush Type
Part supports 2D and 3D mode, and supports 2D/3D switching.
Brush Description
Part brush only works on the tip of the guides, but not on the root.
Case Demonstration
Noise
Noise is used to add organic randomness to hair.
Brush Type
Noise supports 2D and 3D mode, and supports 2D/3D switching.
Brush Options

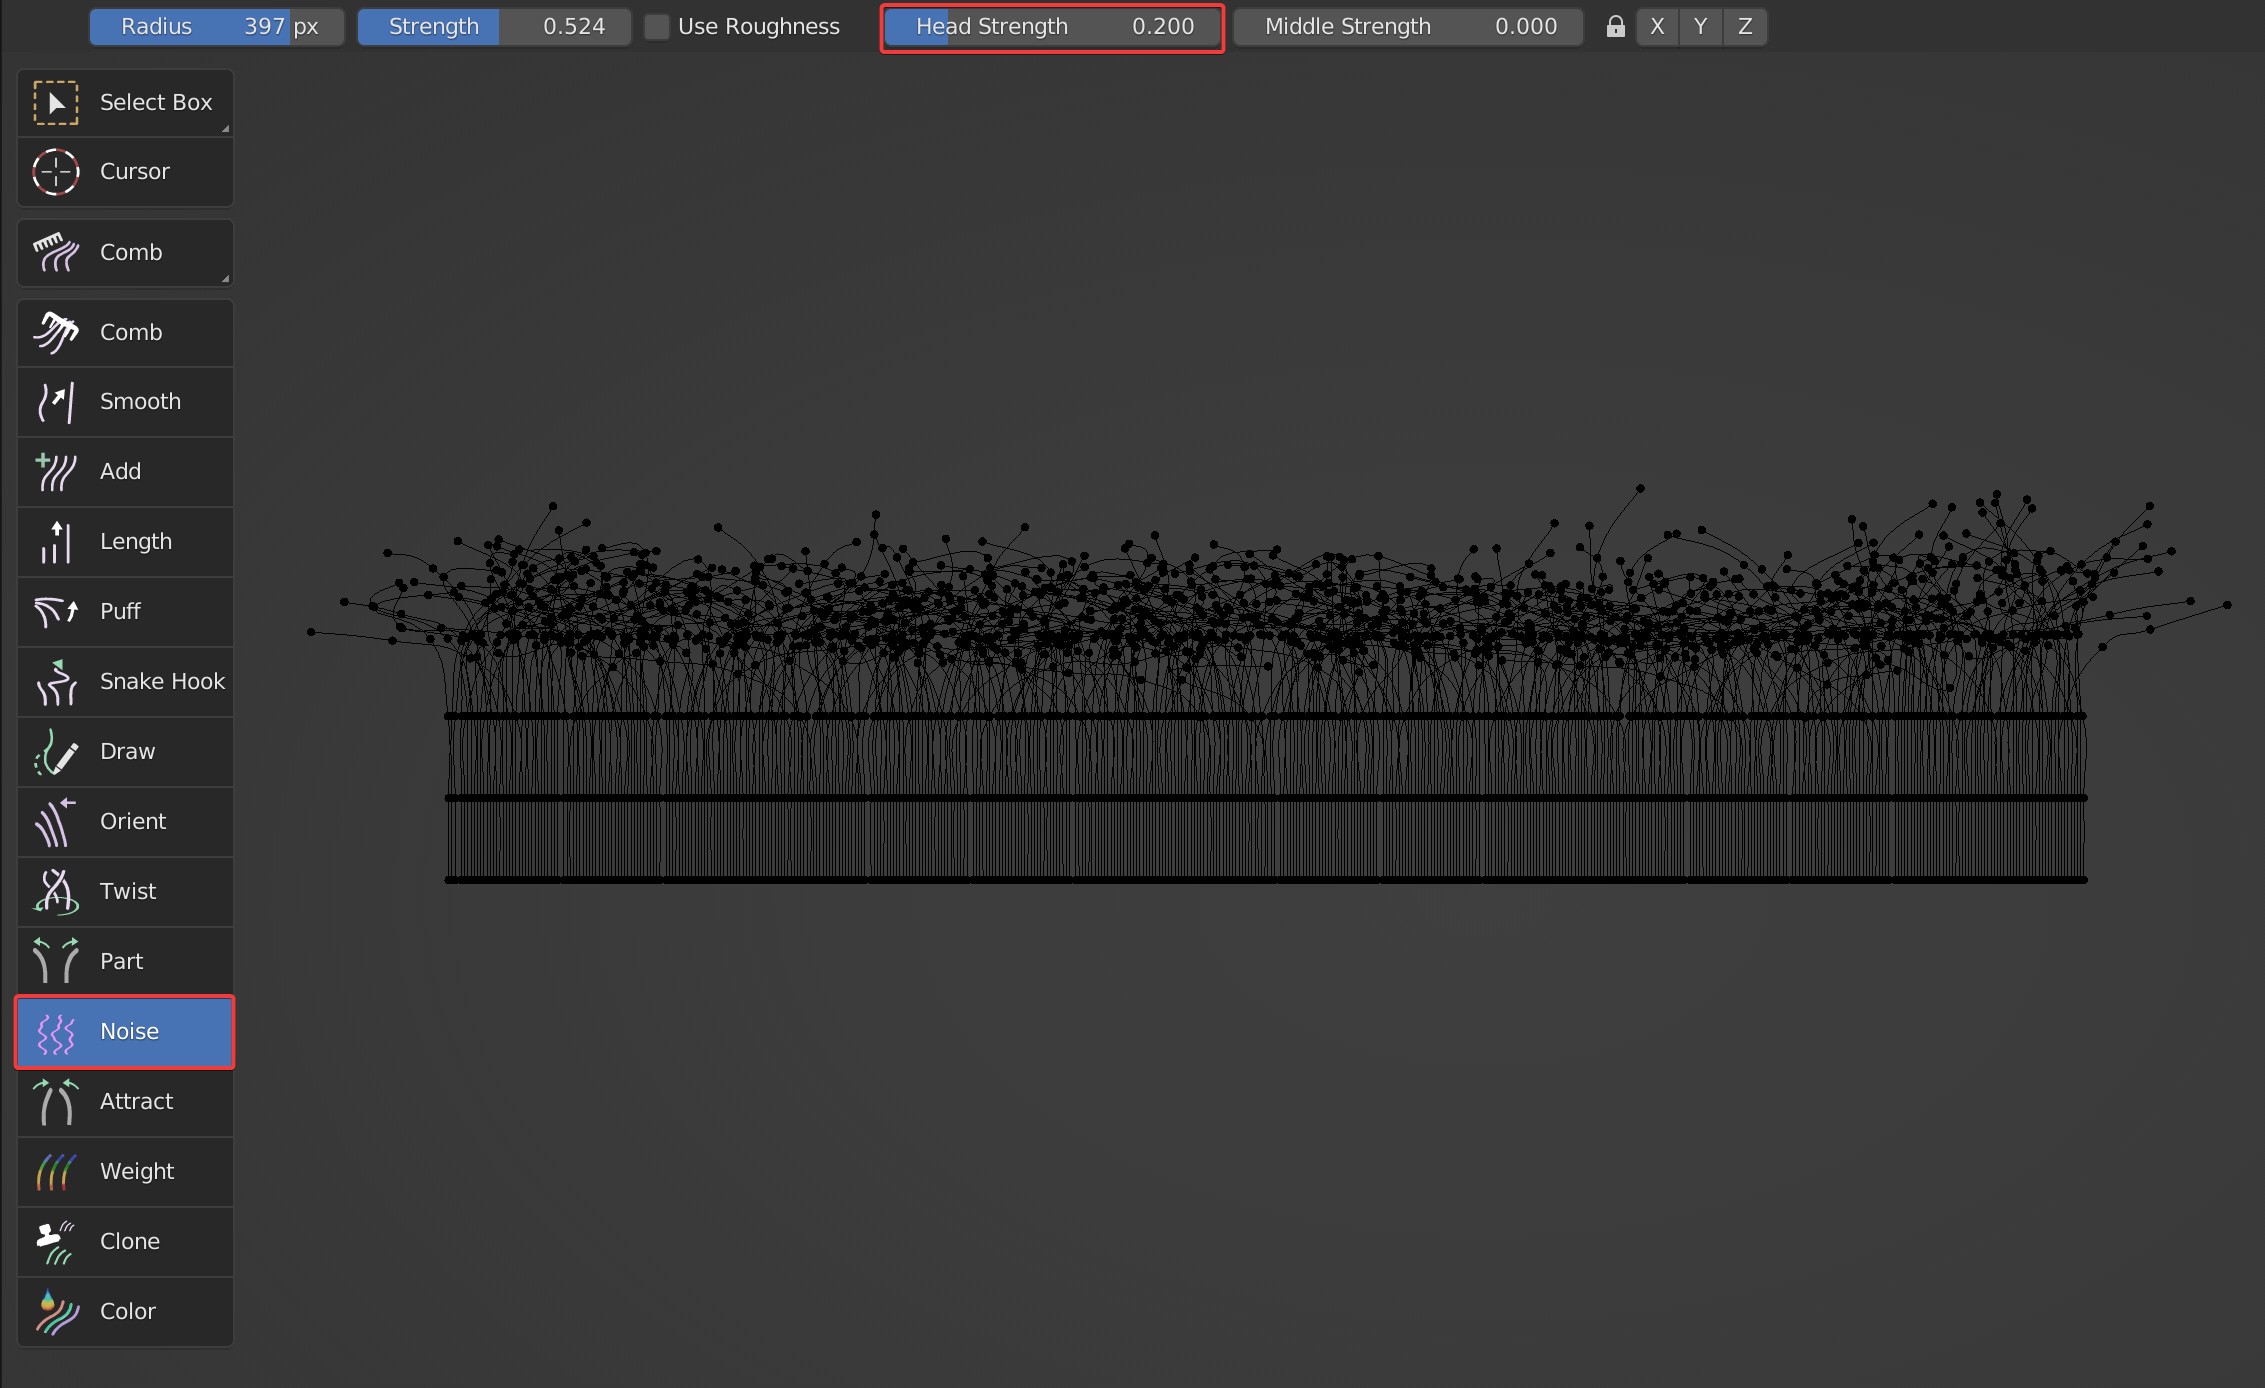
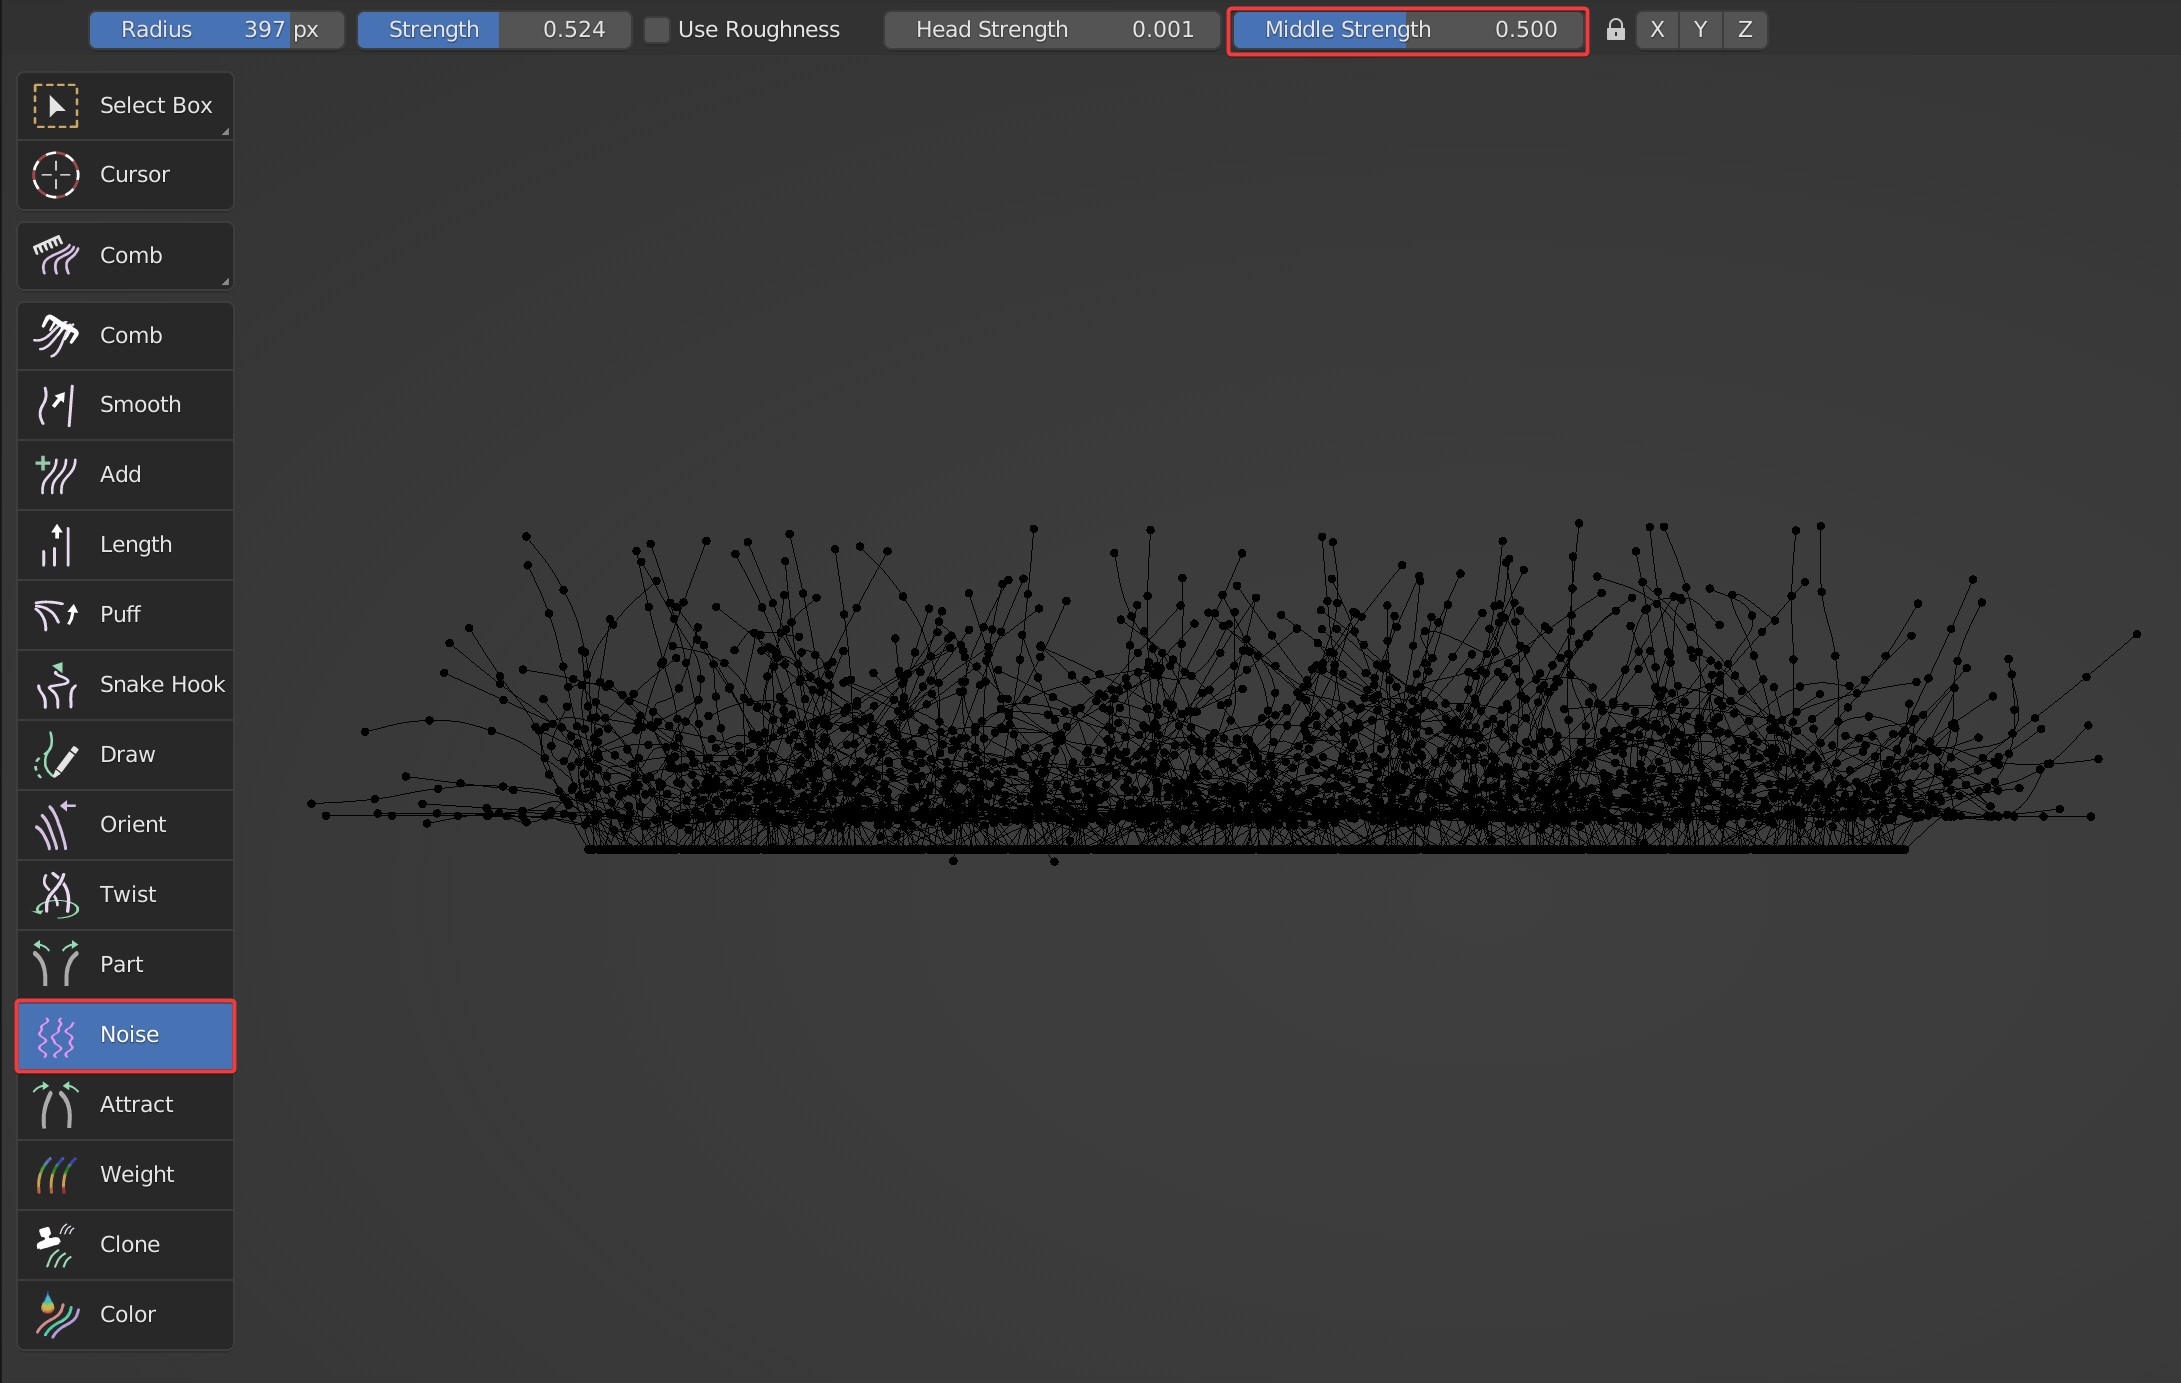
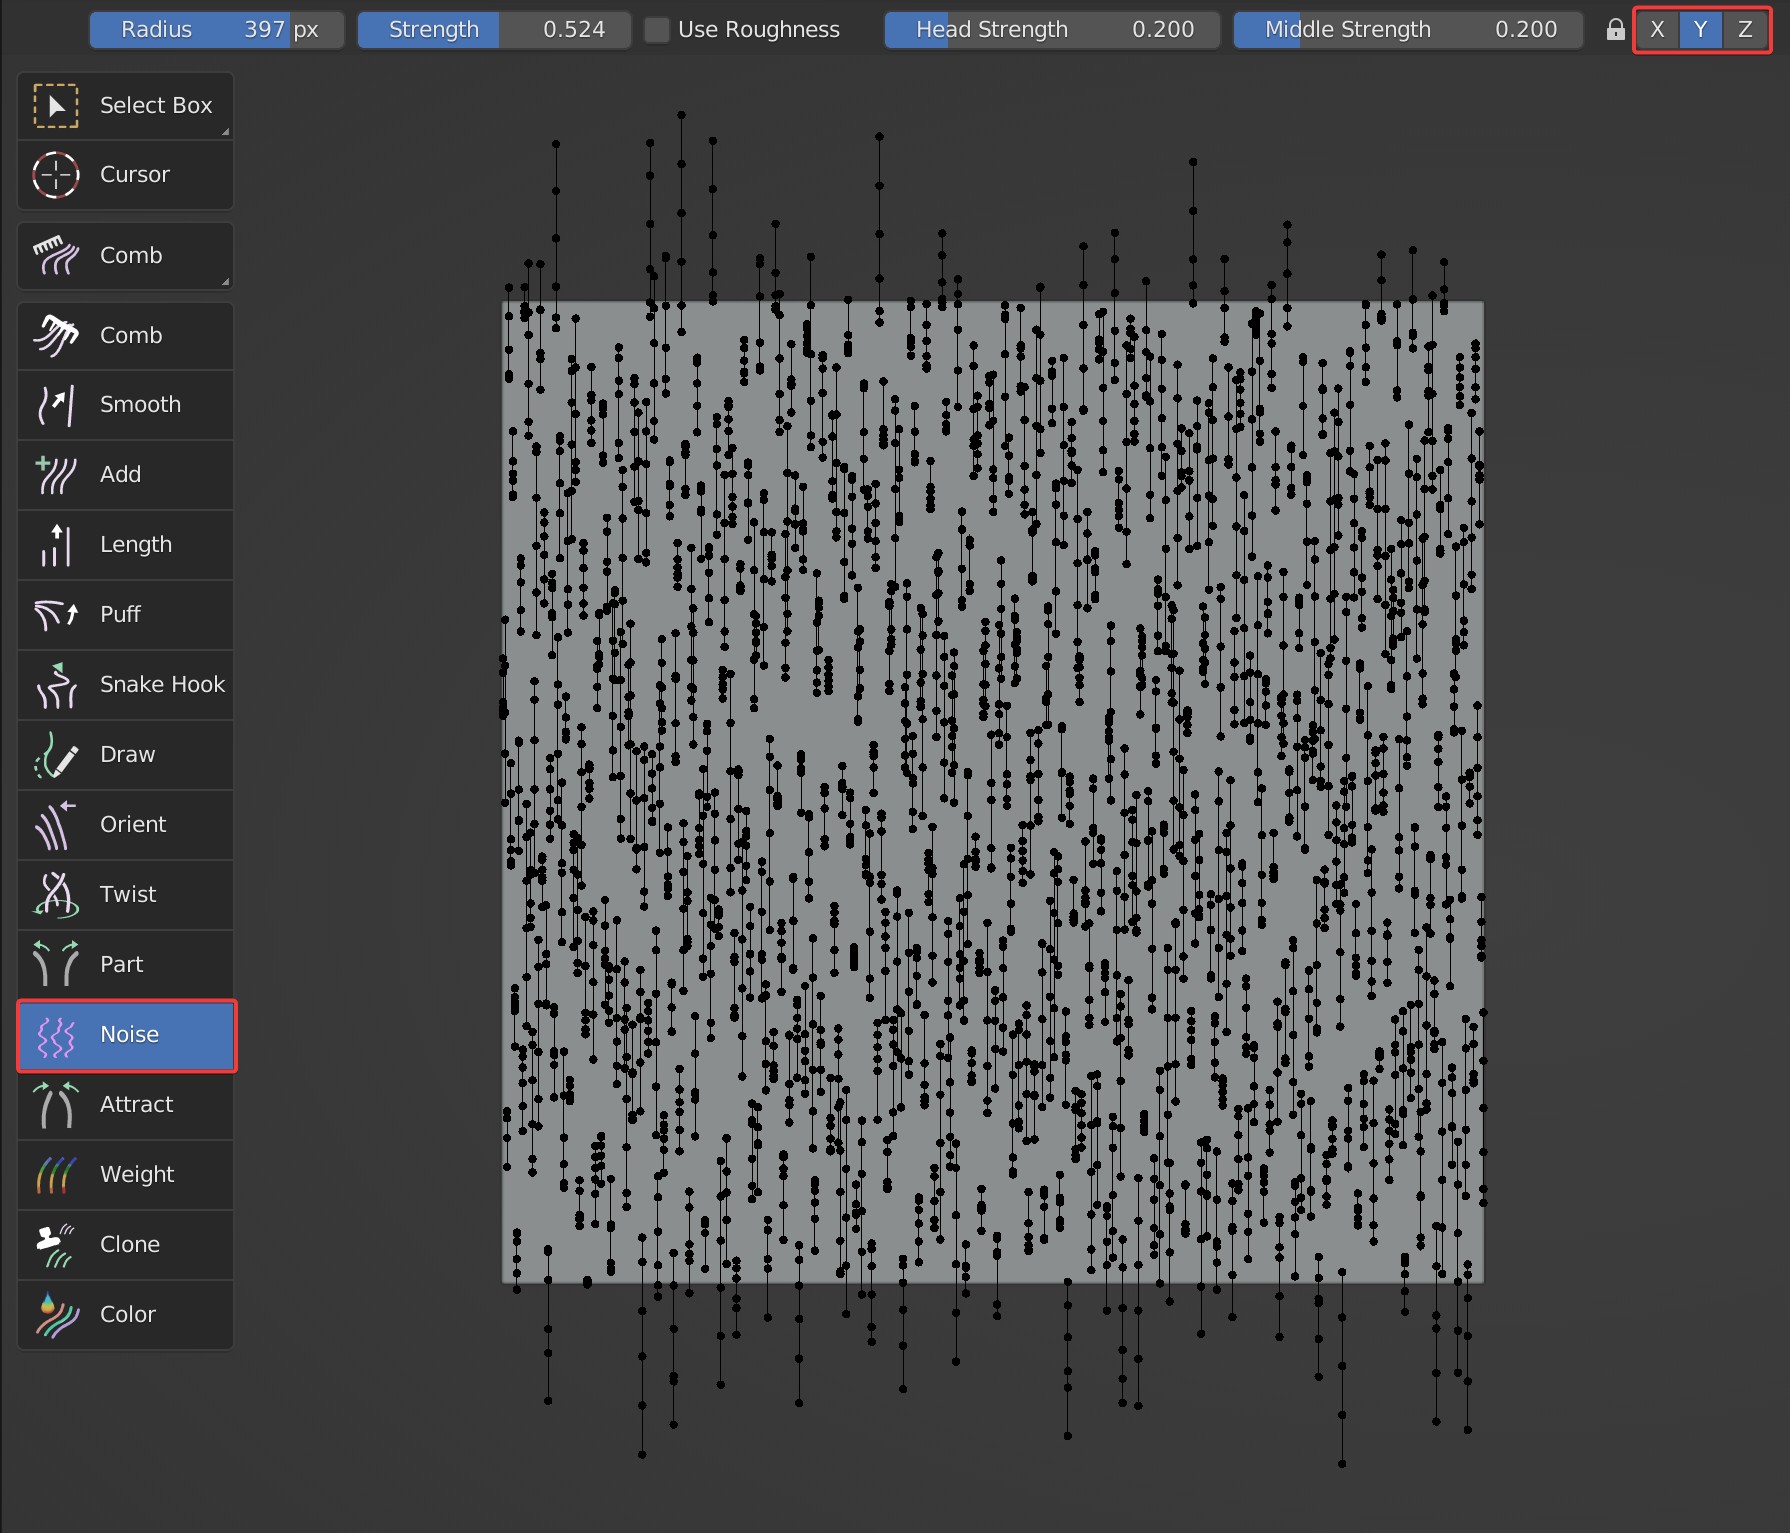
Head Strength, Middle Strength
Control the random strength at the tip of the guides and the middle of the guides separately.
- Head Strength
- Middle Strength:
X, Y, Z
Control the locking of the three axes respectively. When all are locked, the Noise brush has no effect;
- When the X-axis is locked, Noise will only work on the guides in the Y and Z axis.
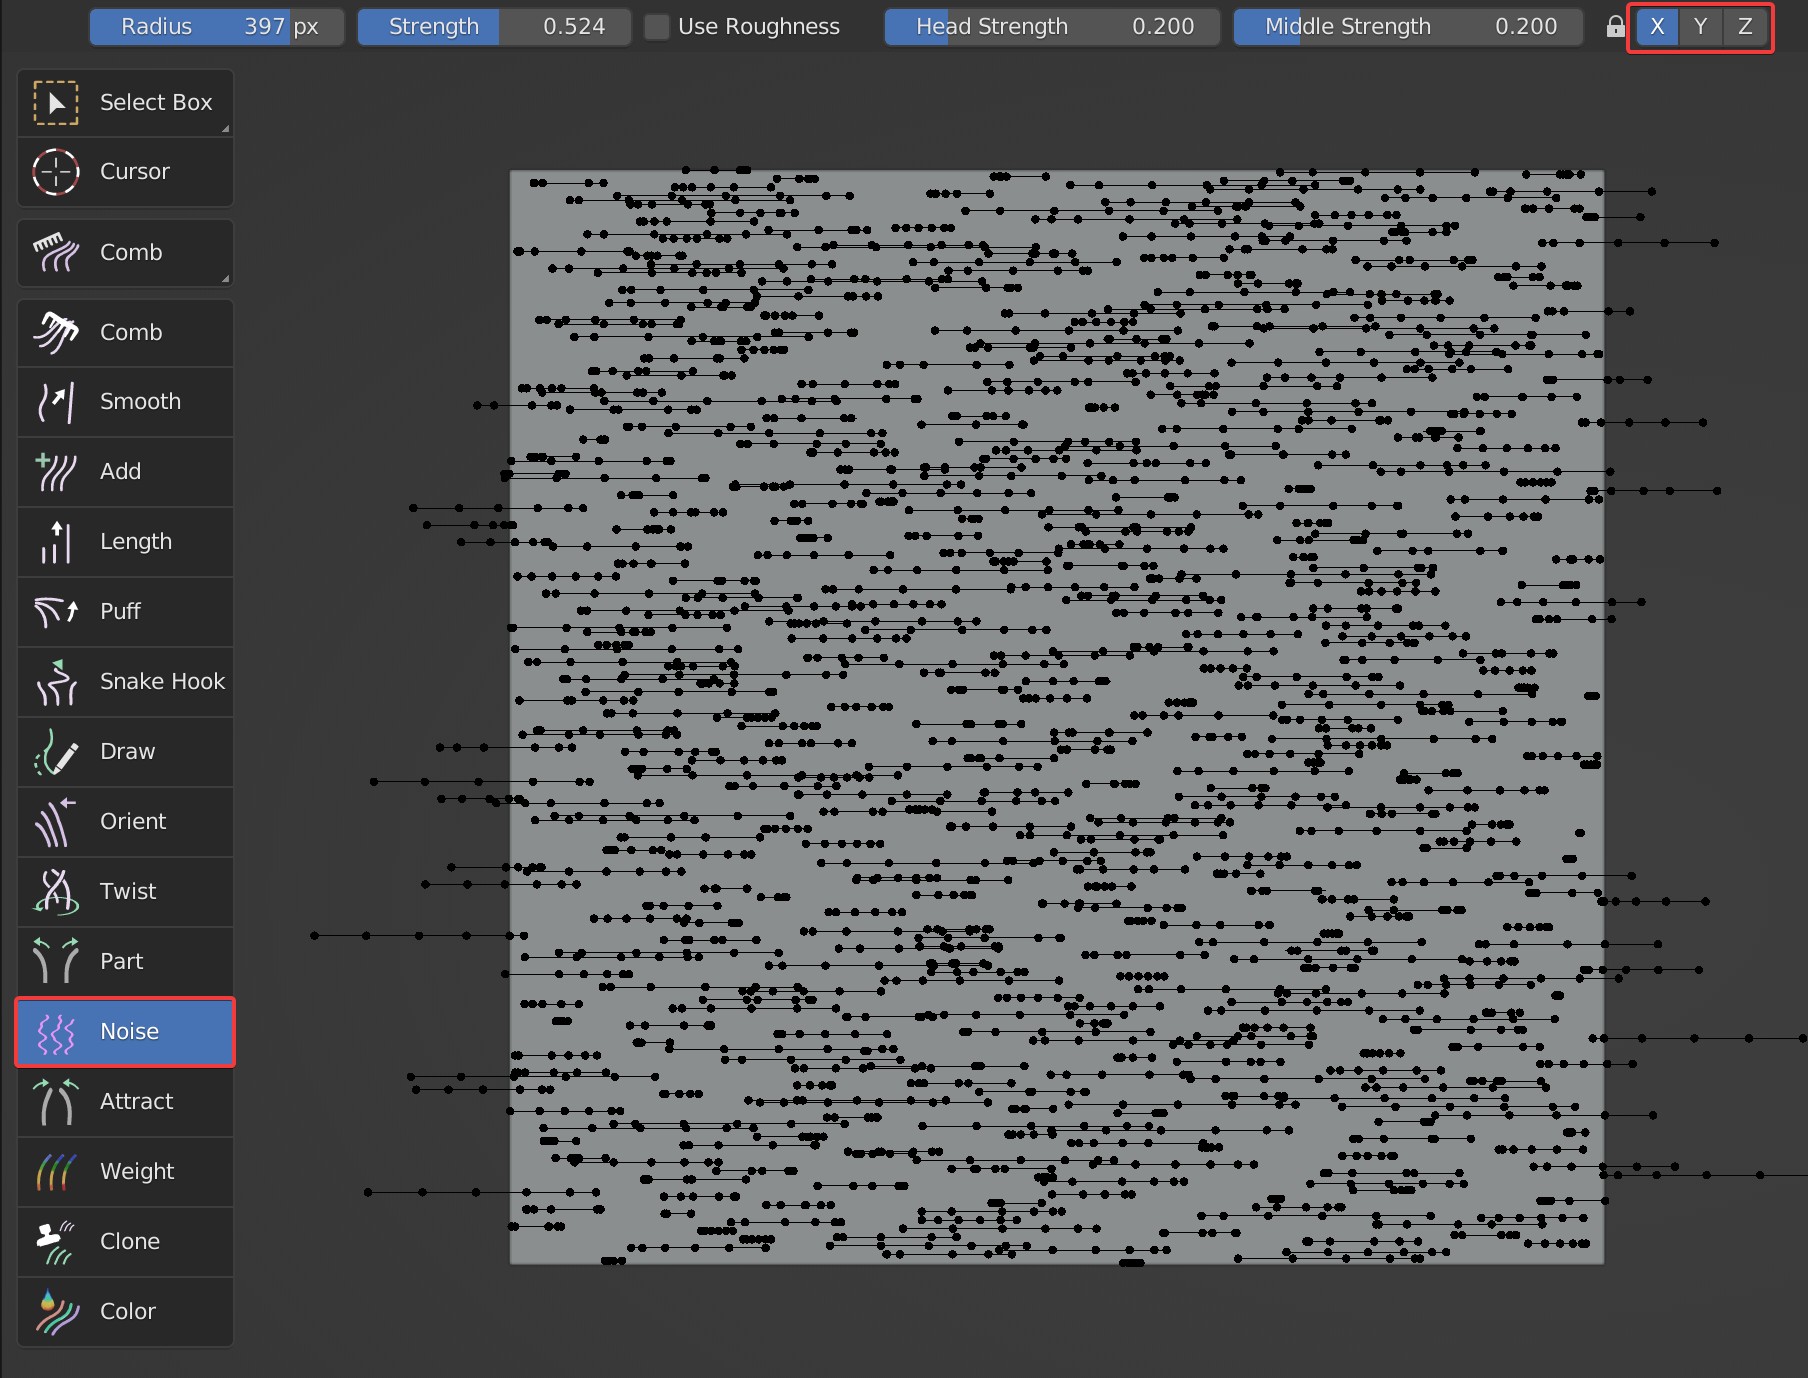
- When the Y-axis is locked, Noise will only work on the guides in the X and Z axis.
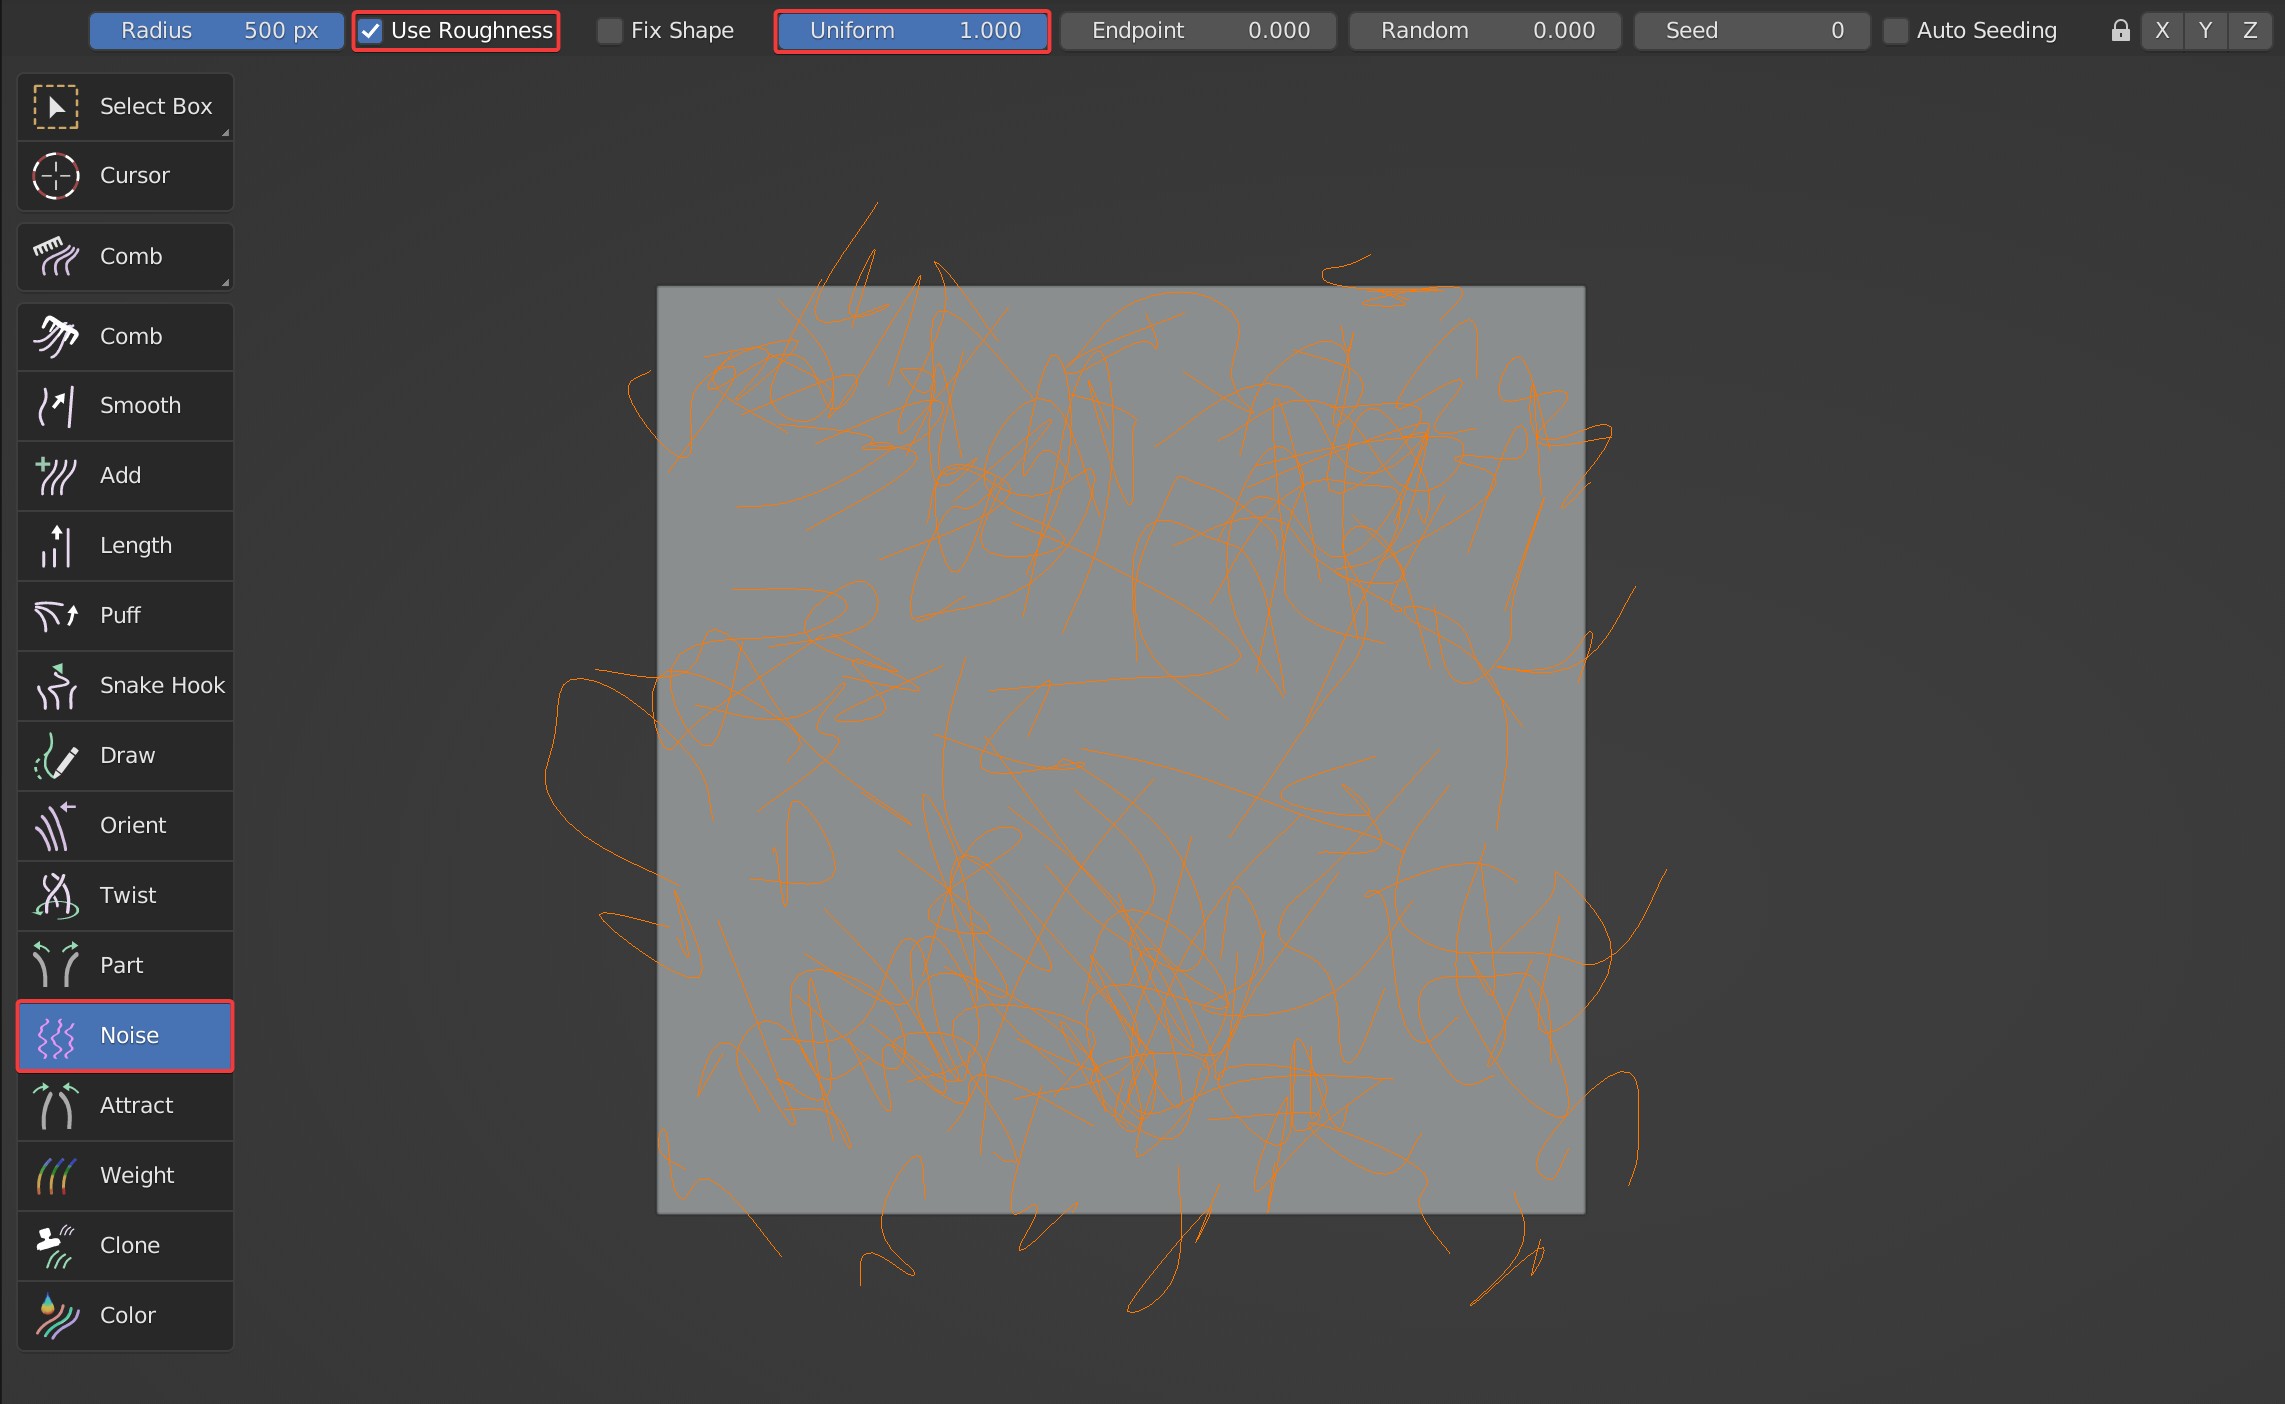
Use Roughness
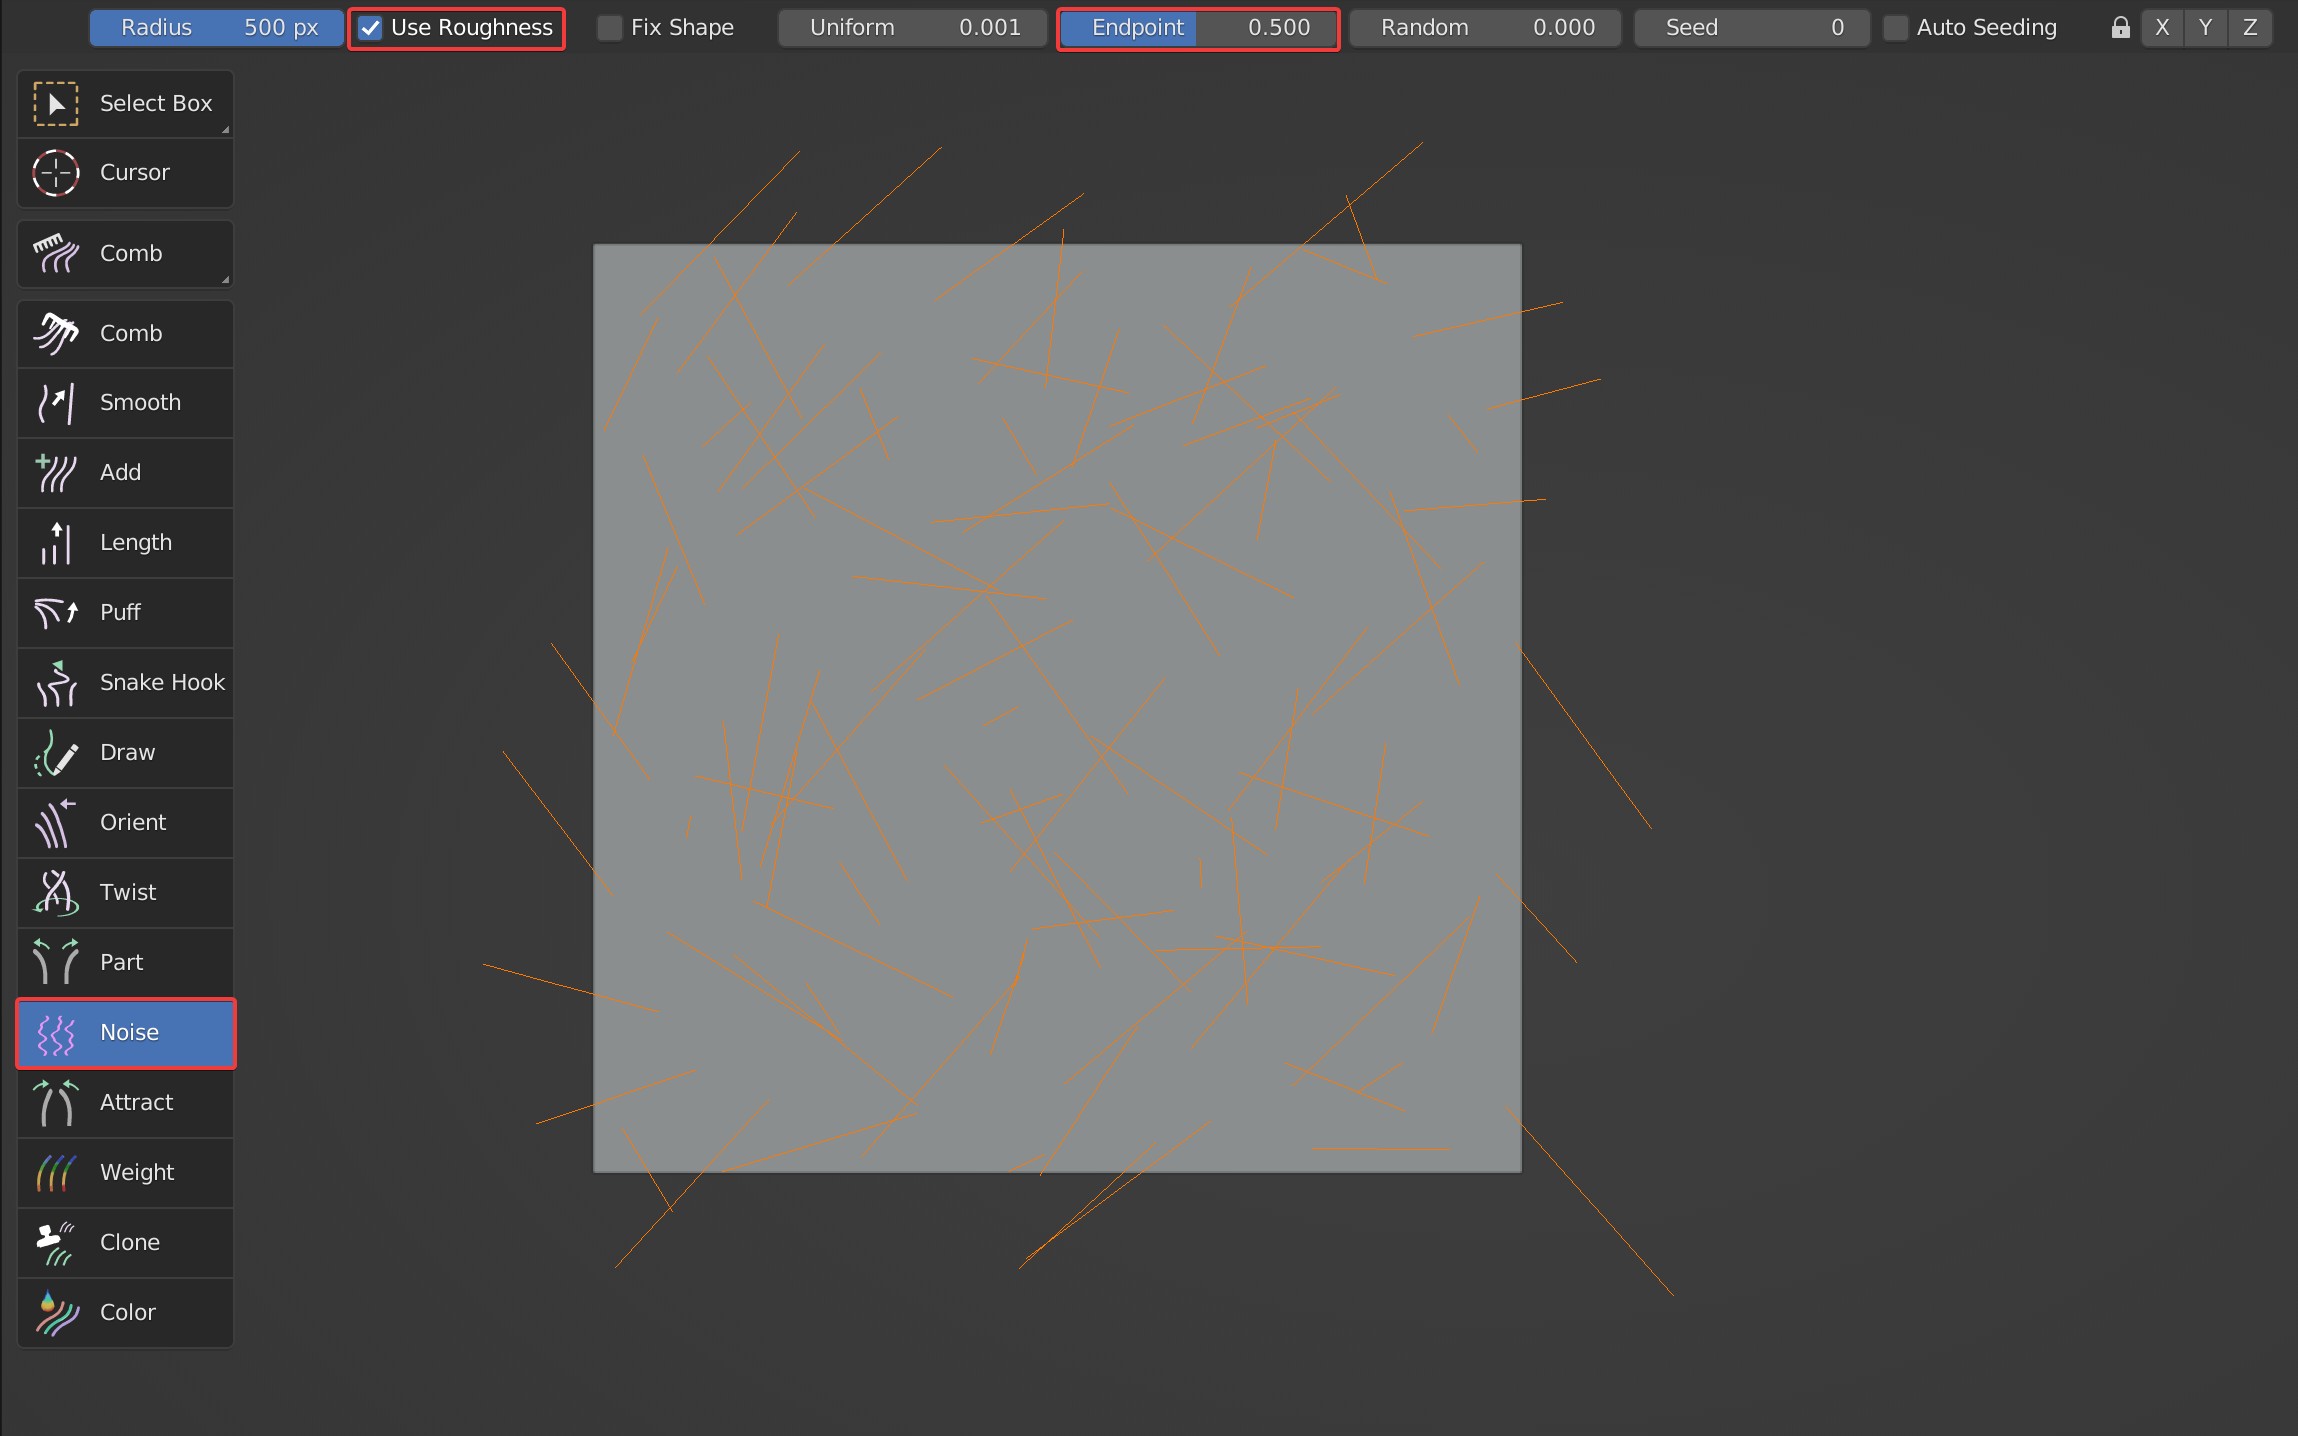
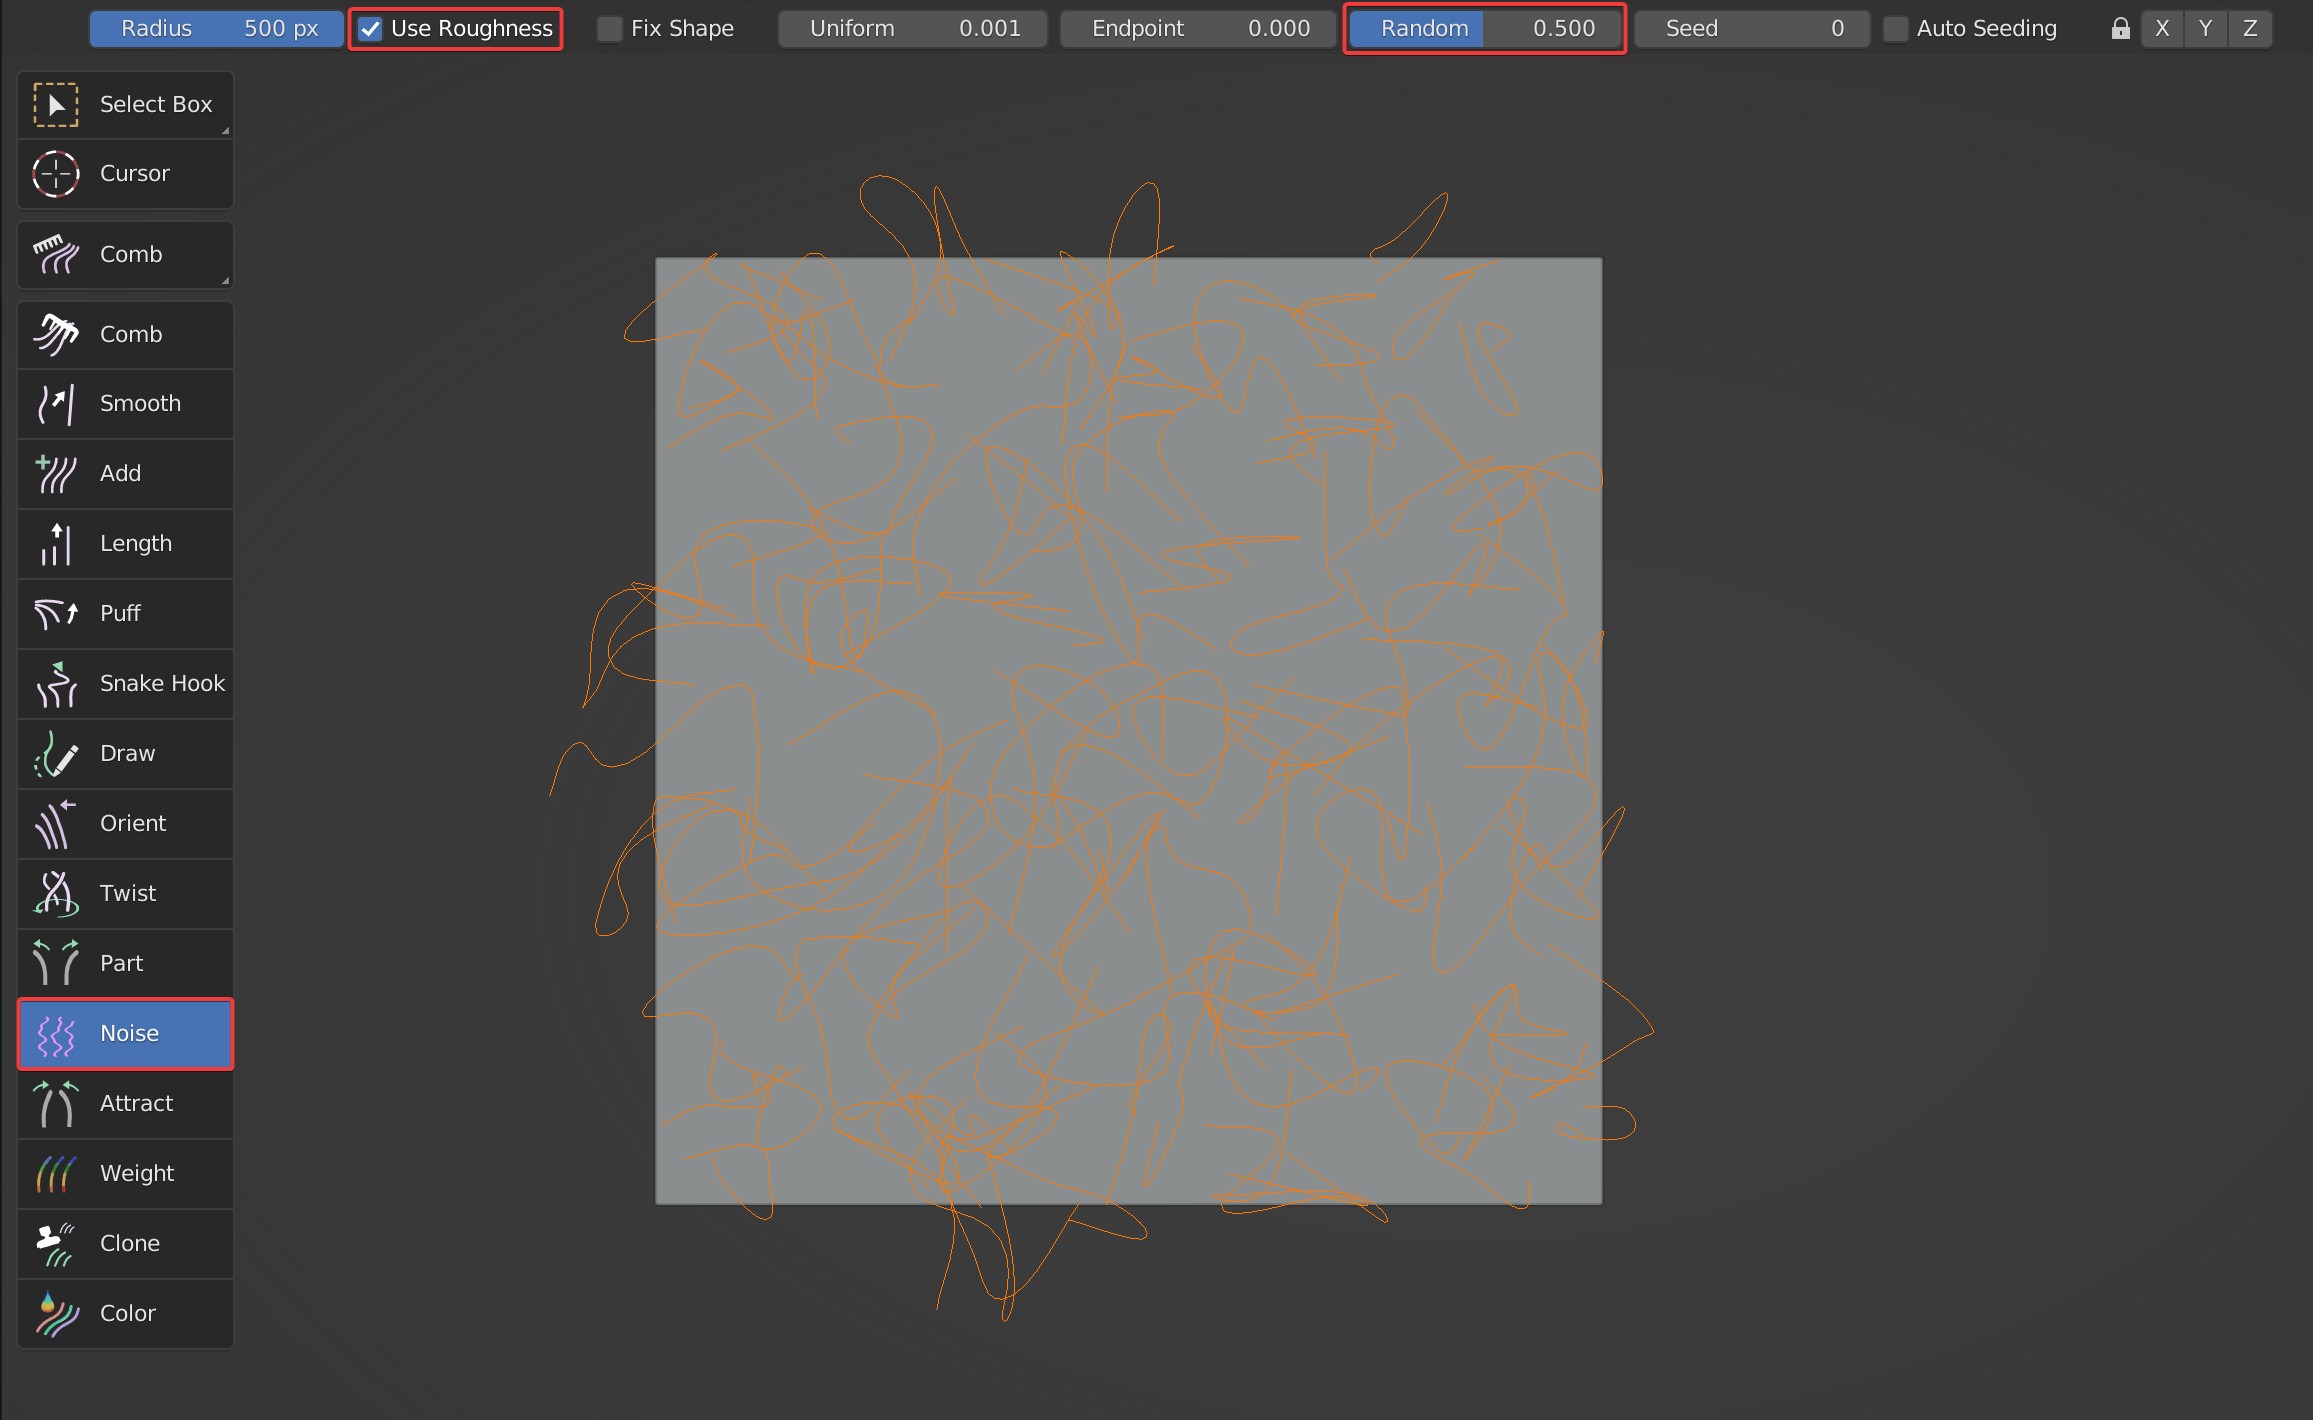
Roughness control of Noise; when this option is enabled, some extra options will appear: Fix Shape, Uniform, Endpoint, Random, Seed, Auto Seeding. Uniform, Endpoint, and Random are the same as the Roughness in Blender.

- Uniform
- Endpoint
- Random
Seed: The random seed of Roughness.
Auto Seeding: The Seed of Roughness can change automatically.
- Fix Shape: When Fix Shaped is unchecked, Noise brush works on the hair continuously before mouse is released, all the way to the set parameters; When Fix Shape is checked, brush works on the hair with a single click.
Case Demonstration
Attract
It's used to attract hairs to one points.
Brush Type
Attract supports 2D and 3D mode, and 2D/3D switching.
Brush Options

The strength of the brush: No falloff. The larger it is, the stronger it works. No work when it's 0.
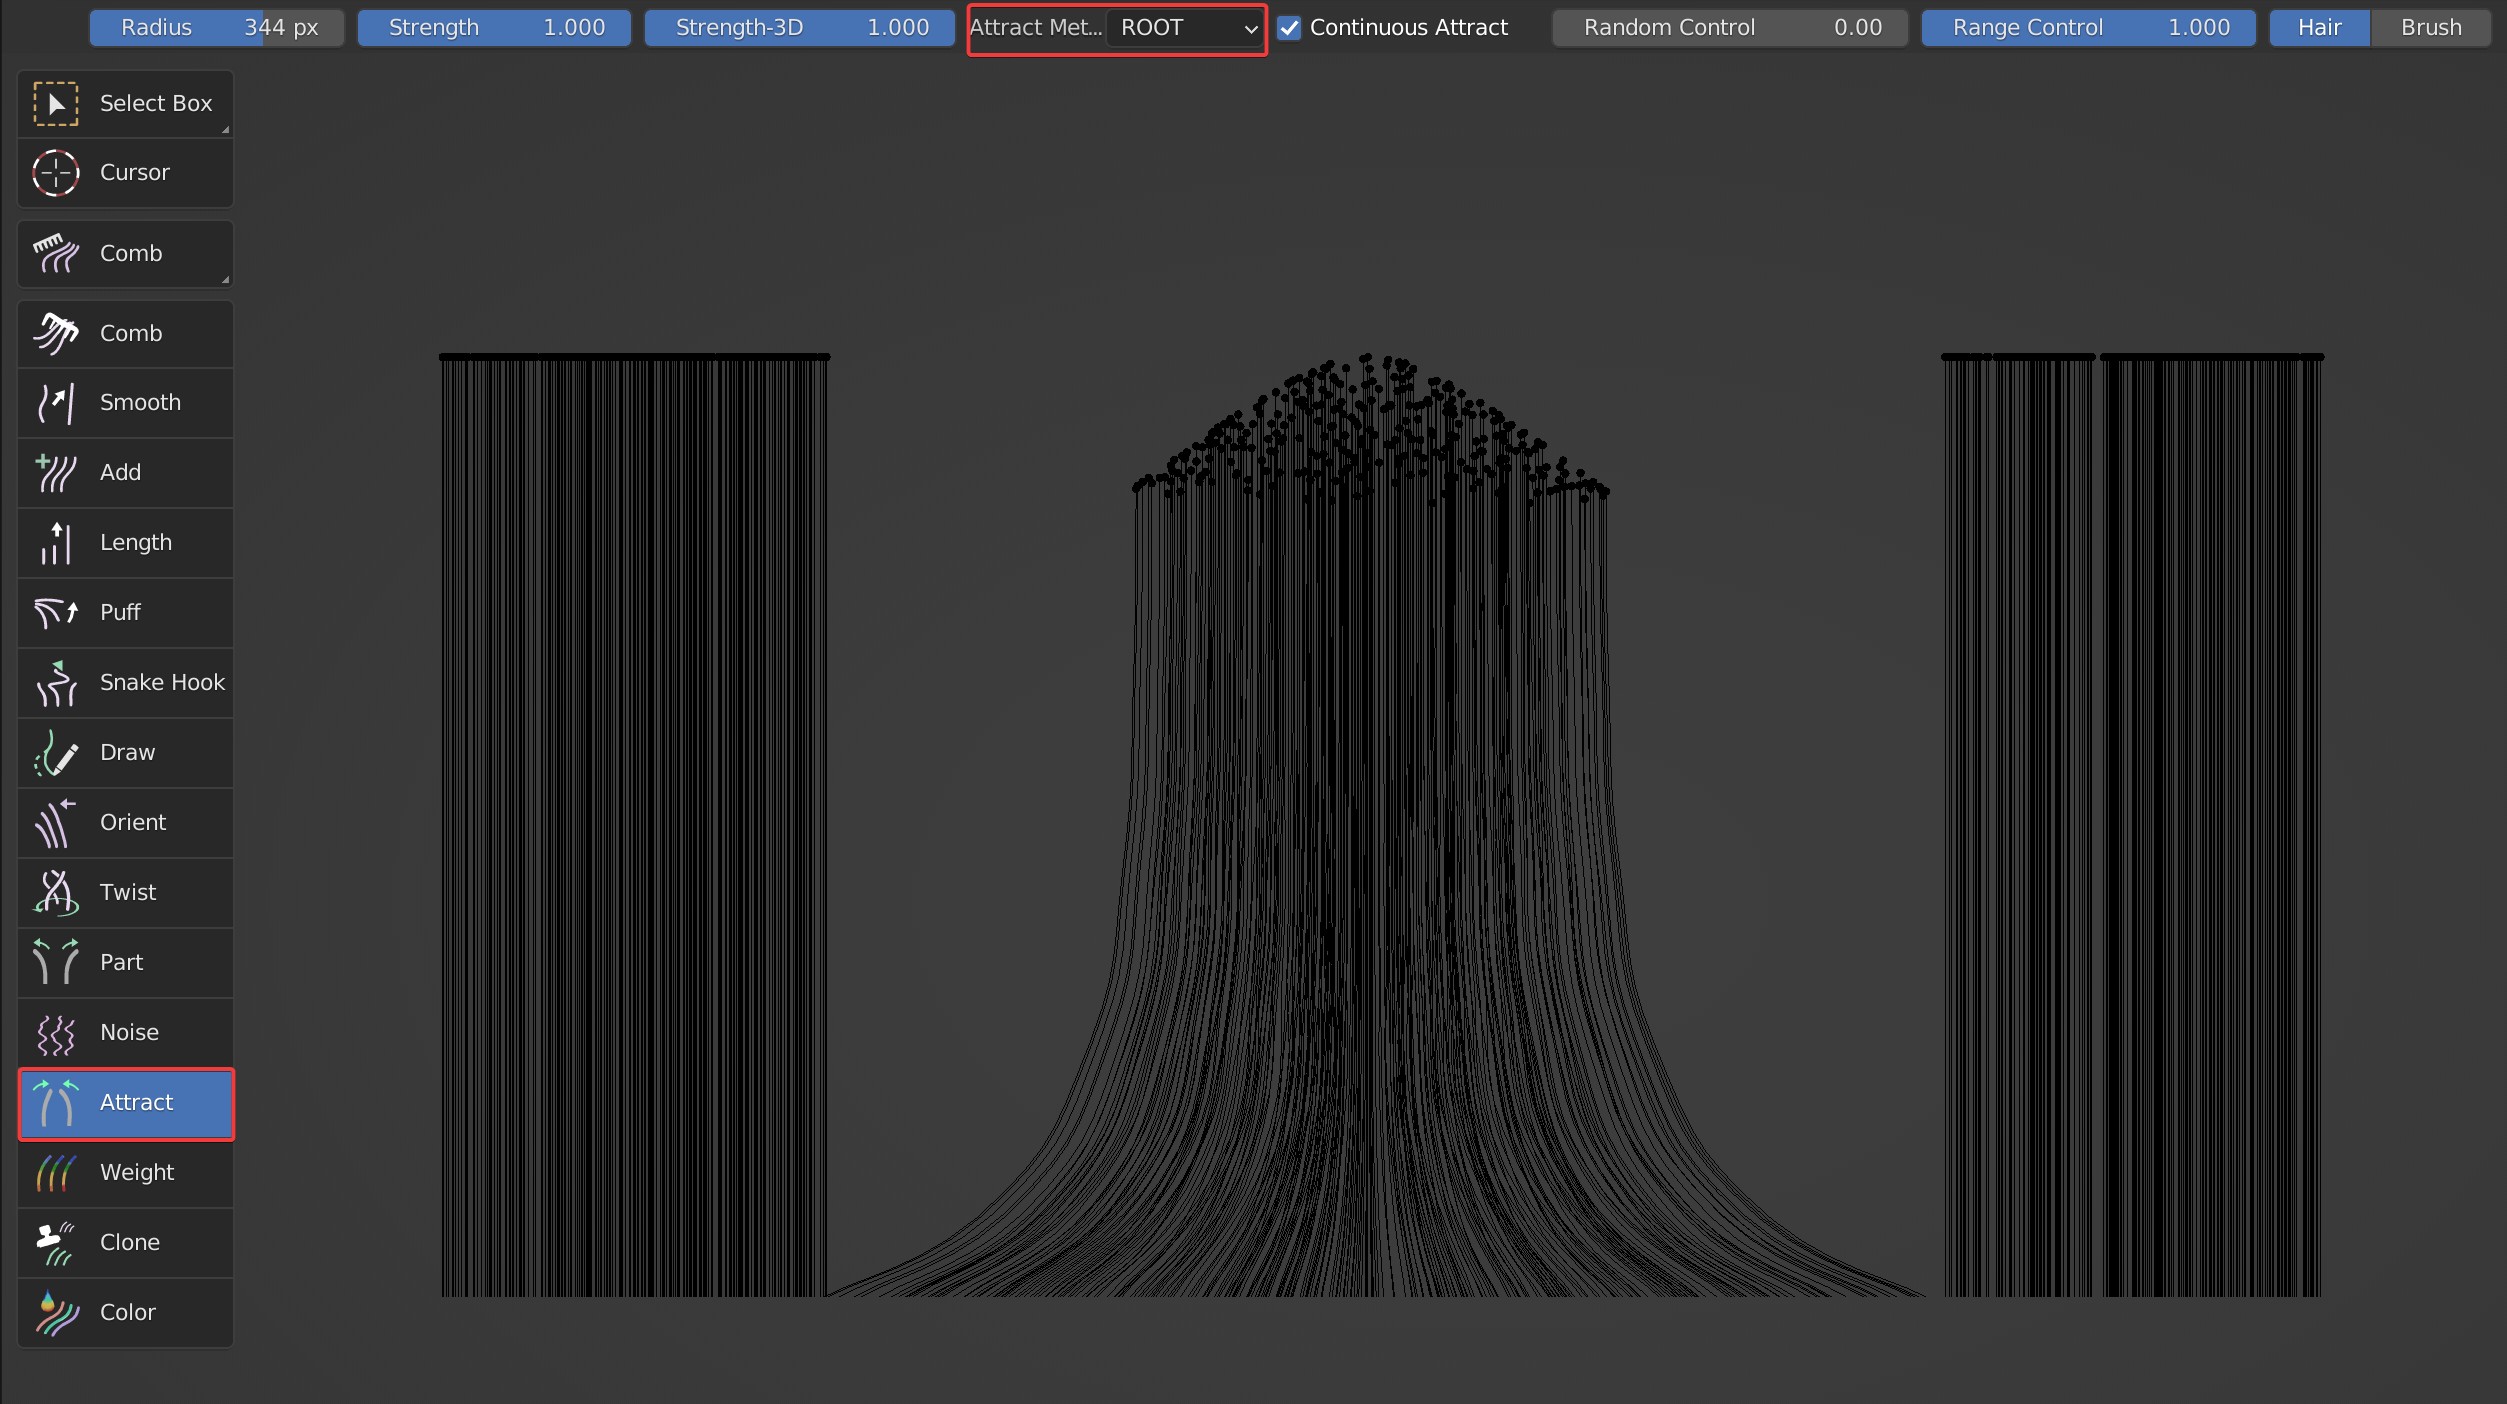
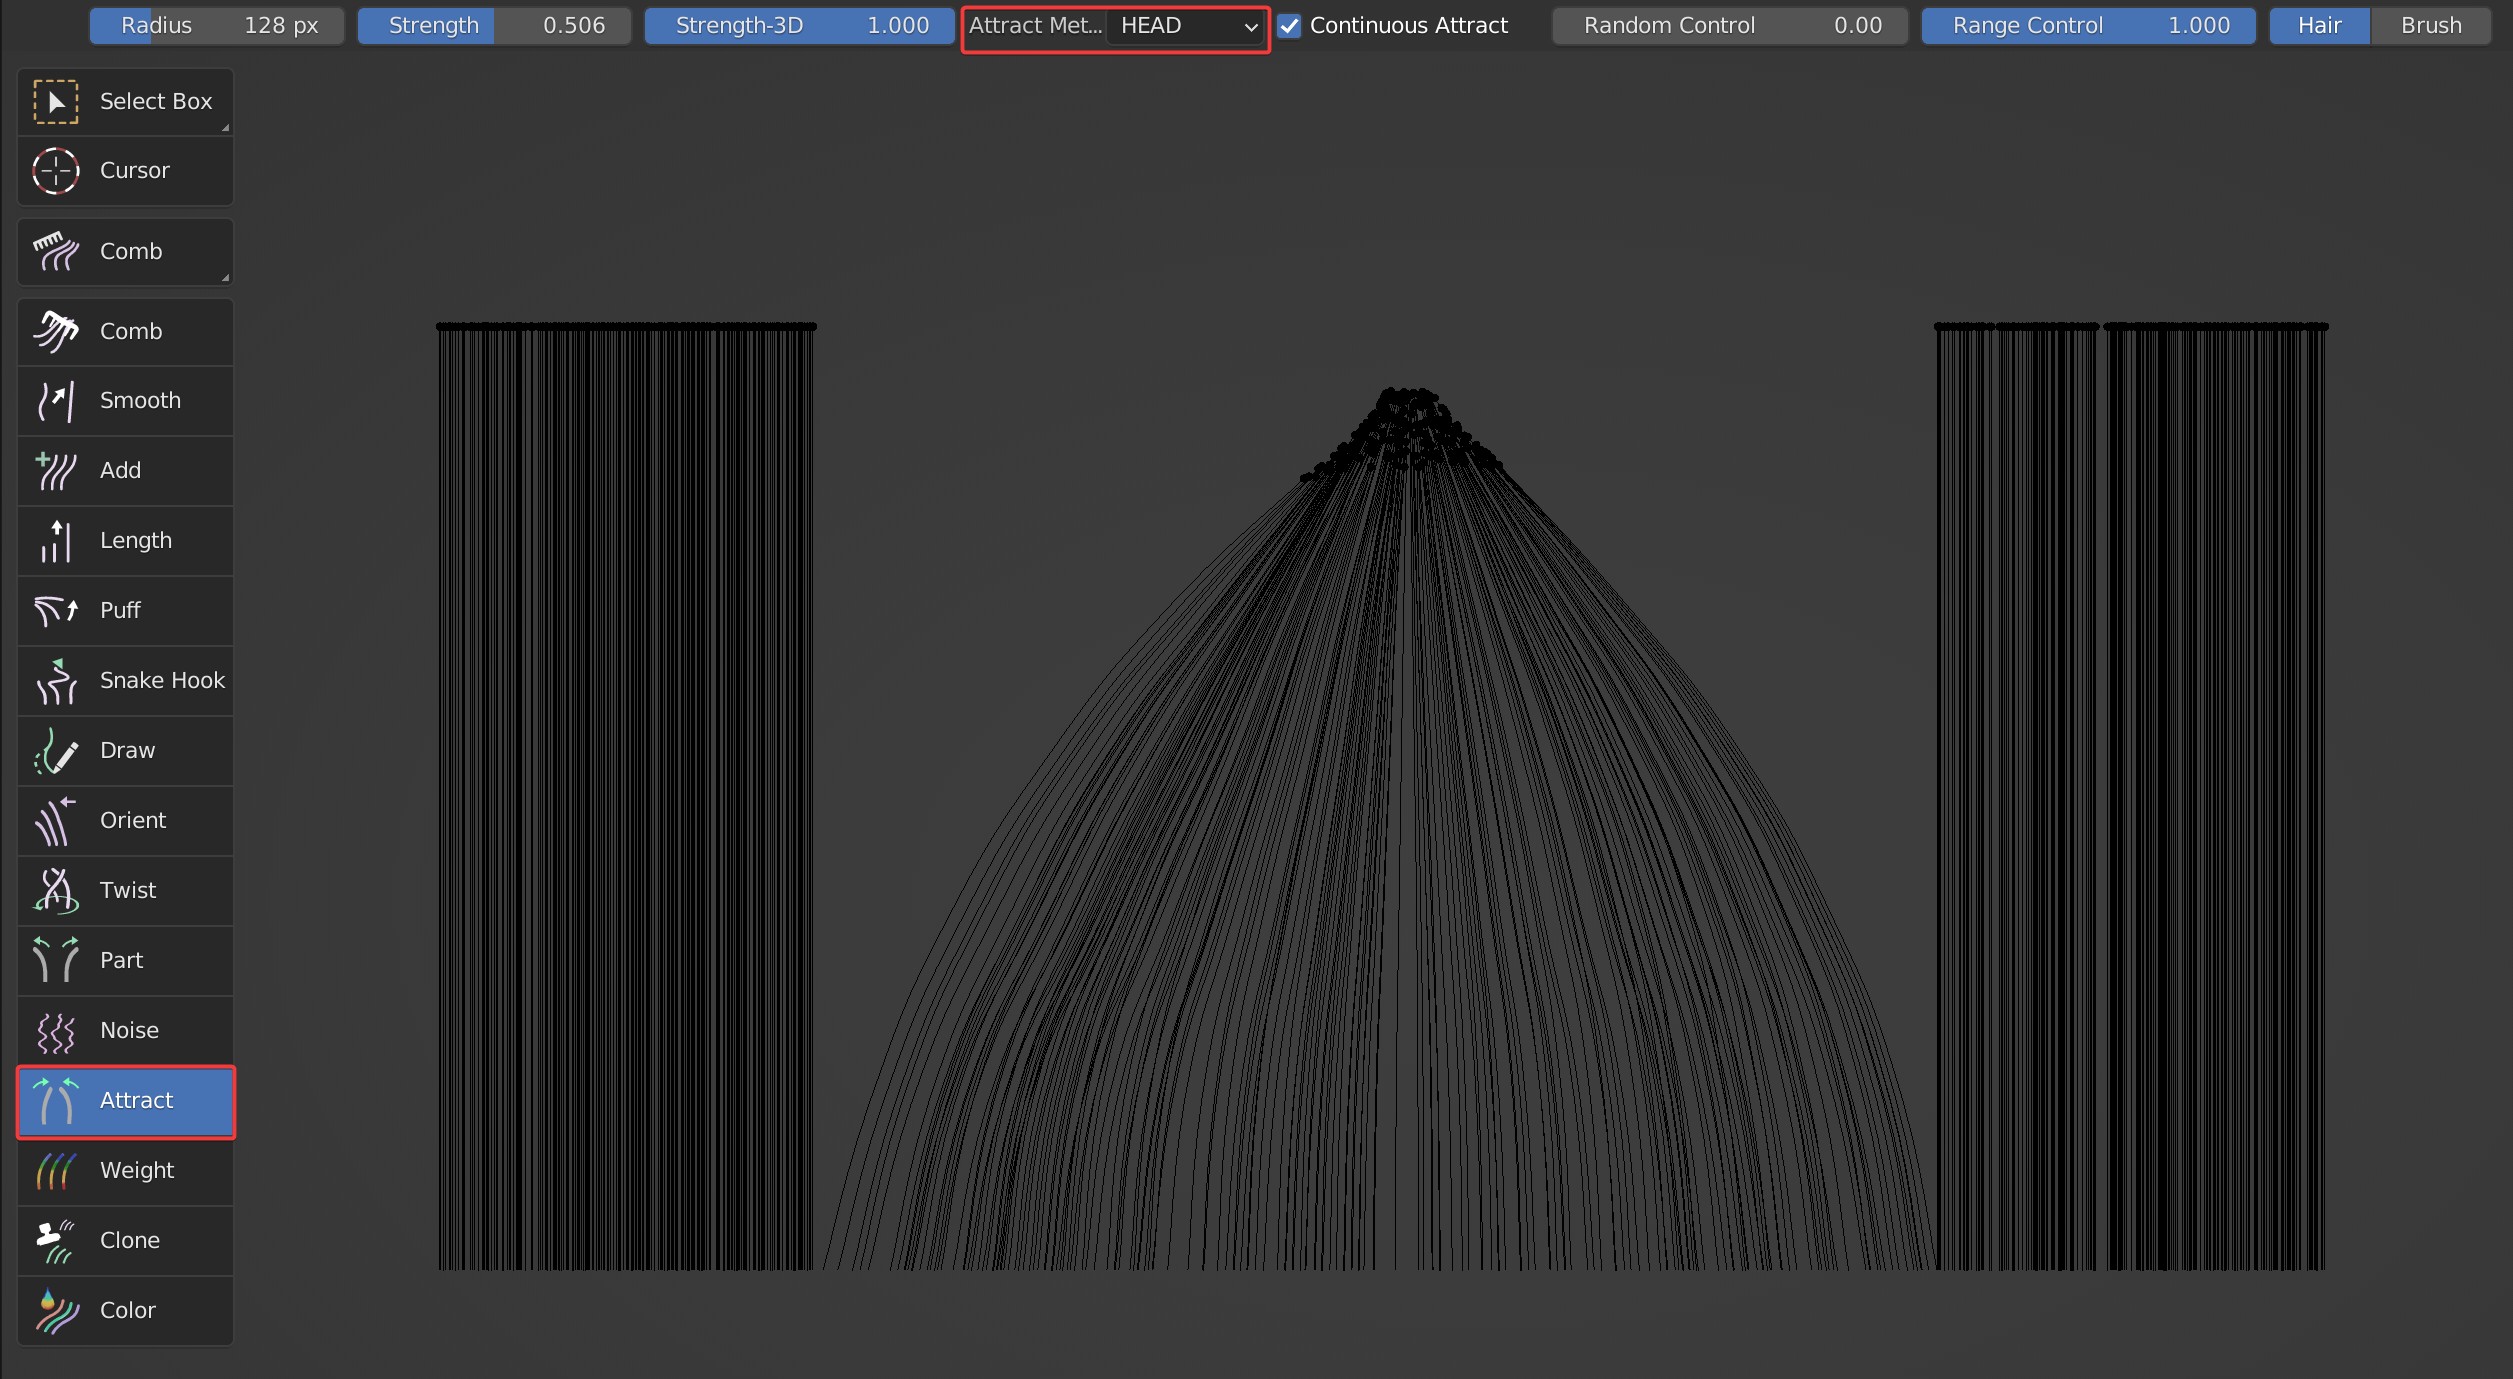
Two attract ways are available: 'HEAD' and 'ROOT'. The brush works at the roots of the hair, and falls off towards the tips when ROOT is selected. The brush works at the tips of the hair, and falls off towards the roots when HEAD is selected.
Comparison between 'ROOT' and 'HEAD'
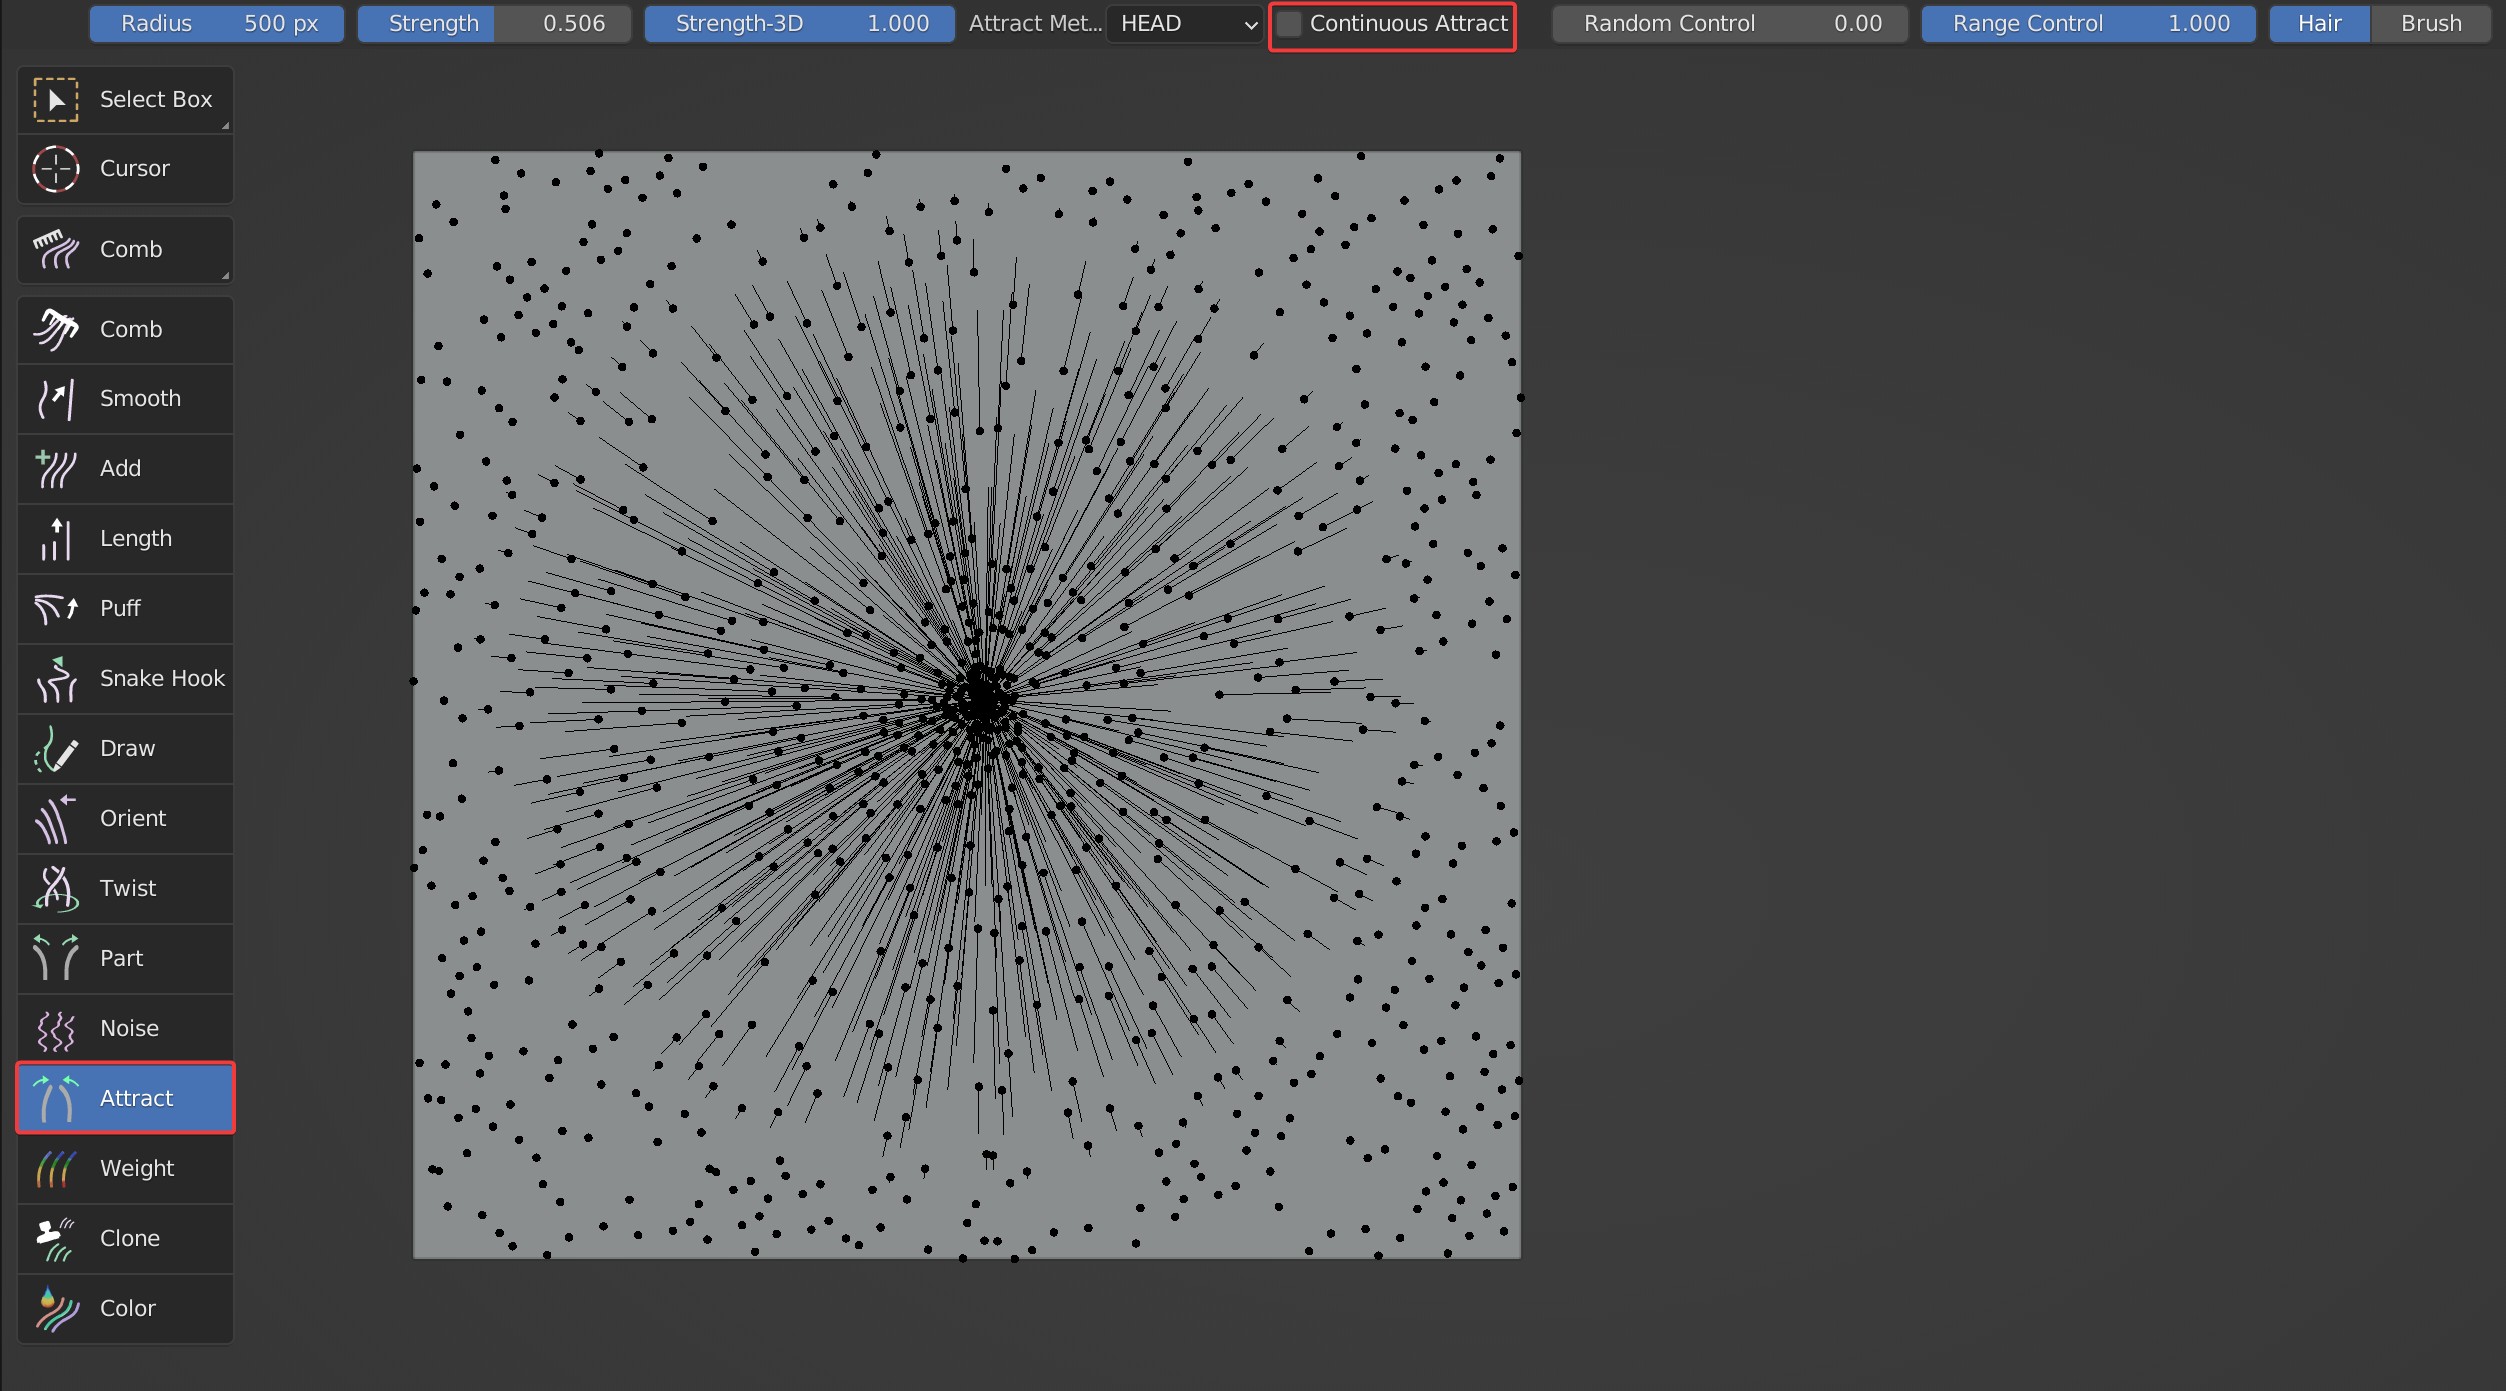
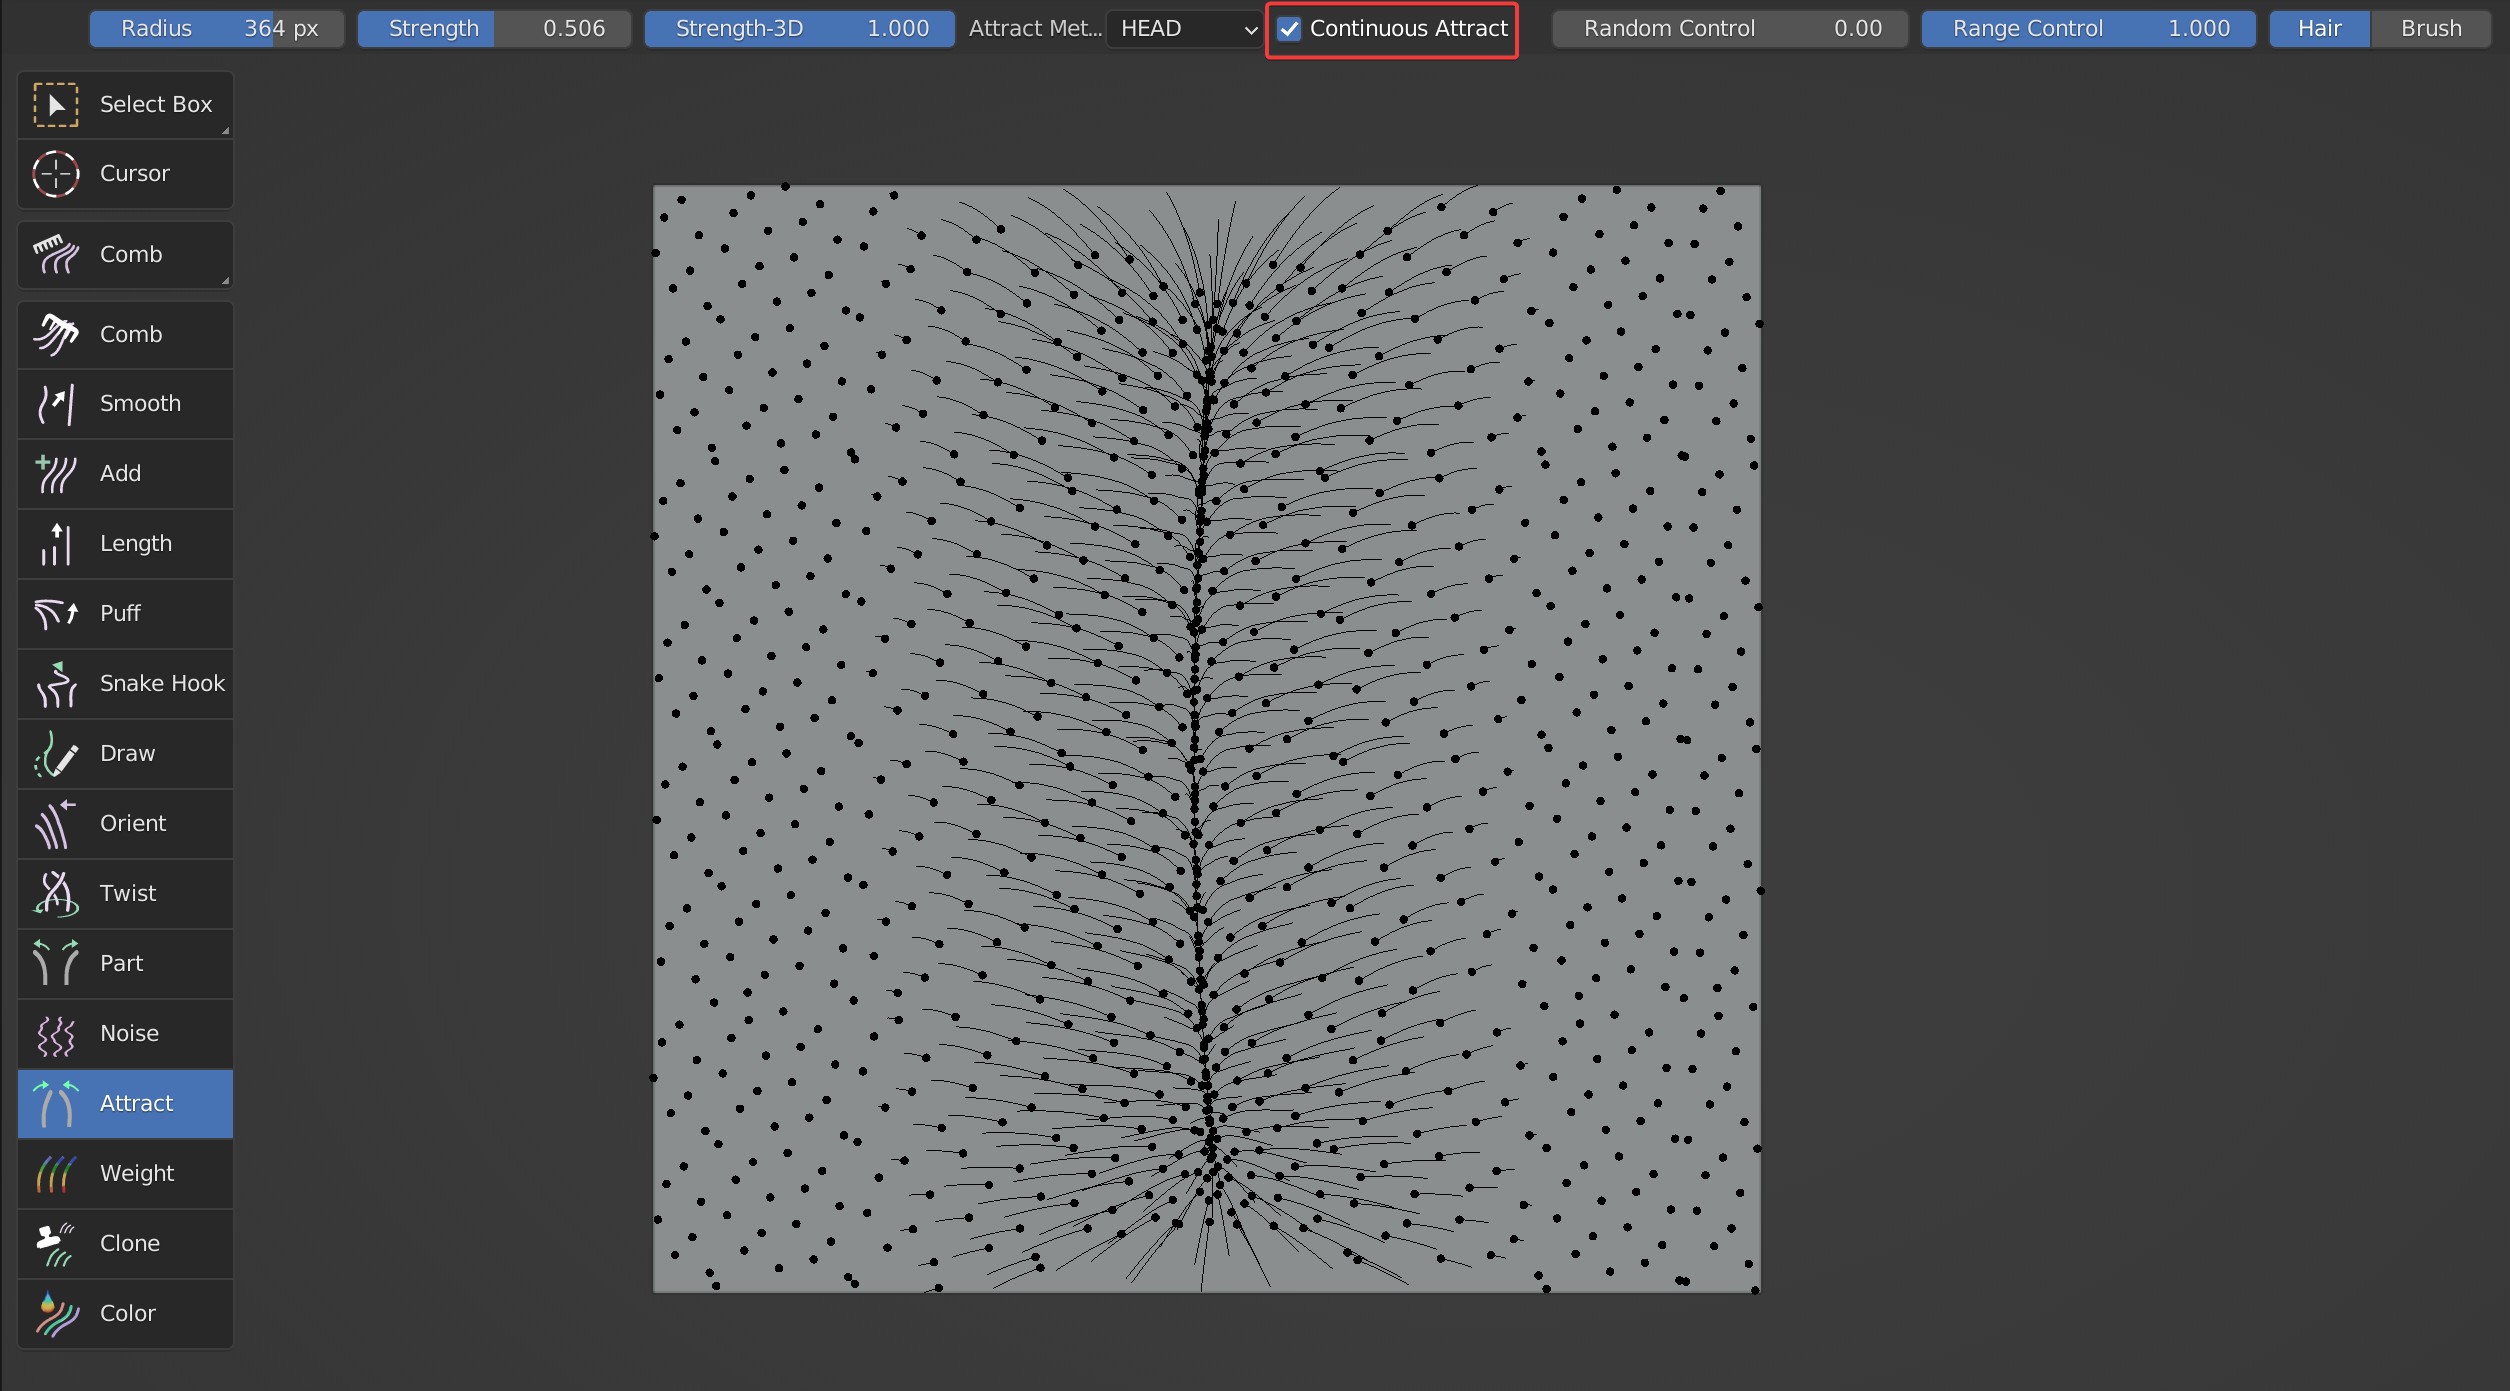
- When Continuous Attract is checked, the attraction method is continuous attraction, and the attraction position will change with the movement of the brush. When Continuous Attract is unchecked, hairs will be attracted to one point.
Comparison with Continuous Attract on and off
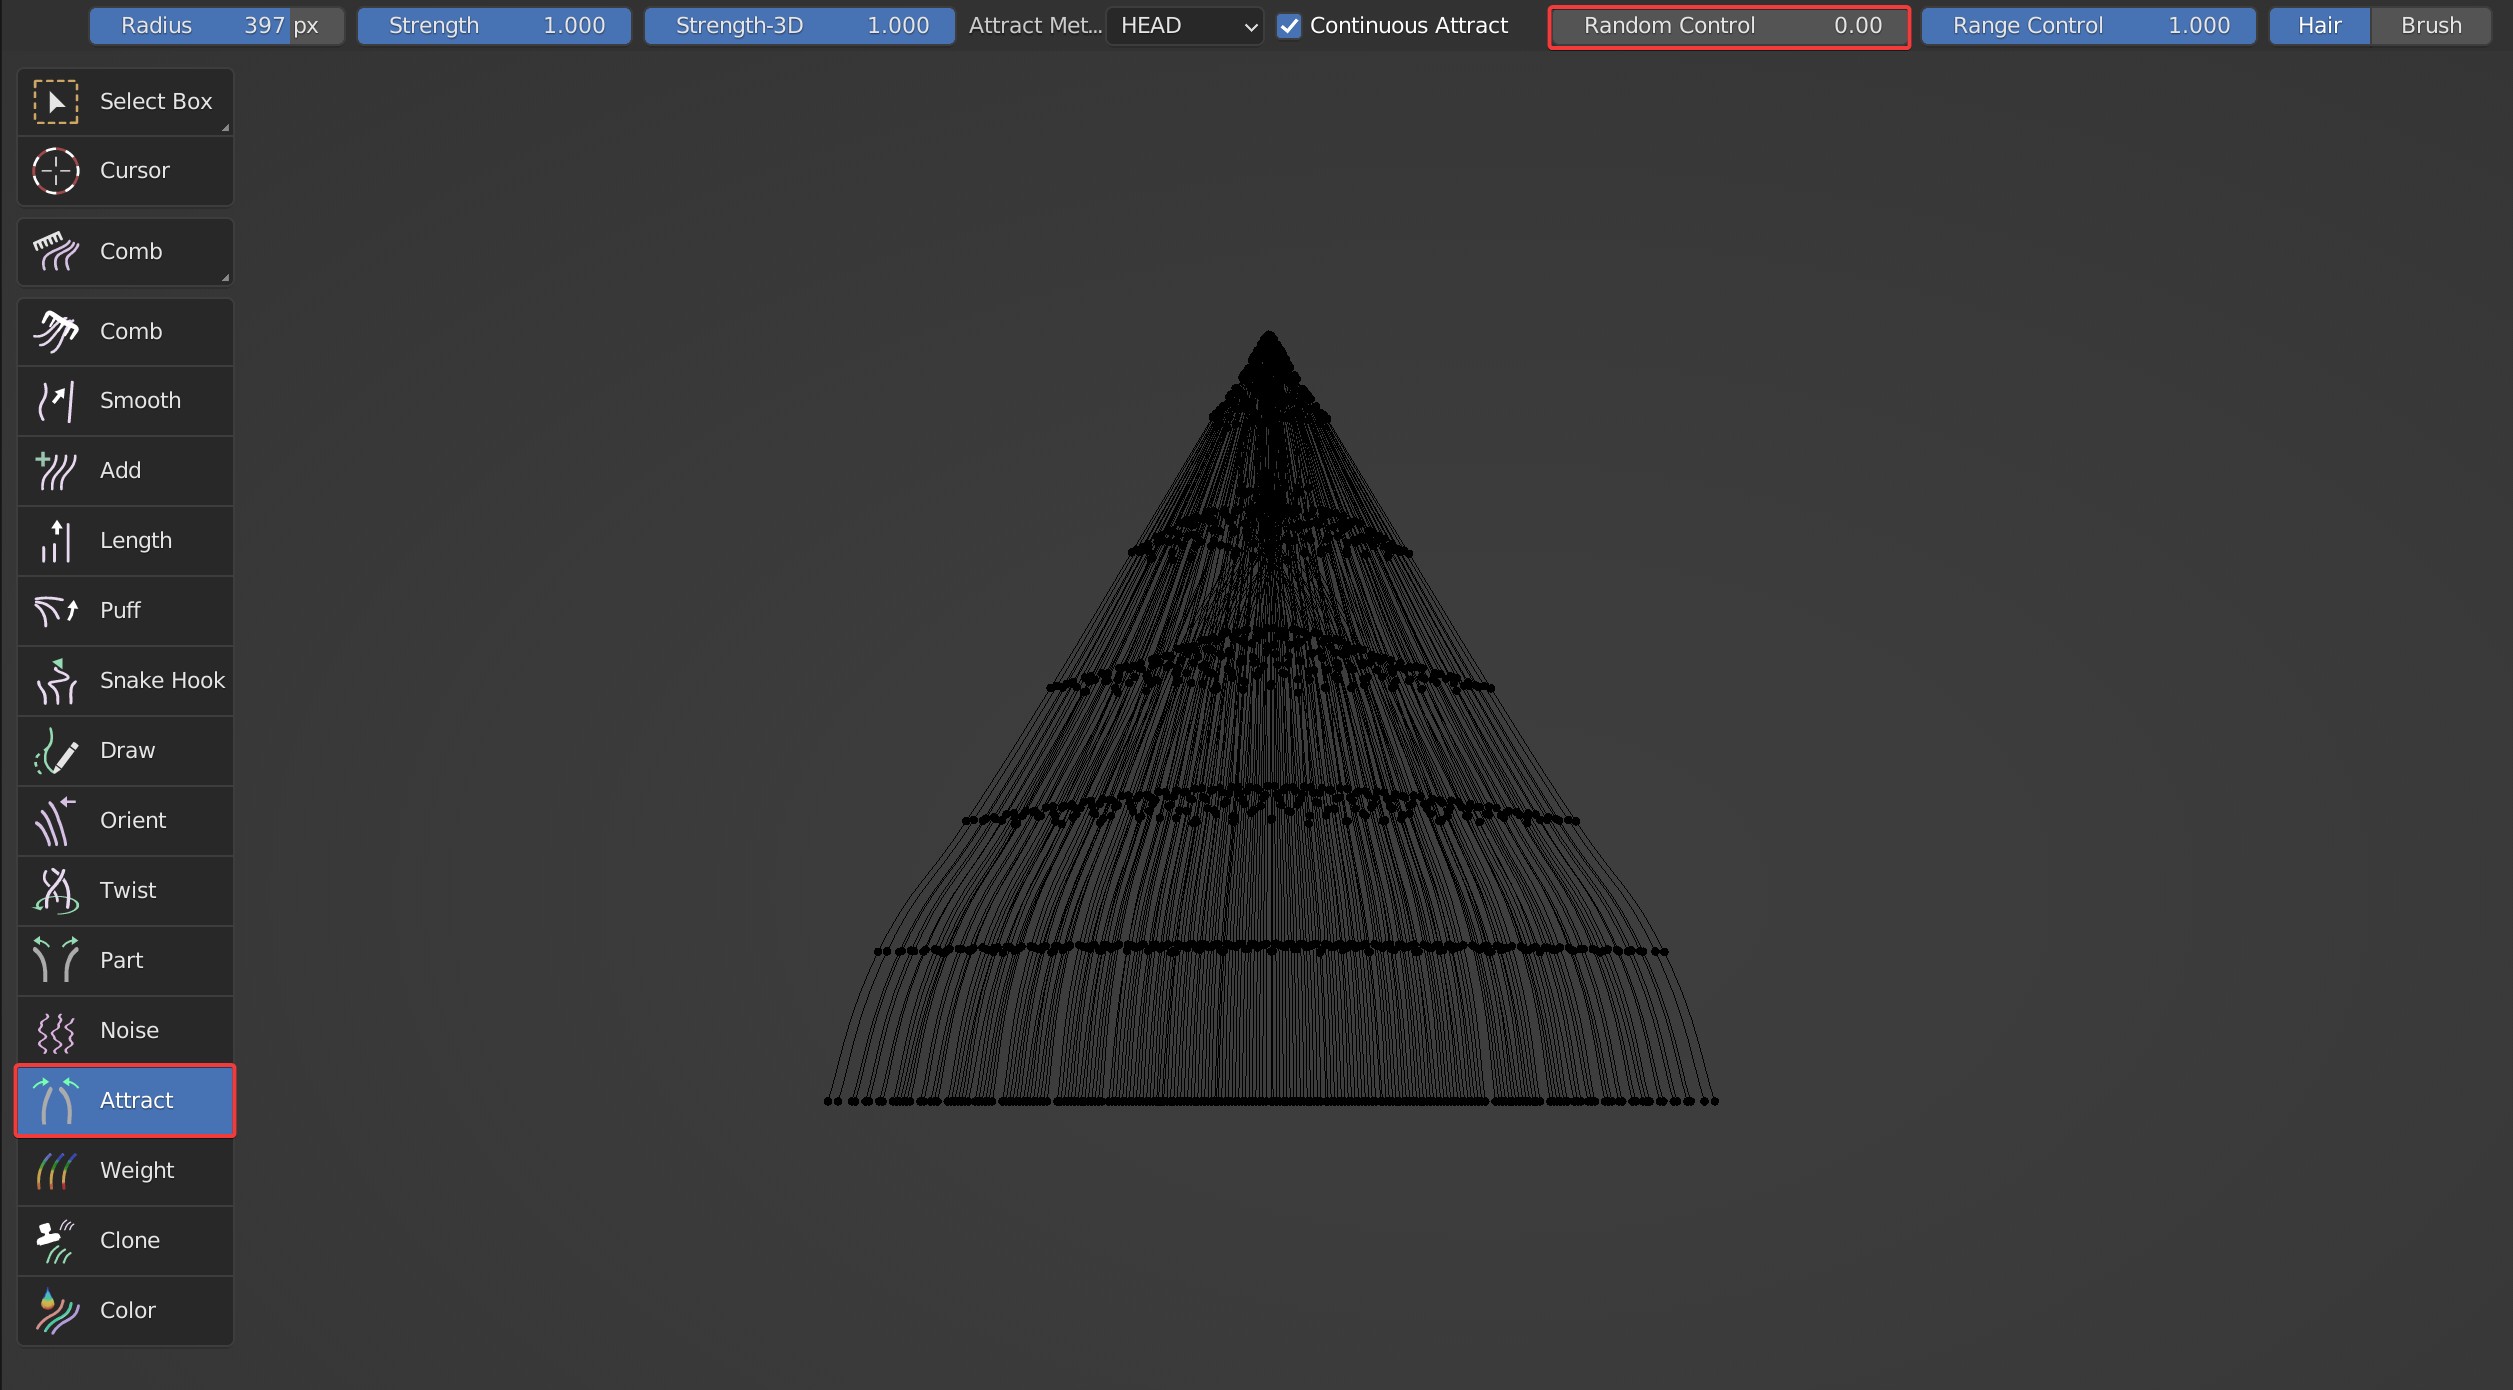
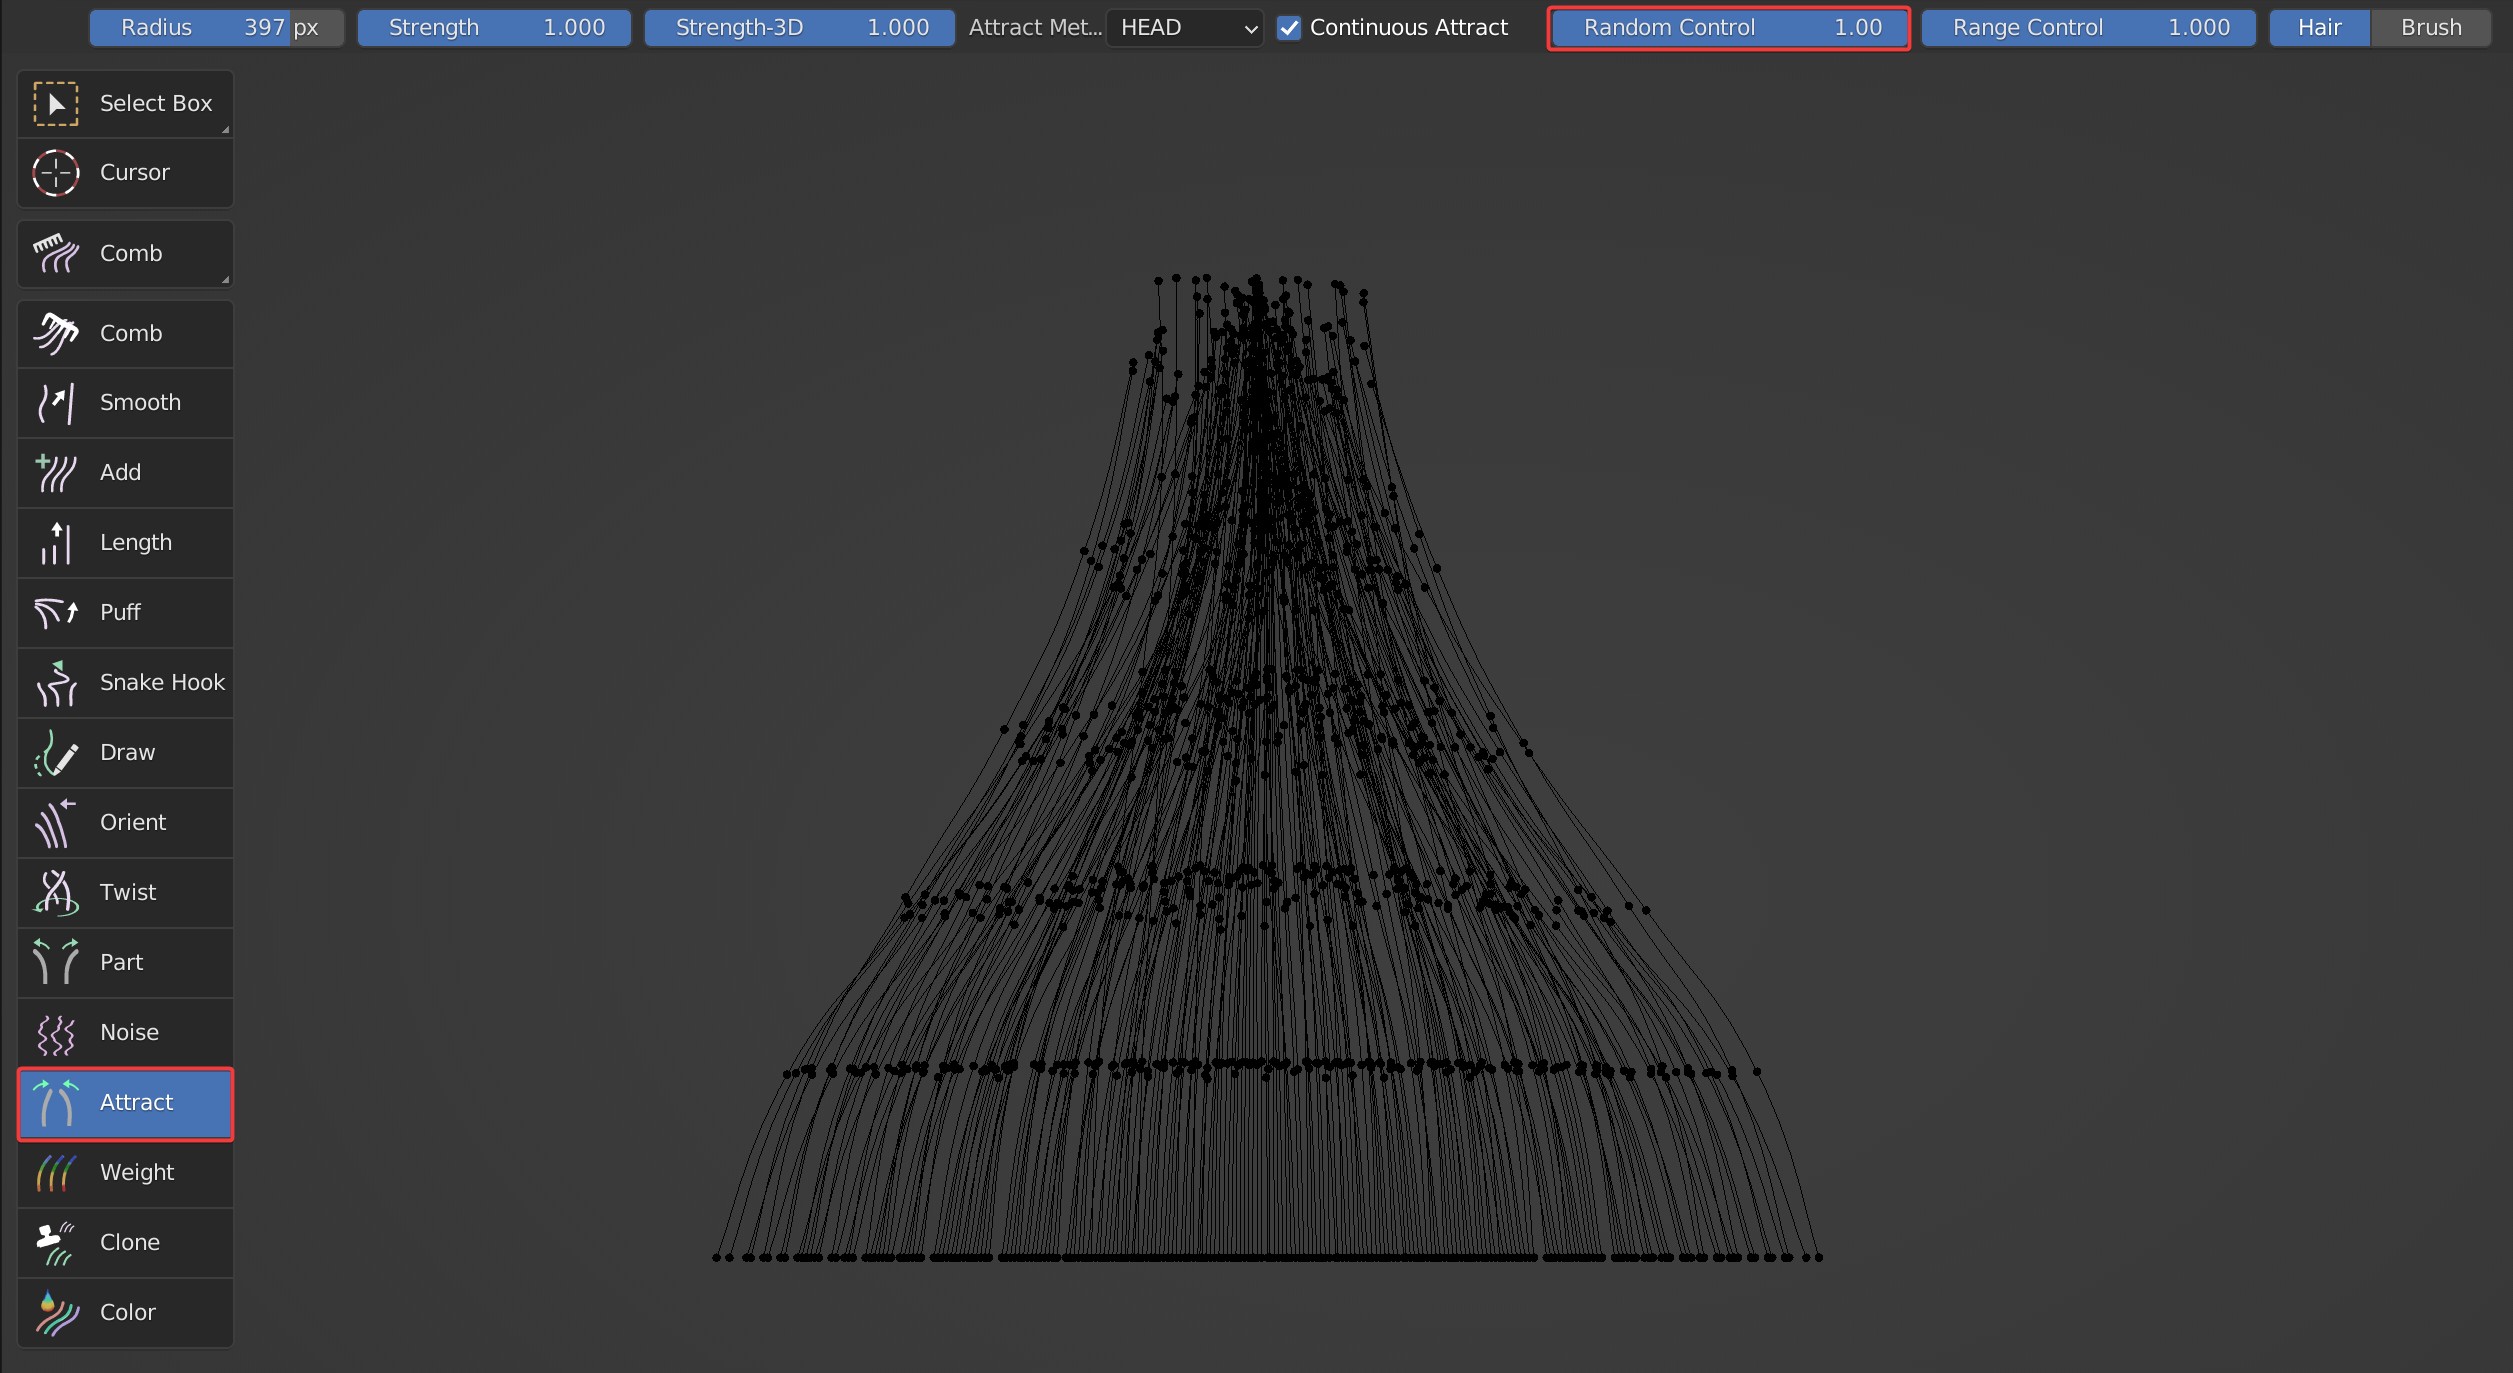
- Random Control can make the attracting position Jitter somewhat.
Comparison between the effects when Random Control is 0 and 1
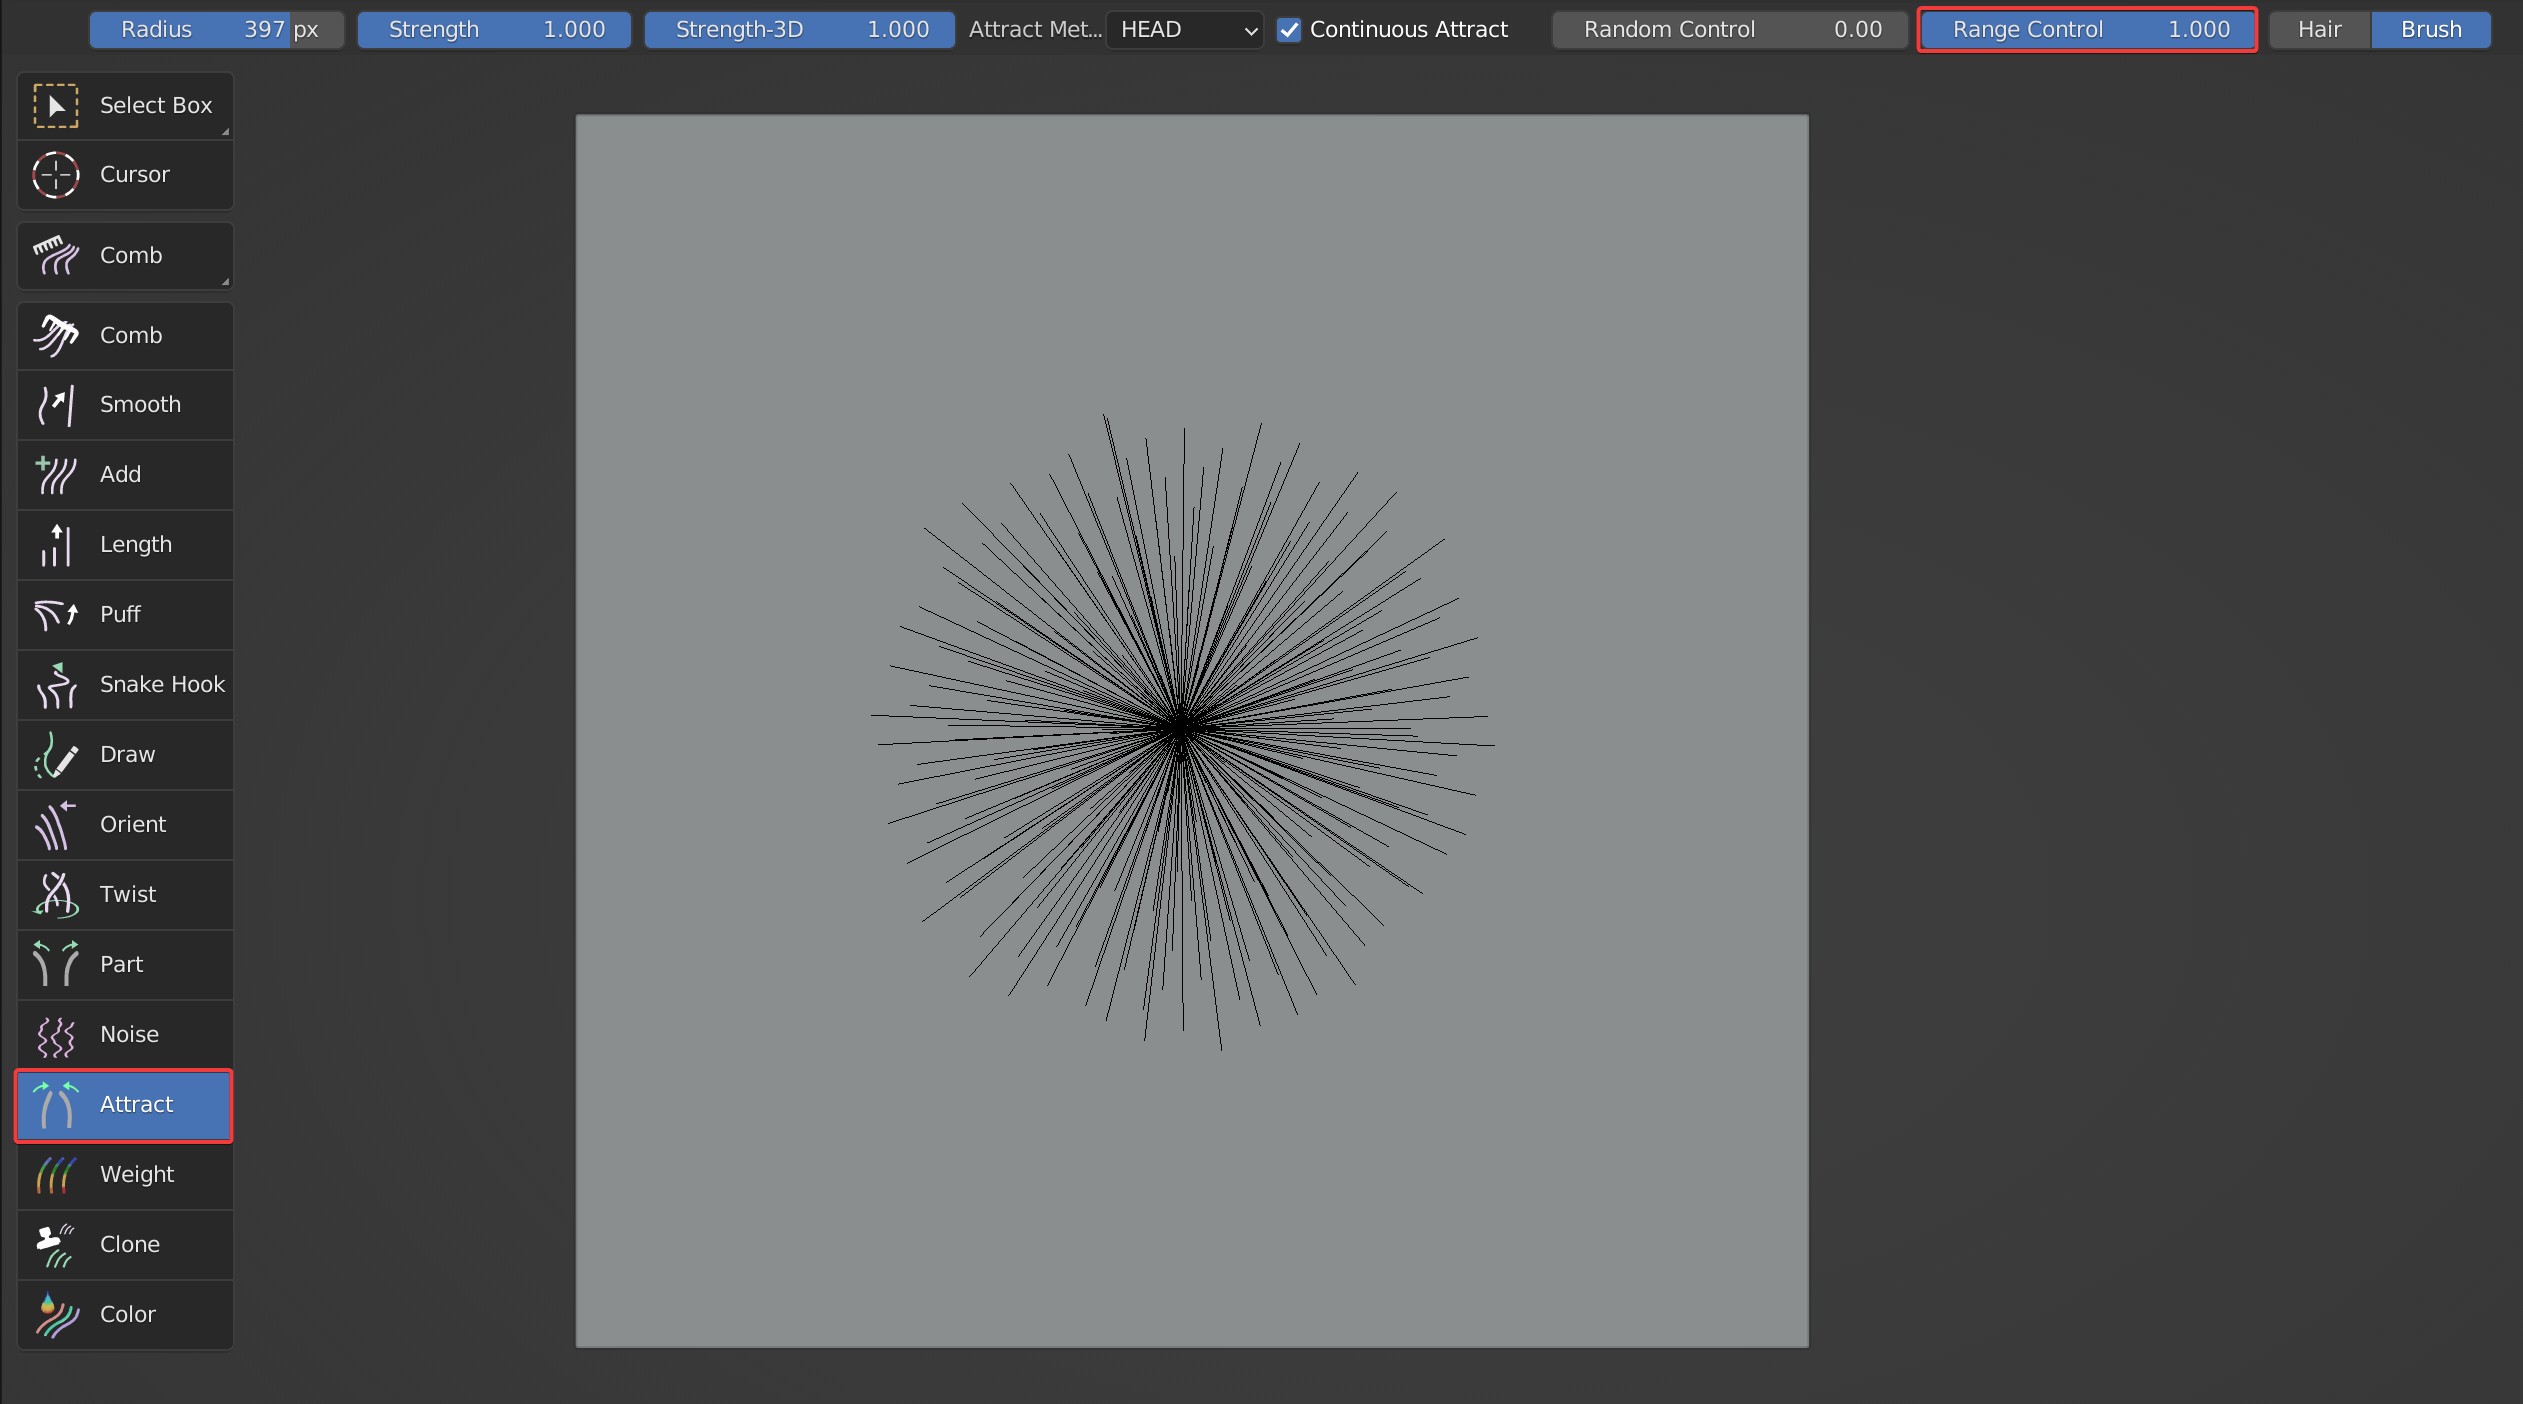
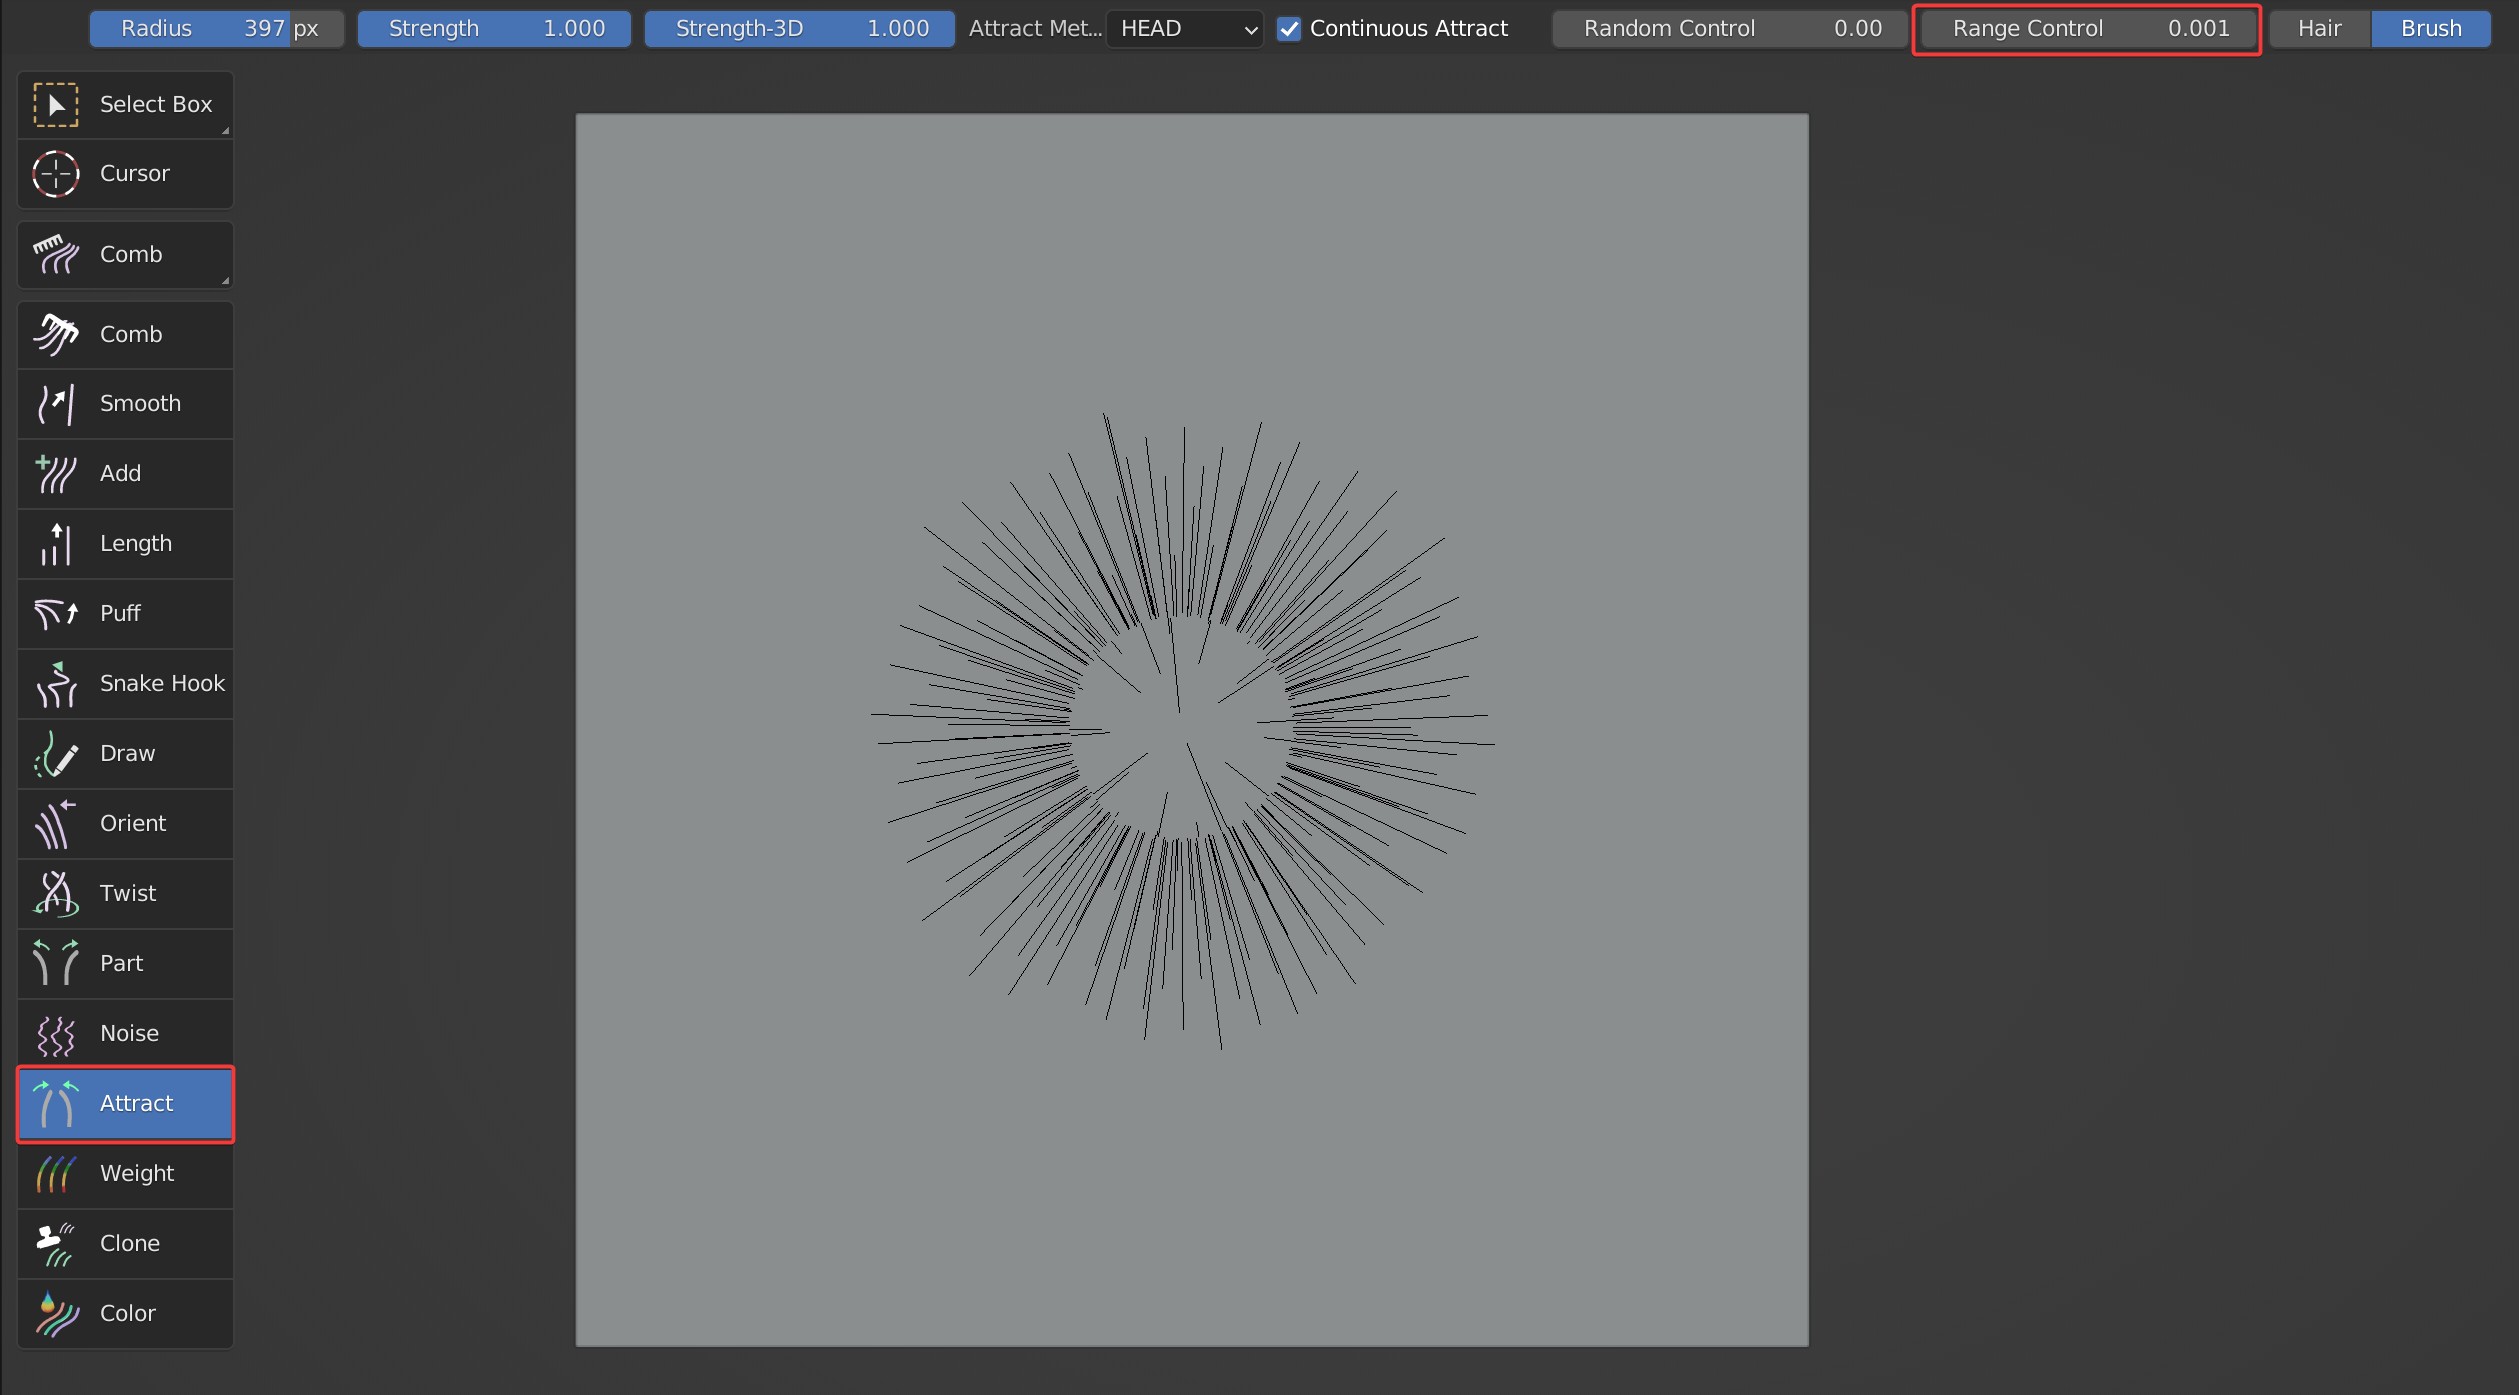
- Range Control controls the scope of attraction area. The larger it is, the smaller the gap in the center.
Comparison between the effects when Range Control is 1 and 0.001
- Two attracting positions are available:'Hair' and 'Brush'; 'Hair' means to attract hairs toward the one that is closest to the center of the brush; Brush means to attract hairs toward the center of the brush.
Case Demonstration
Clone
Used to clone guides.
Brush Options

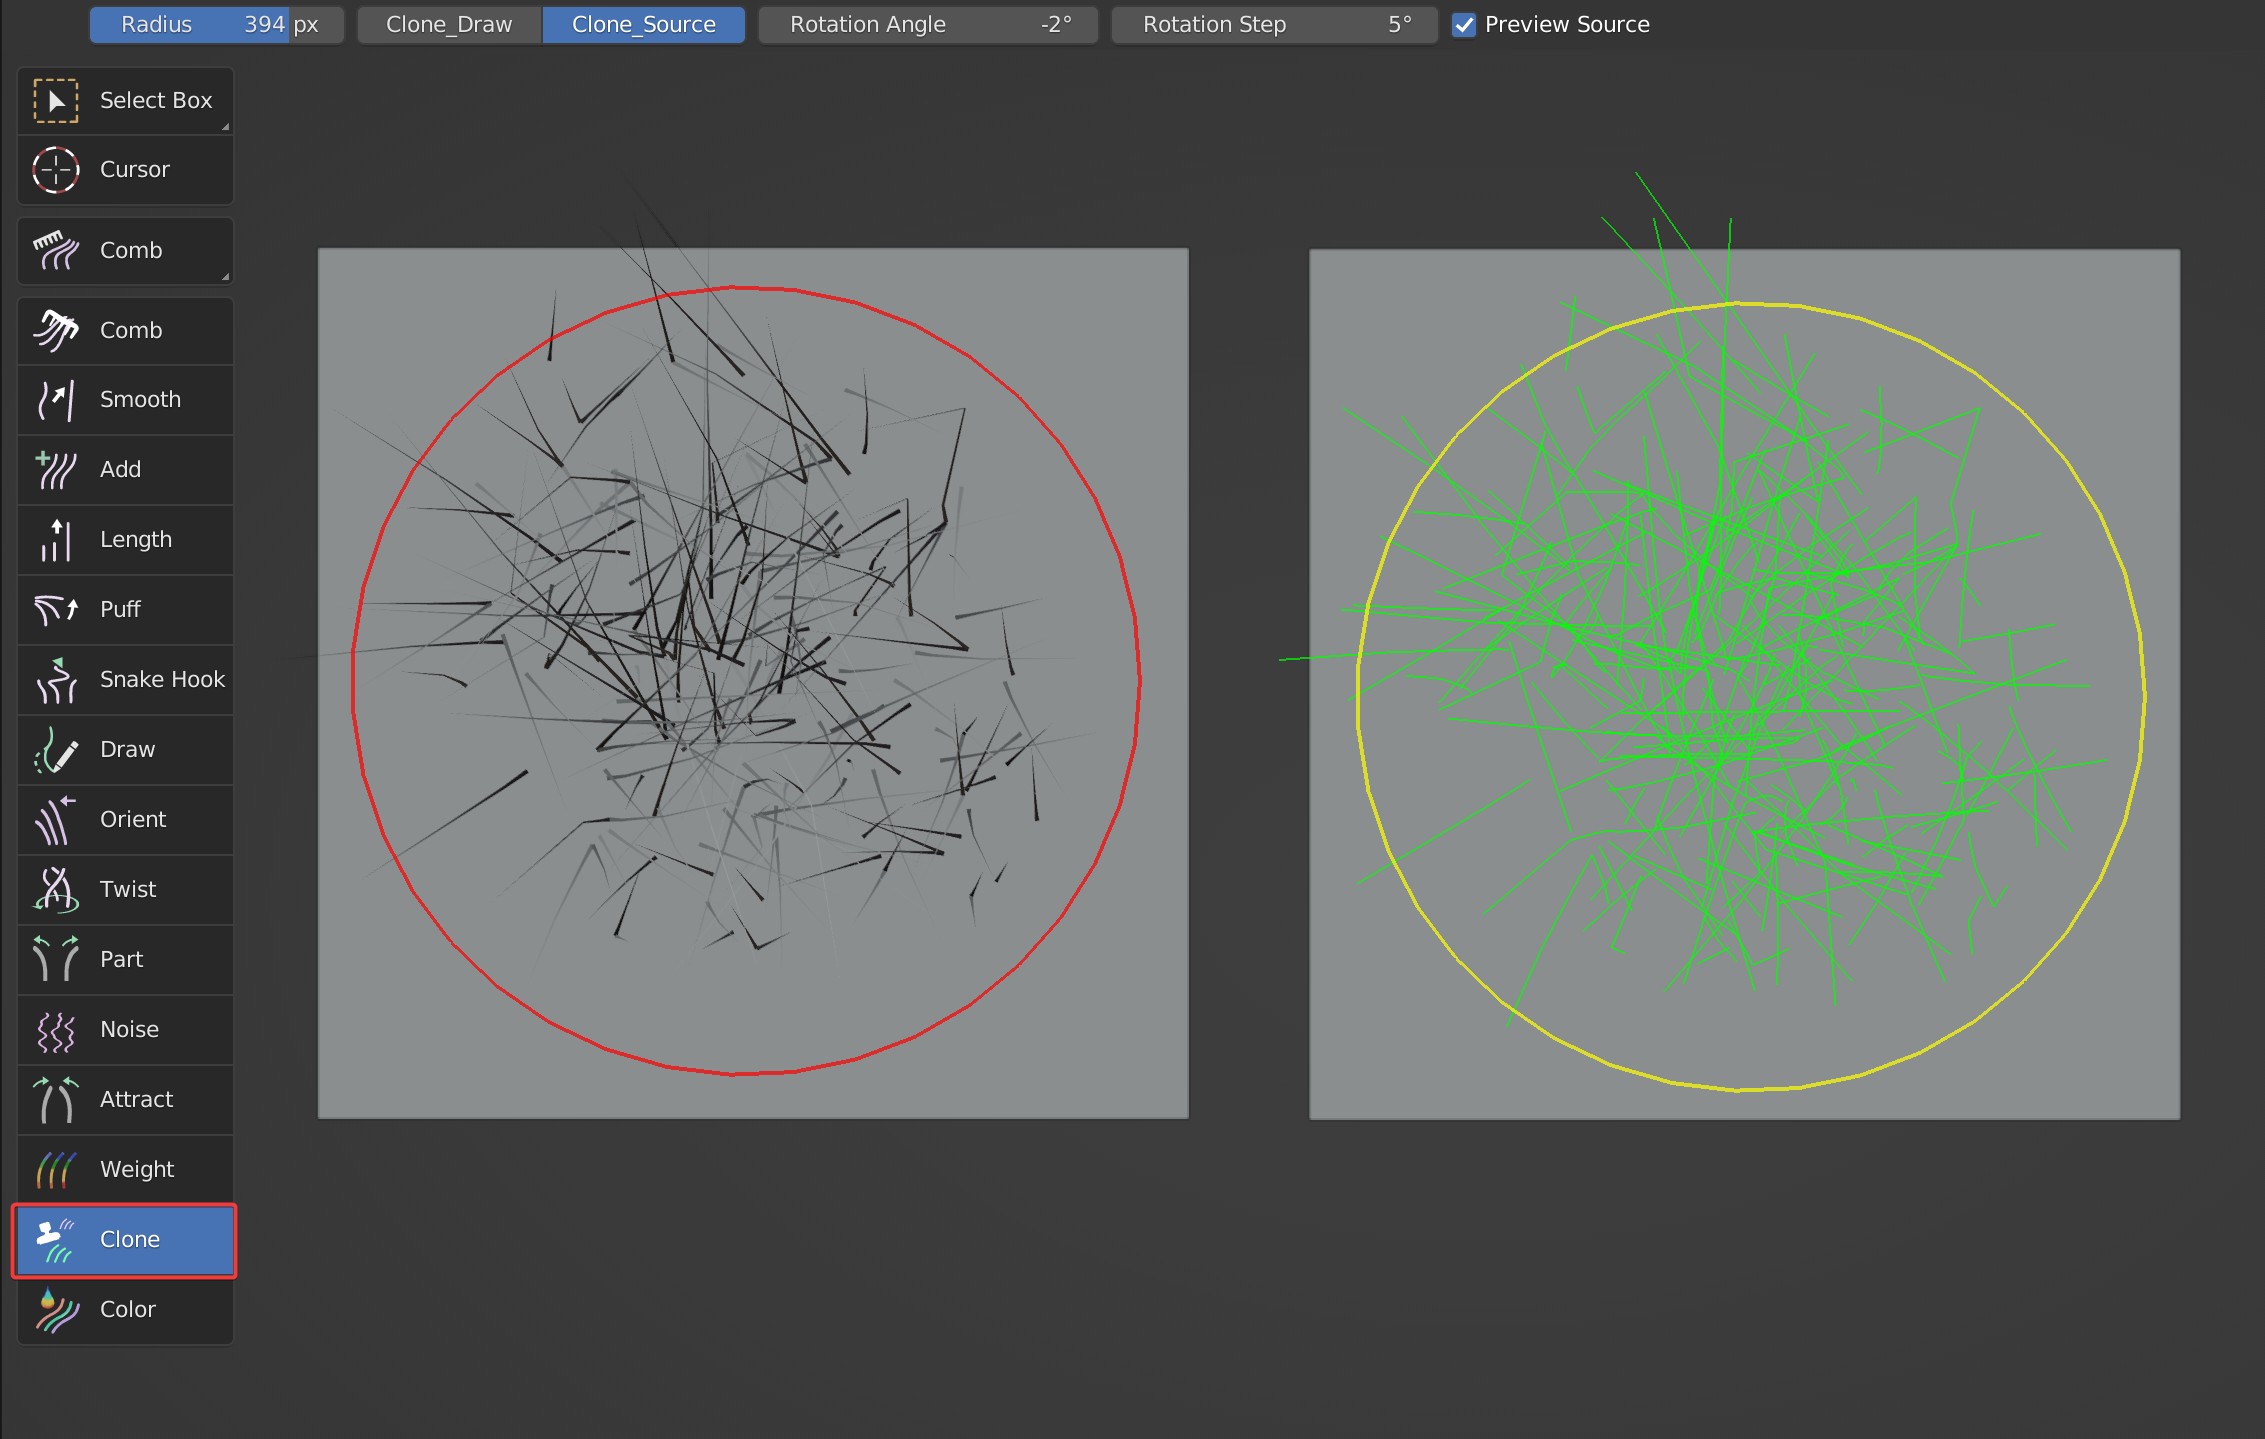
Clone_Source: Sample clone source on the object; Hold Shift and hit the wanted area to sample clone source.
Clone_Draw: Draw/Clone the hair of clone source on surface.
Preview Source: Visually display the cloned guides and the location to be cloned.
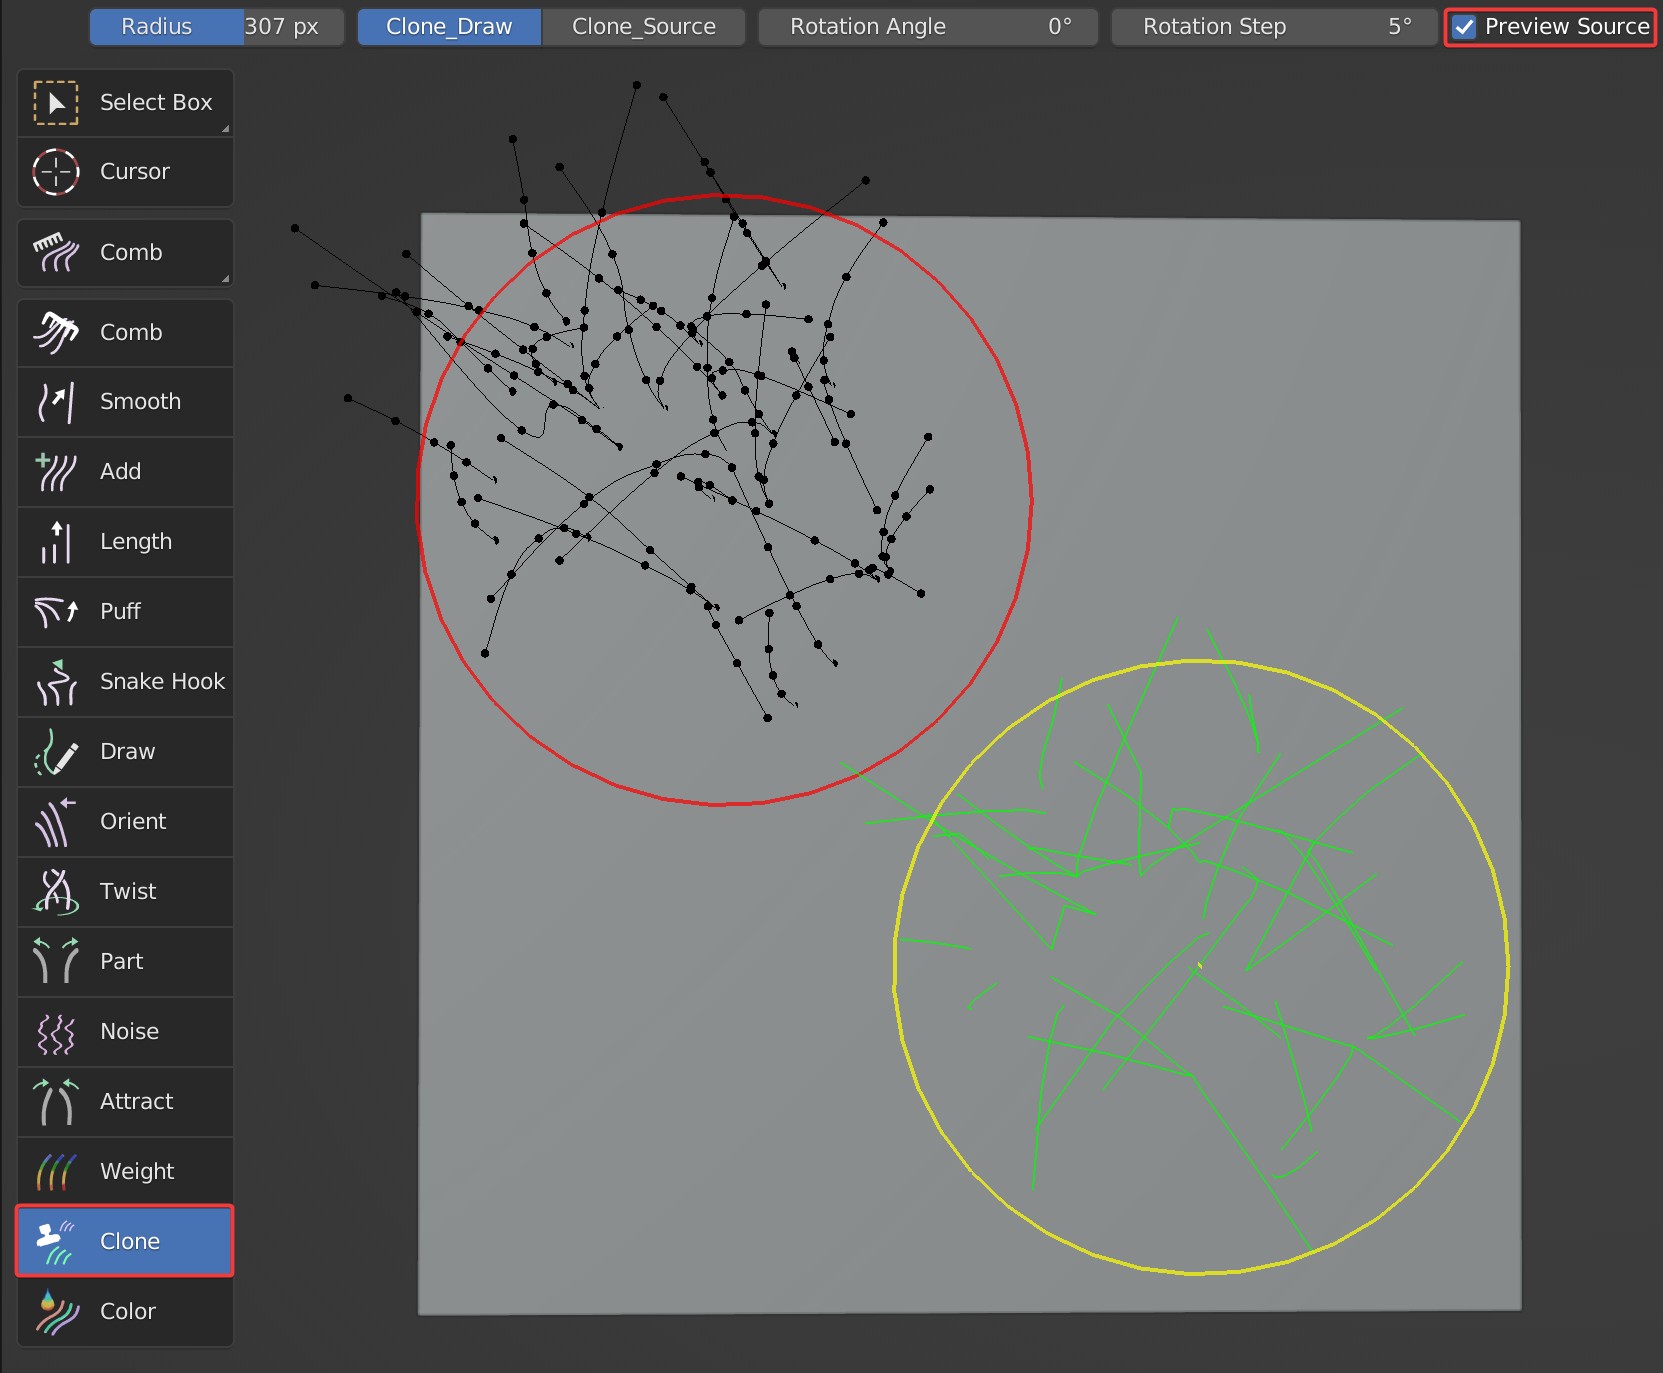
- Rotation Angle: Rotate the clone source according to its value; Press Ctrl and scroll mouse wheel to change it quickly.

Usage Tips
- Hold Shift to sample clone source on the object; And release Shift to clone hair.
- It's available to pick clone source from other particle systems and objects.
Notes
To clear clone source, you can sample an area without guides.
Please make sure Transform and Delta Transform are set to the initial value to avoid some errors.
Case Demonstration
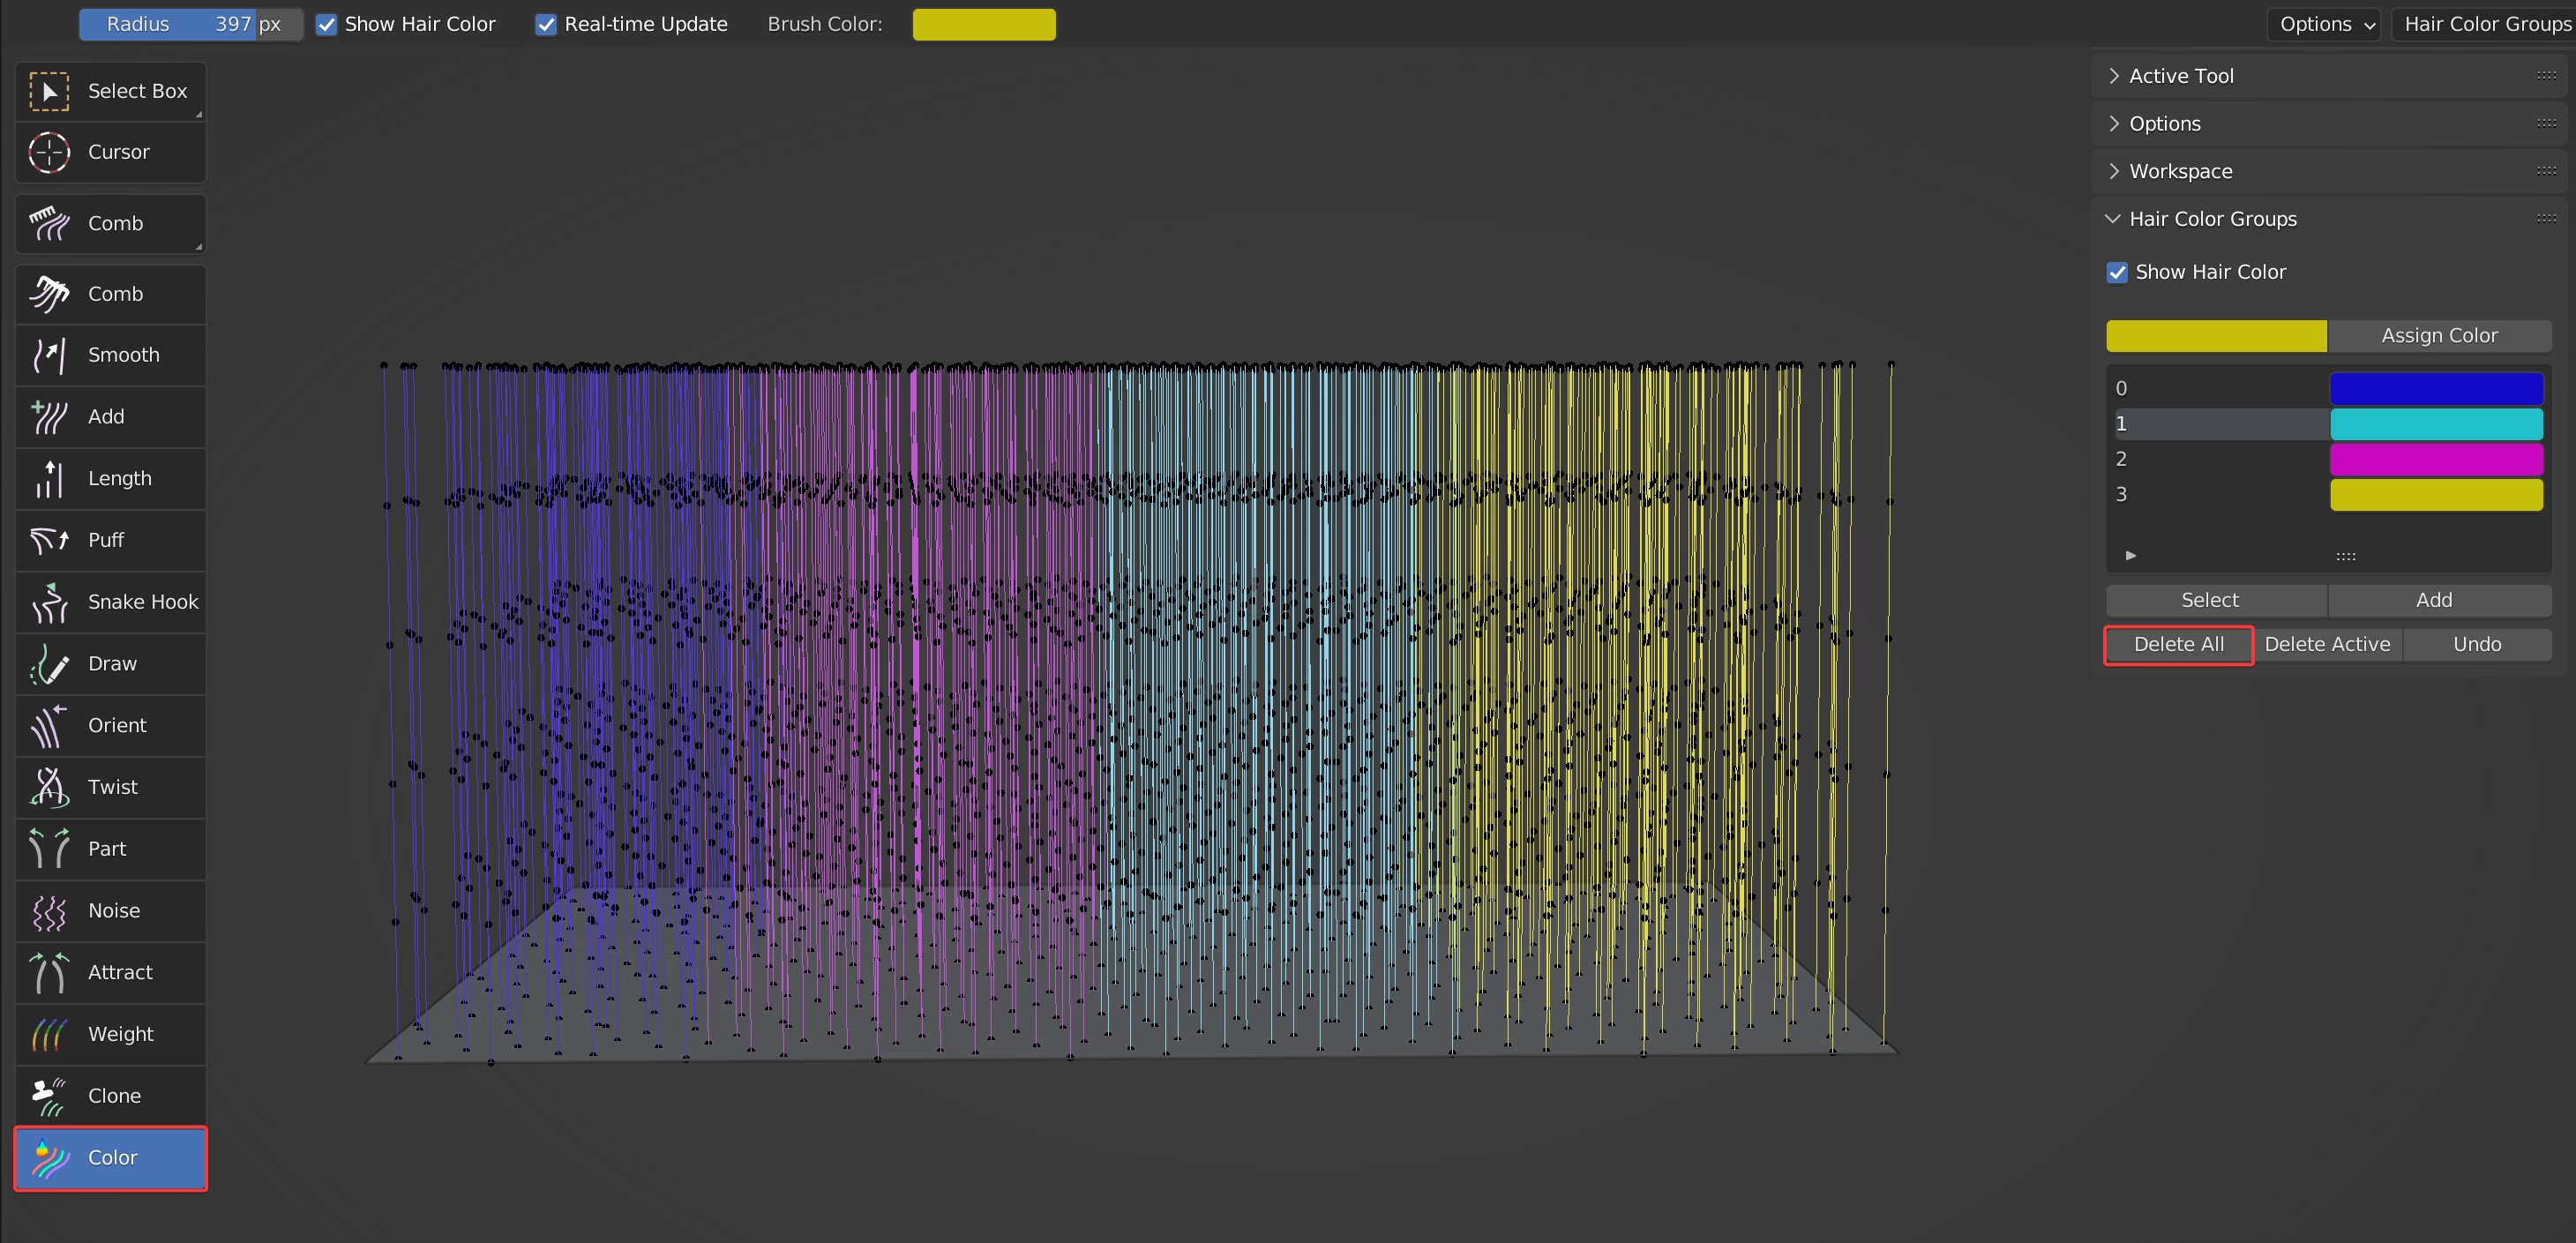
Color
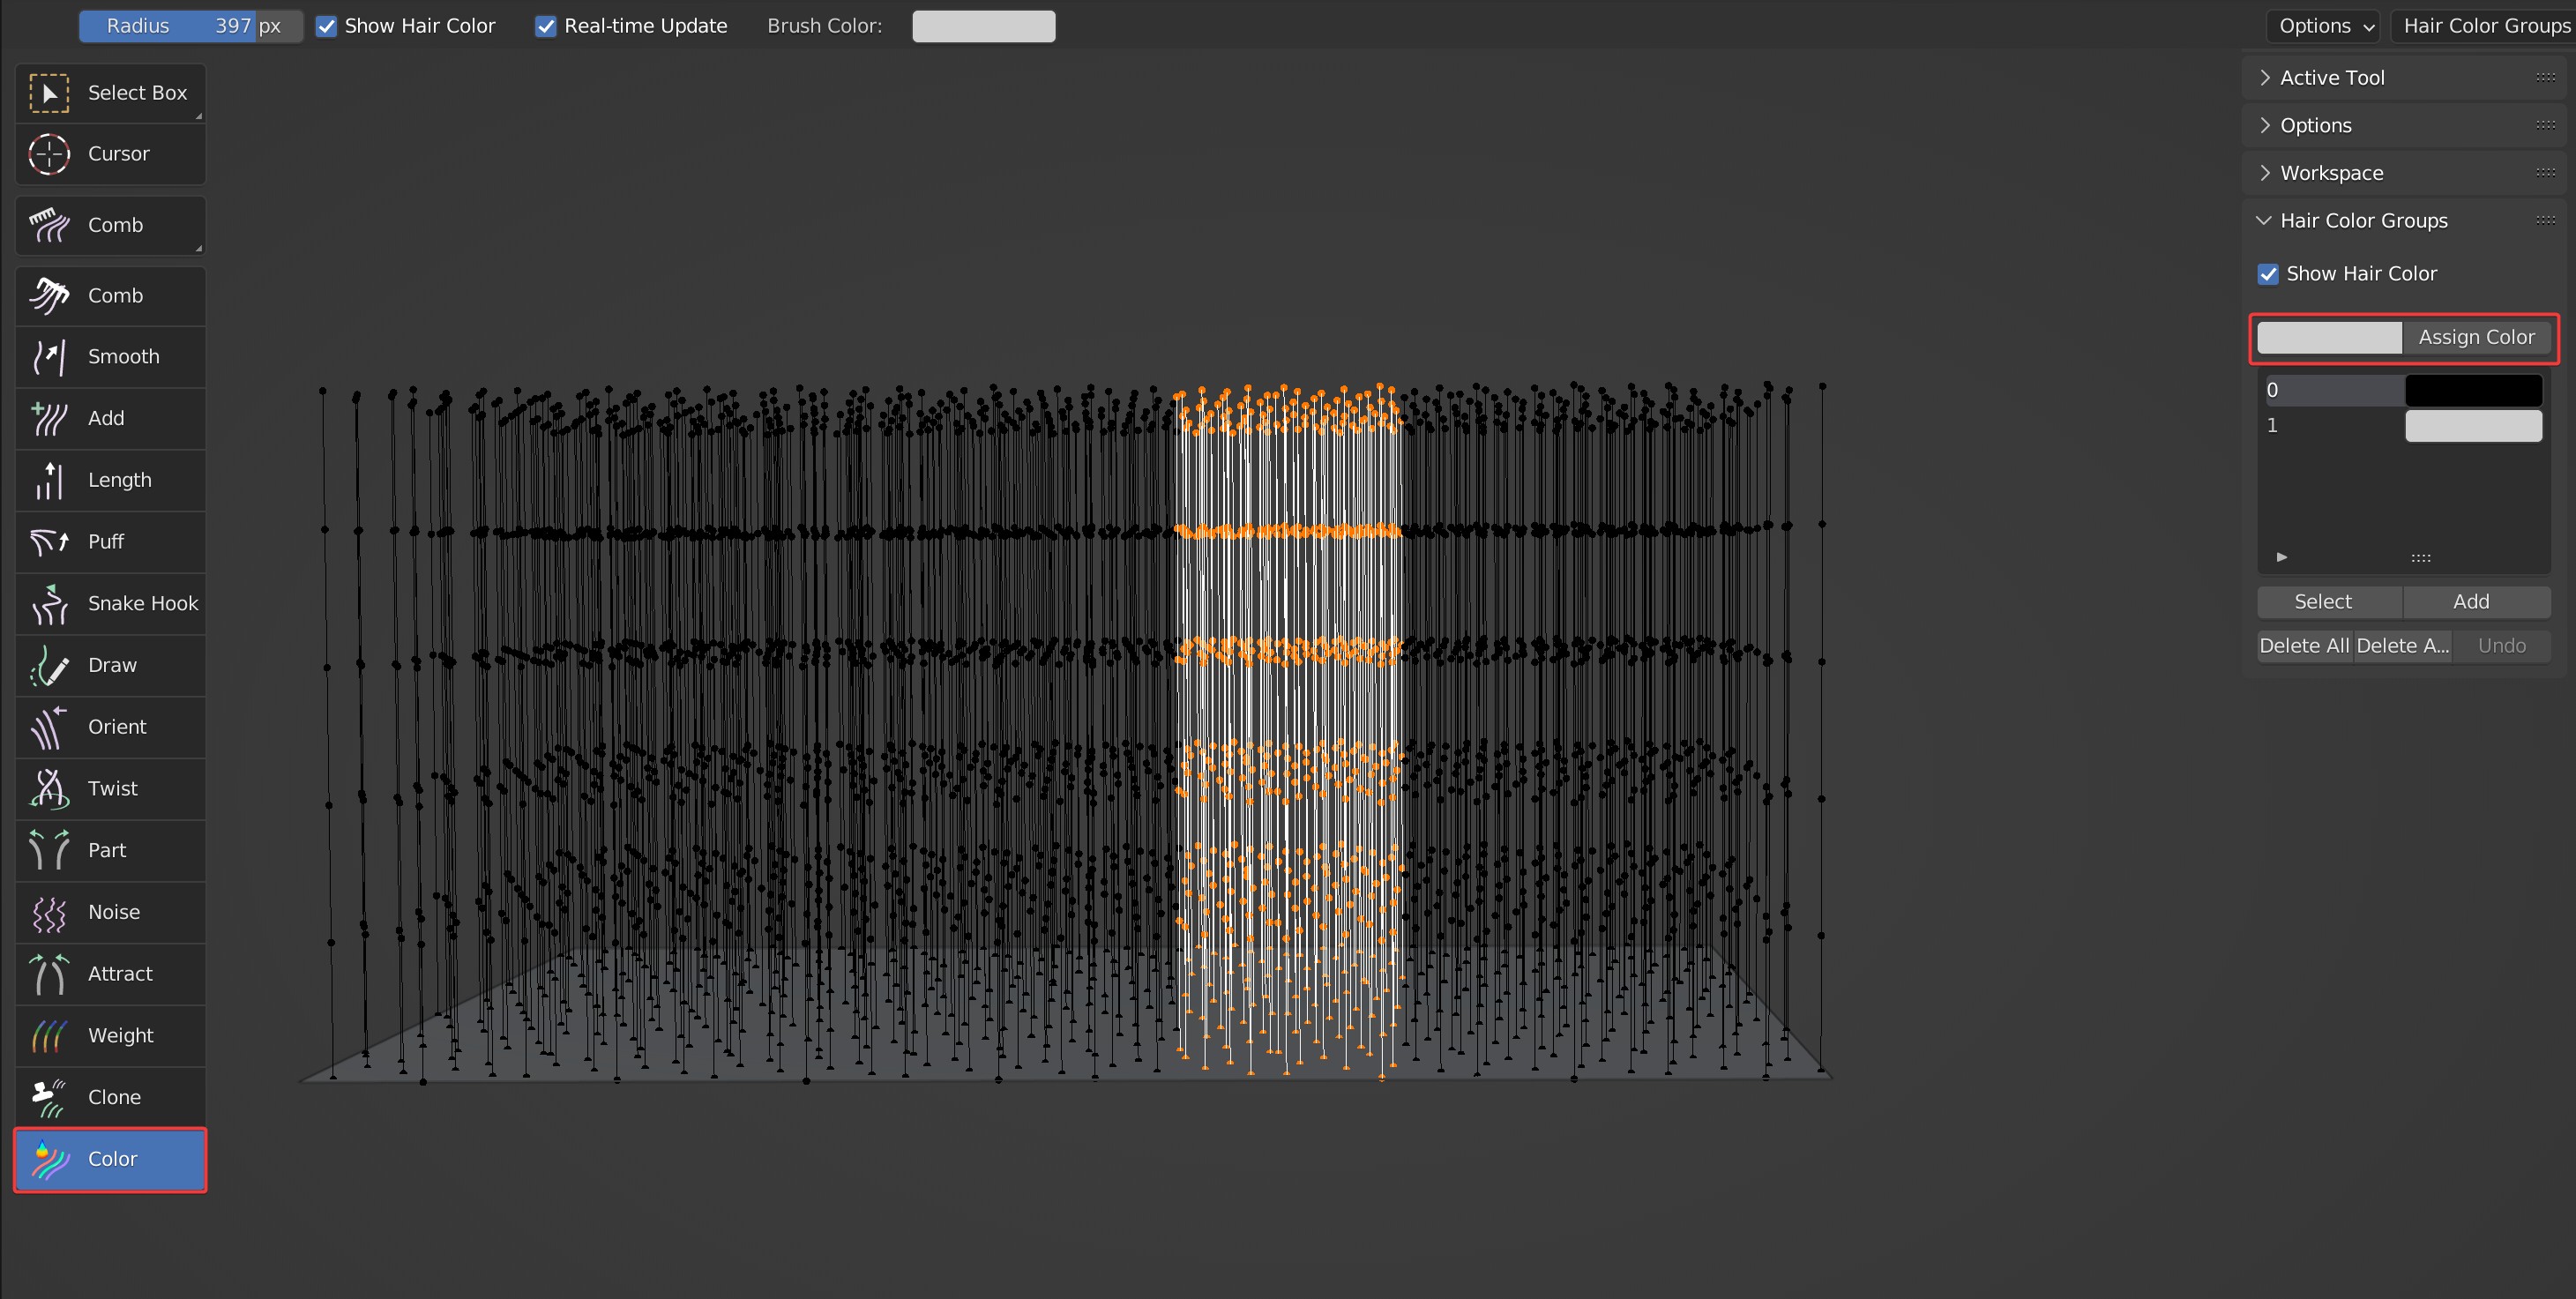
Color brush is used to paint different colors for the guides to achieve the effect of selections, which is used to quickly select hairs.
Brush Options

Show Hair Color: When checked, the color can be displayed.
Tip 1
If you use Renderer in Blender, the painted colors can only be displayed in particle edit mode. CyclesHair renderer is provided to display the color in the object mode and Material Preview mode. The drawn color will be displayed if it exists, or hairs display material color.
Tip 2
When the hair color is not displayed properly, please turn off Show Hair Color and then turn it on again to update the result.
Real-time Update: When it is checked, the drawing effect can be displayed in real time. If unchecked, the drawing result will not be displayed until the mouse is released.
TIP
Unchecking this function can increase calculation speed when there are too many guides.
Brush Color: Set the color of the hair to be painted.
Panel Options
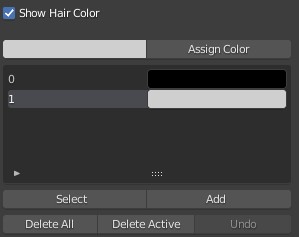
- Assign Color: Assign the current color to the selected hair
- Select: Select the hair in the current color group.
- Add: Add hairs to the existing color groups.
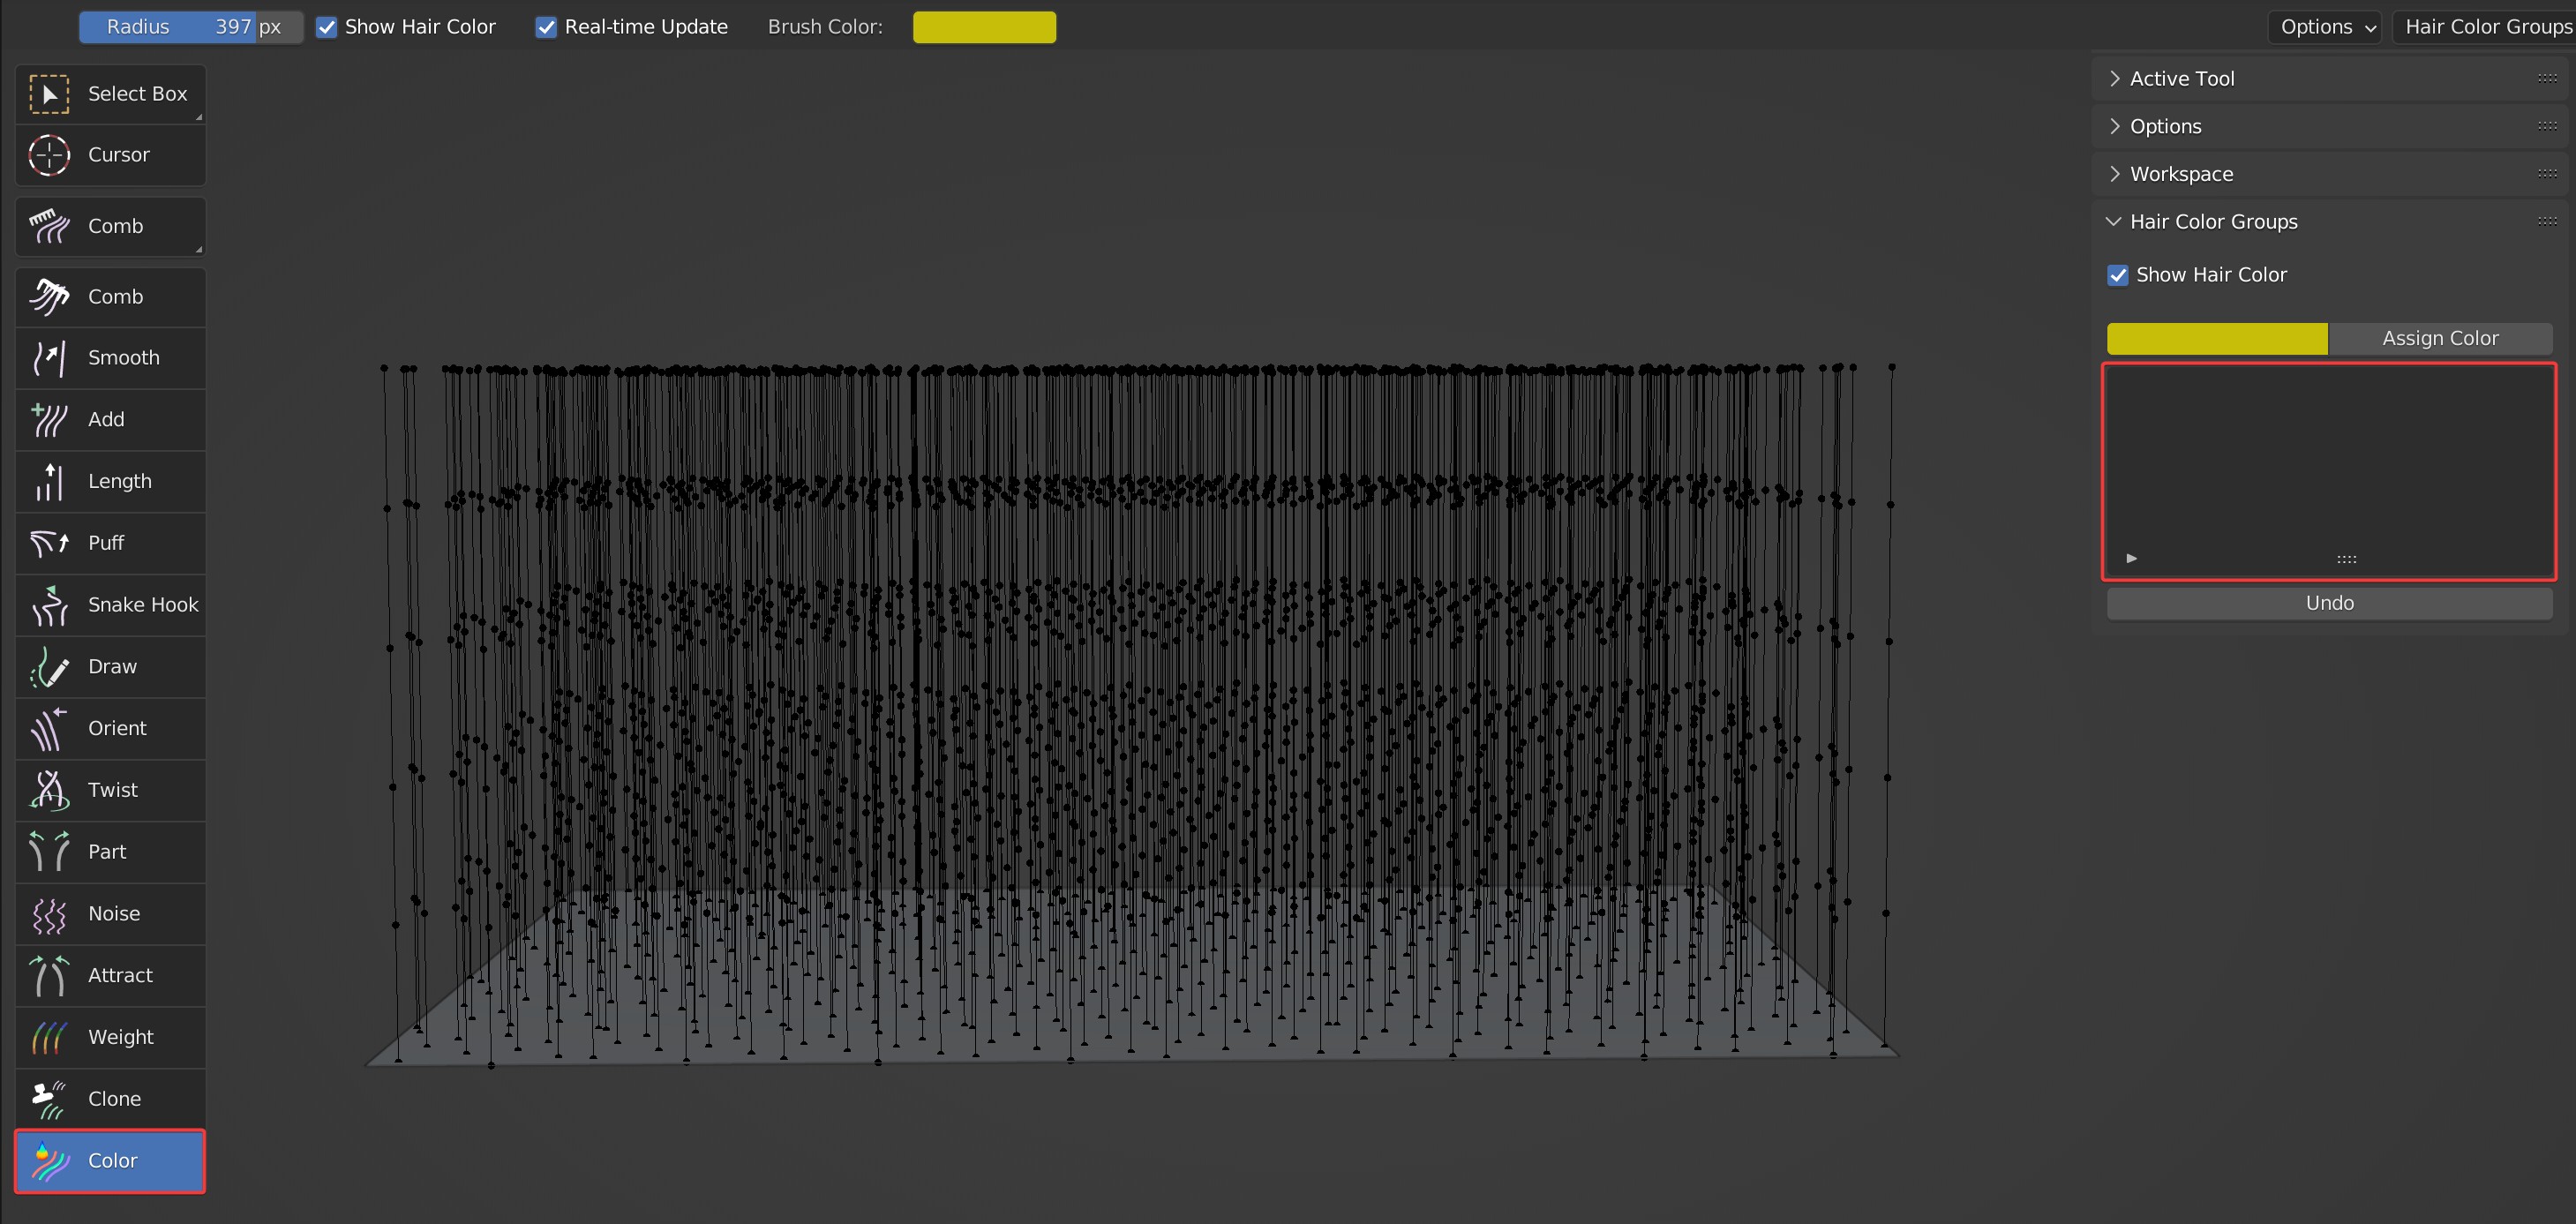
- Delete All: Delete all color groups and reset all hair colors to the default black.
Effects before and after deletion
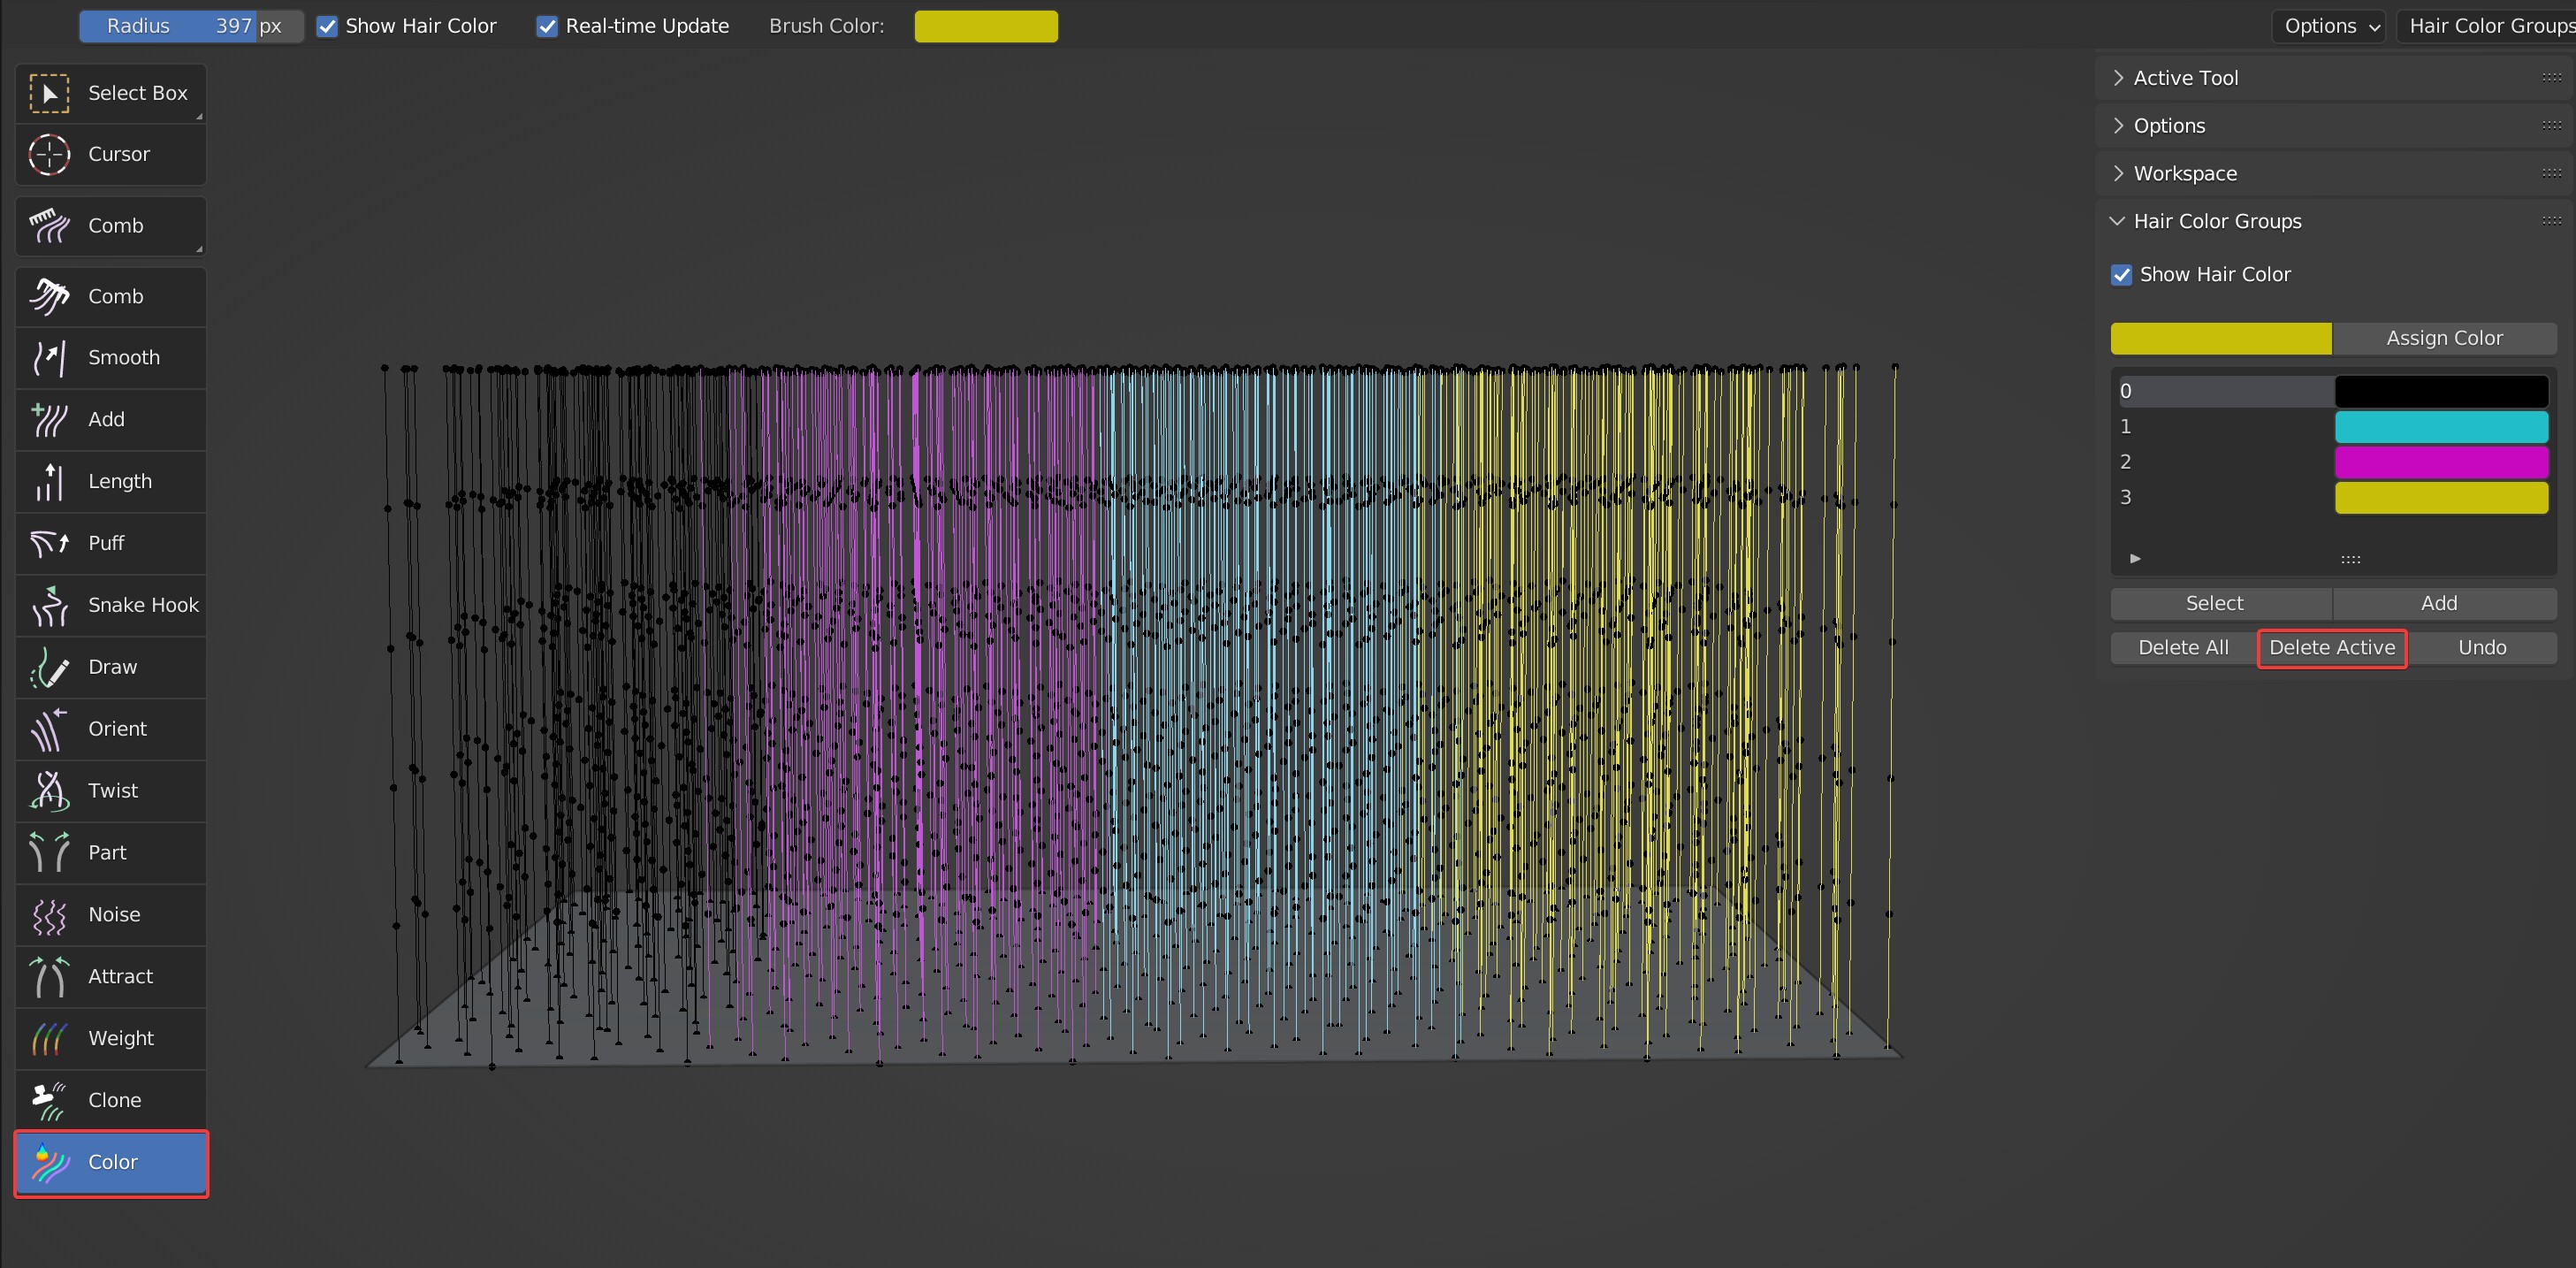
- Delete Active: Delete the current color group and reset the color of hair in the group to the default black.
Effects before and after deletion

- Undo: Undo previous color editing history, including color drawing and color group operations.
Notes
In CyclesHair renderer and viewport shading is Material Preview in the object mode, the black guides display white by default.
In Point and Tip mode, it's easy to check the selected guides; In Path mode, the selected guides cannot be checked.
Case Demonstration
Draw
Used to directly draw hair guides on the surface of the model.
Brush Type
Draw only works in 2D mode.
Brush Options


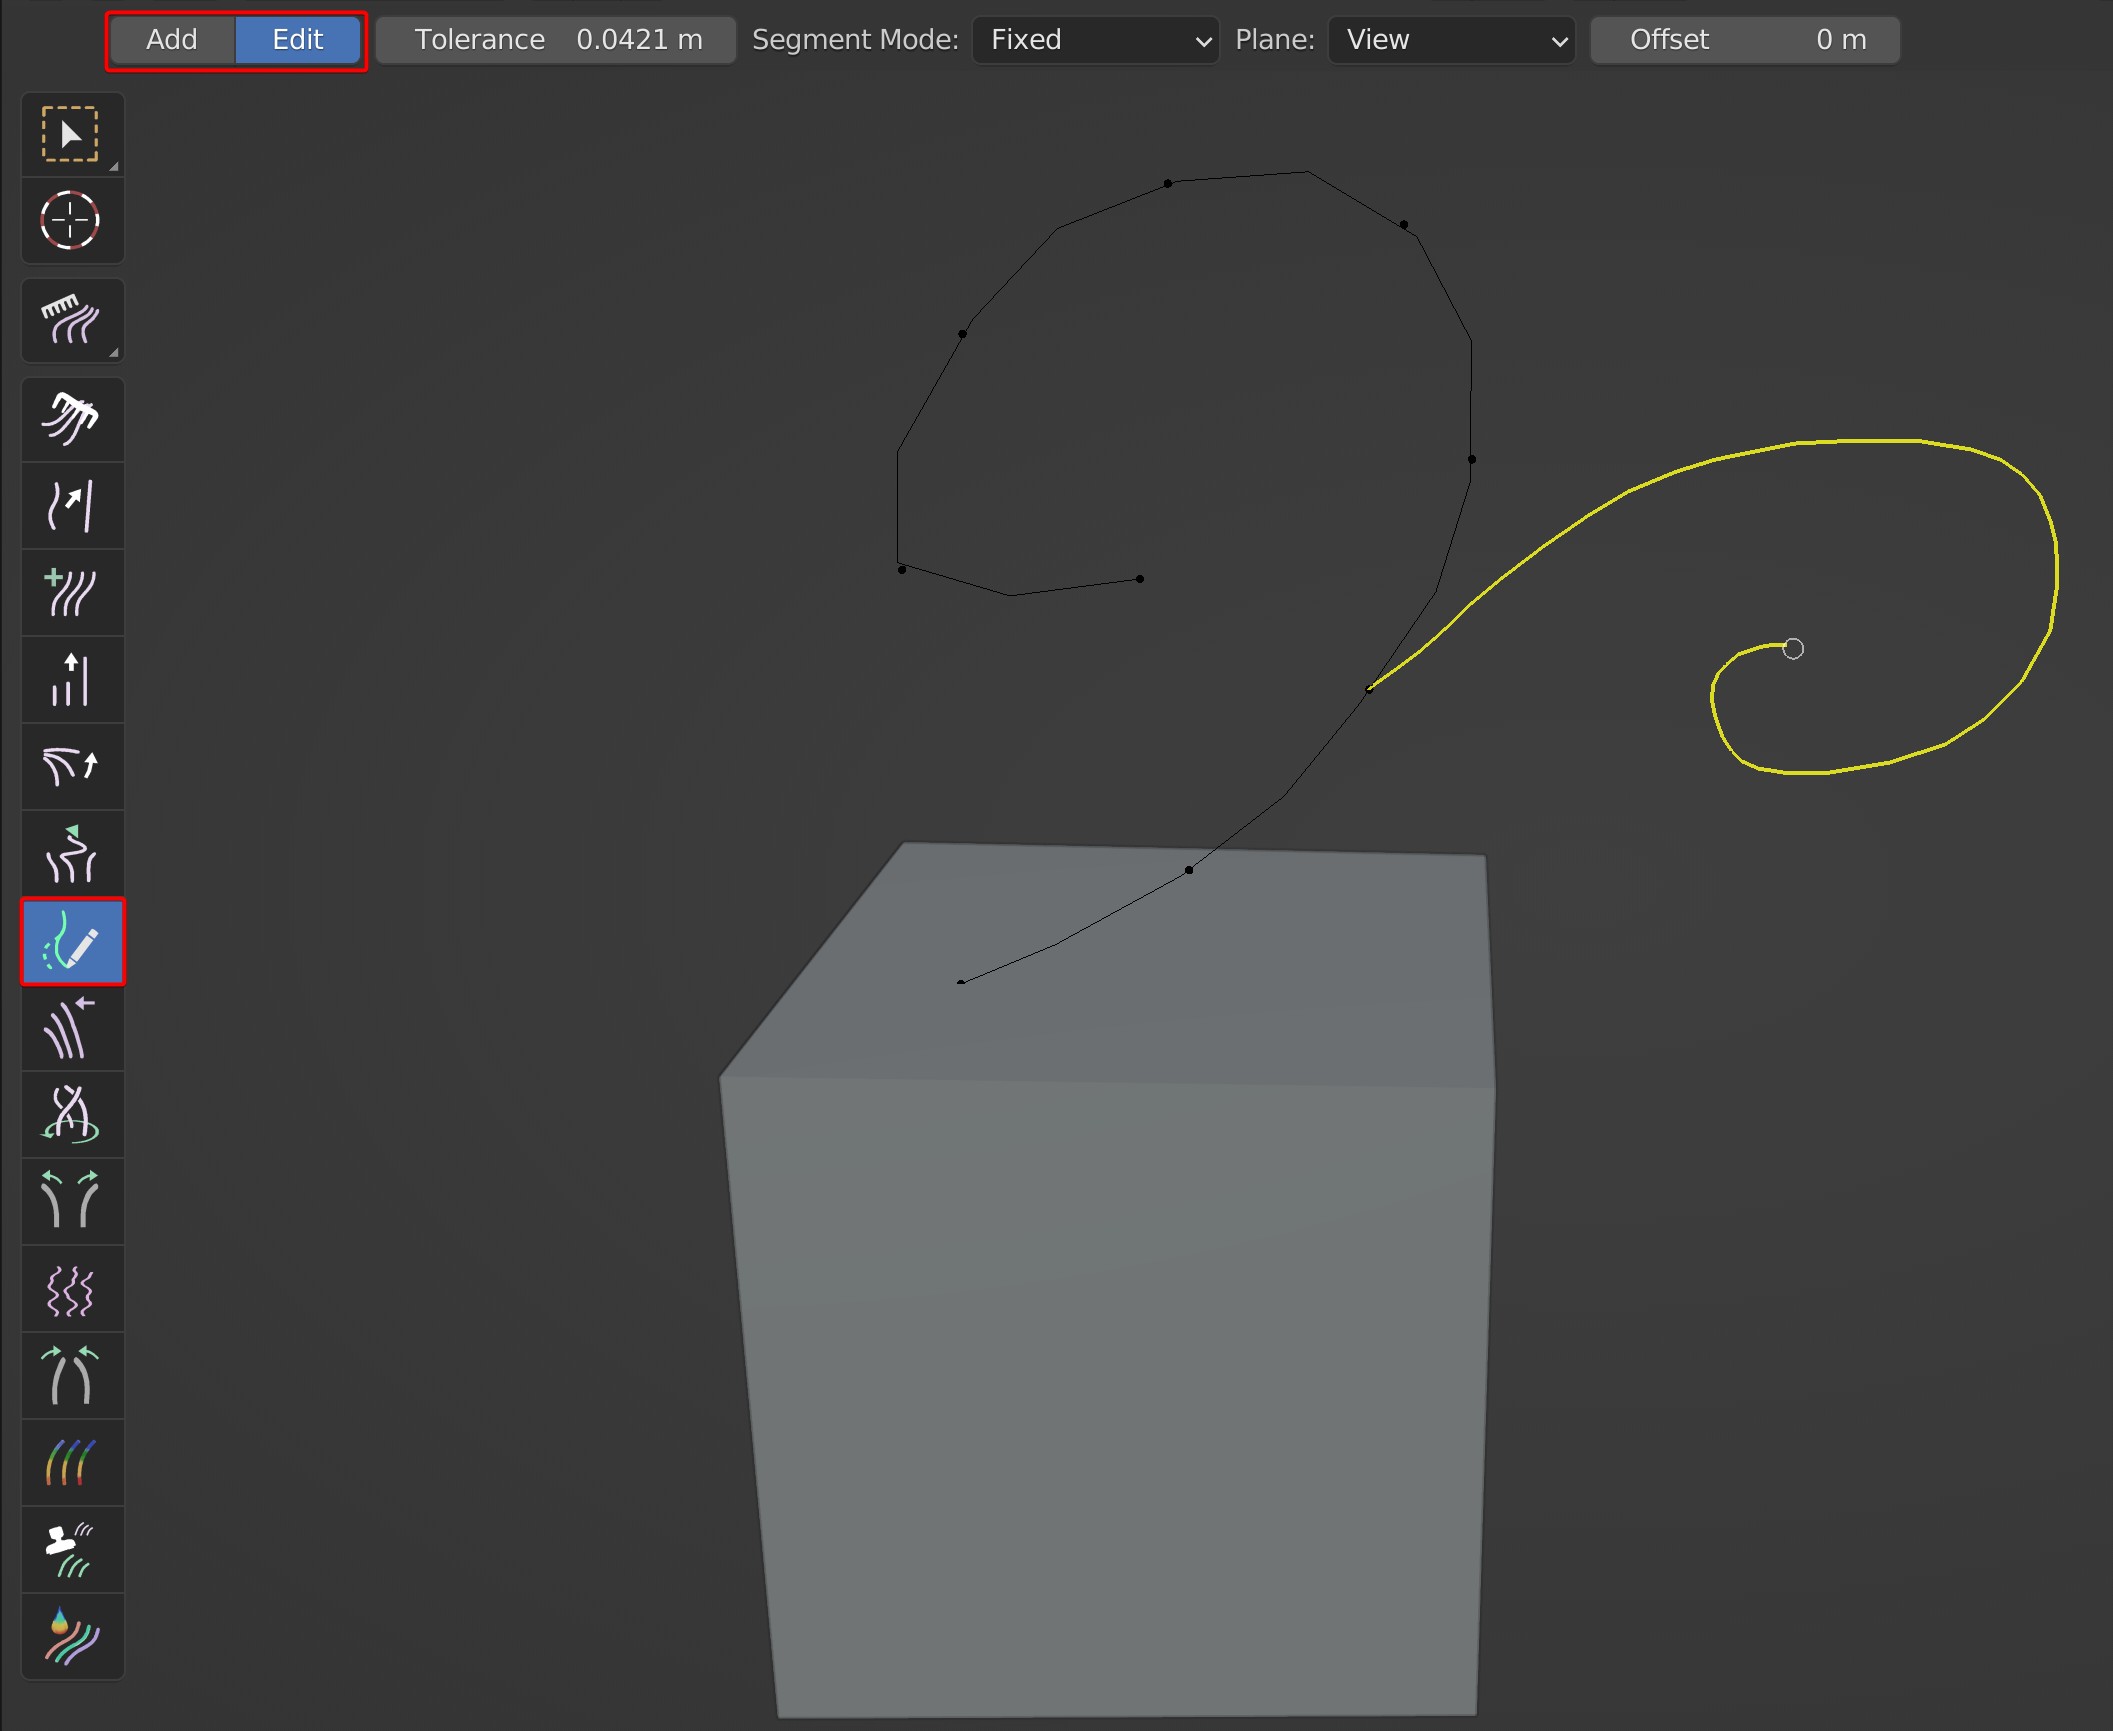
Two draw modes are provided: Add and Edit
- Add: Add guides by drawing directly on the model surface
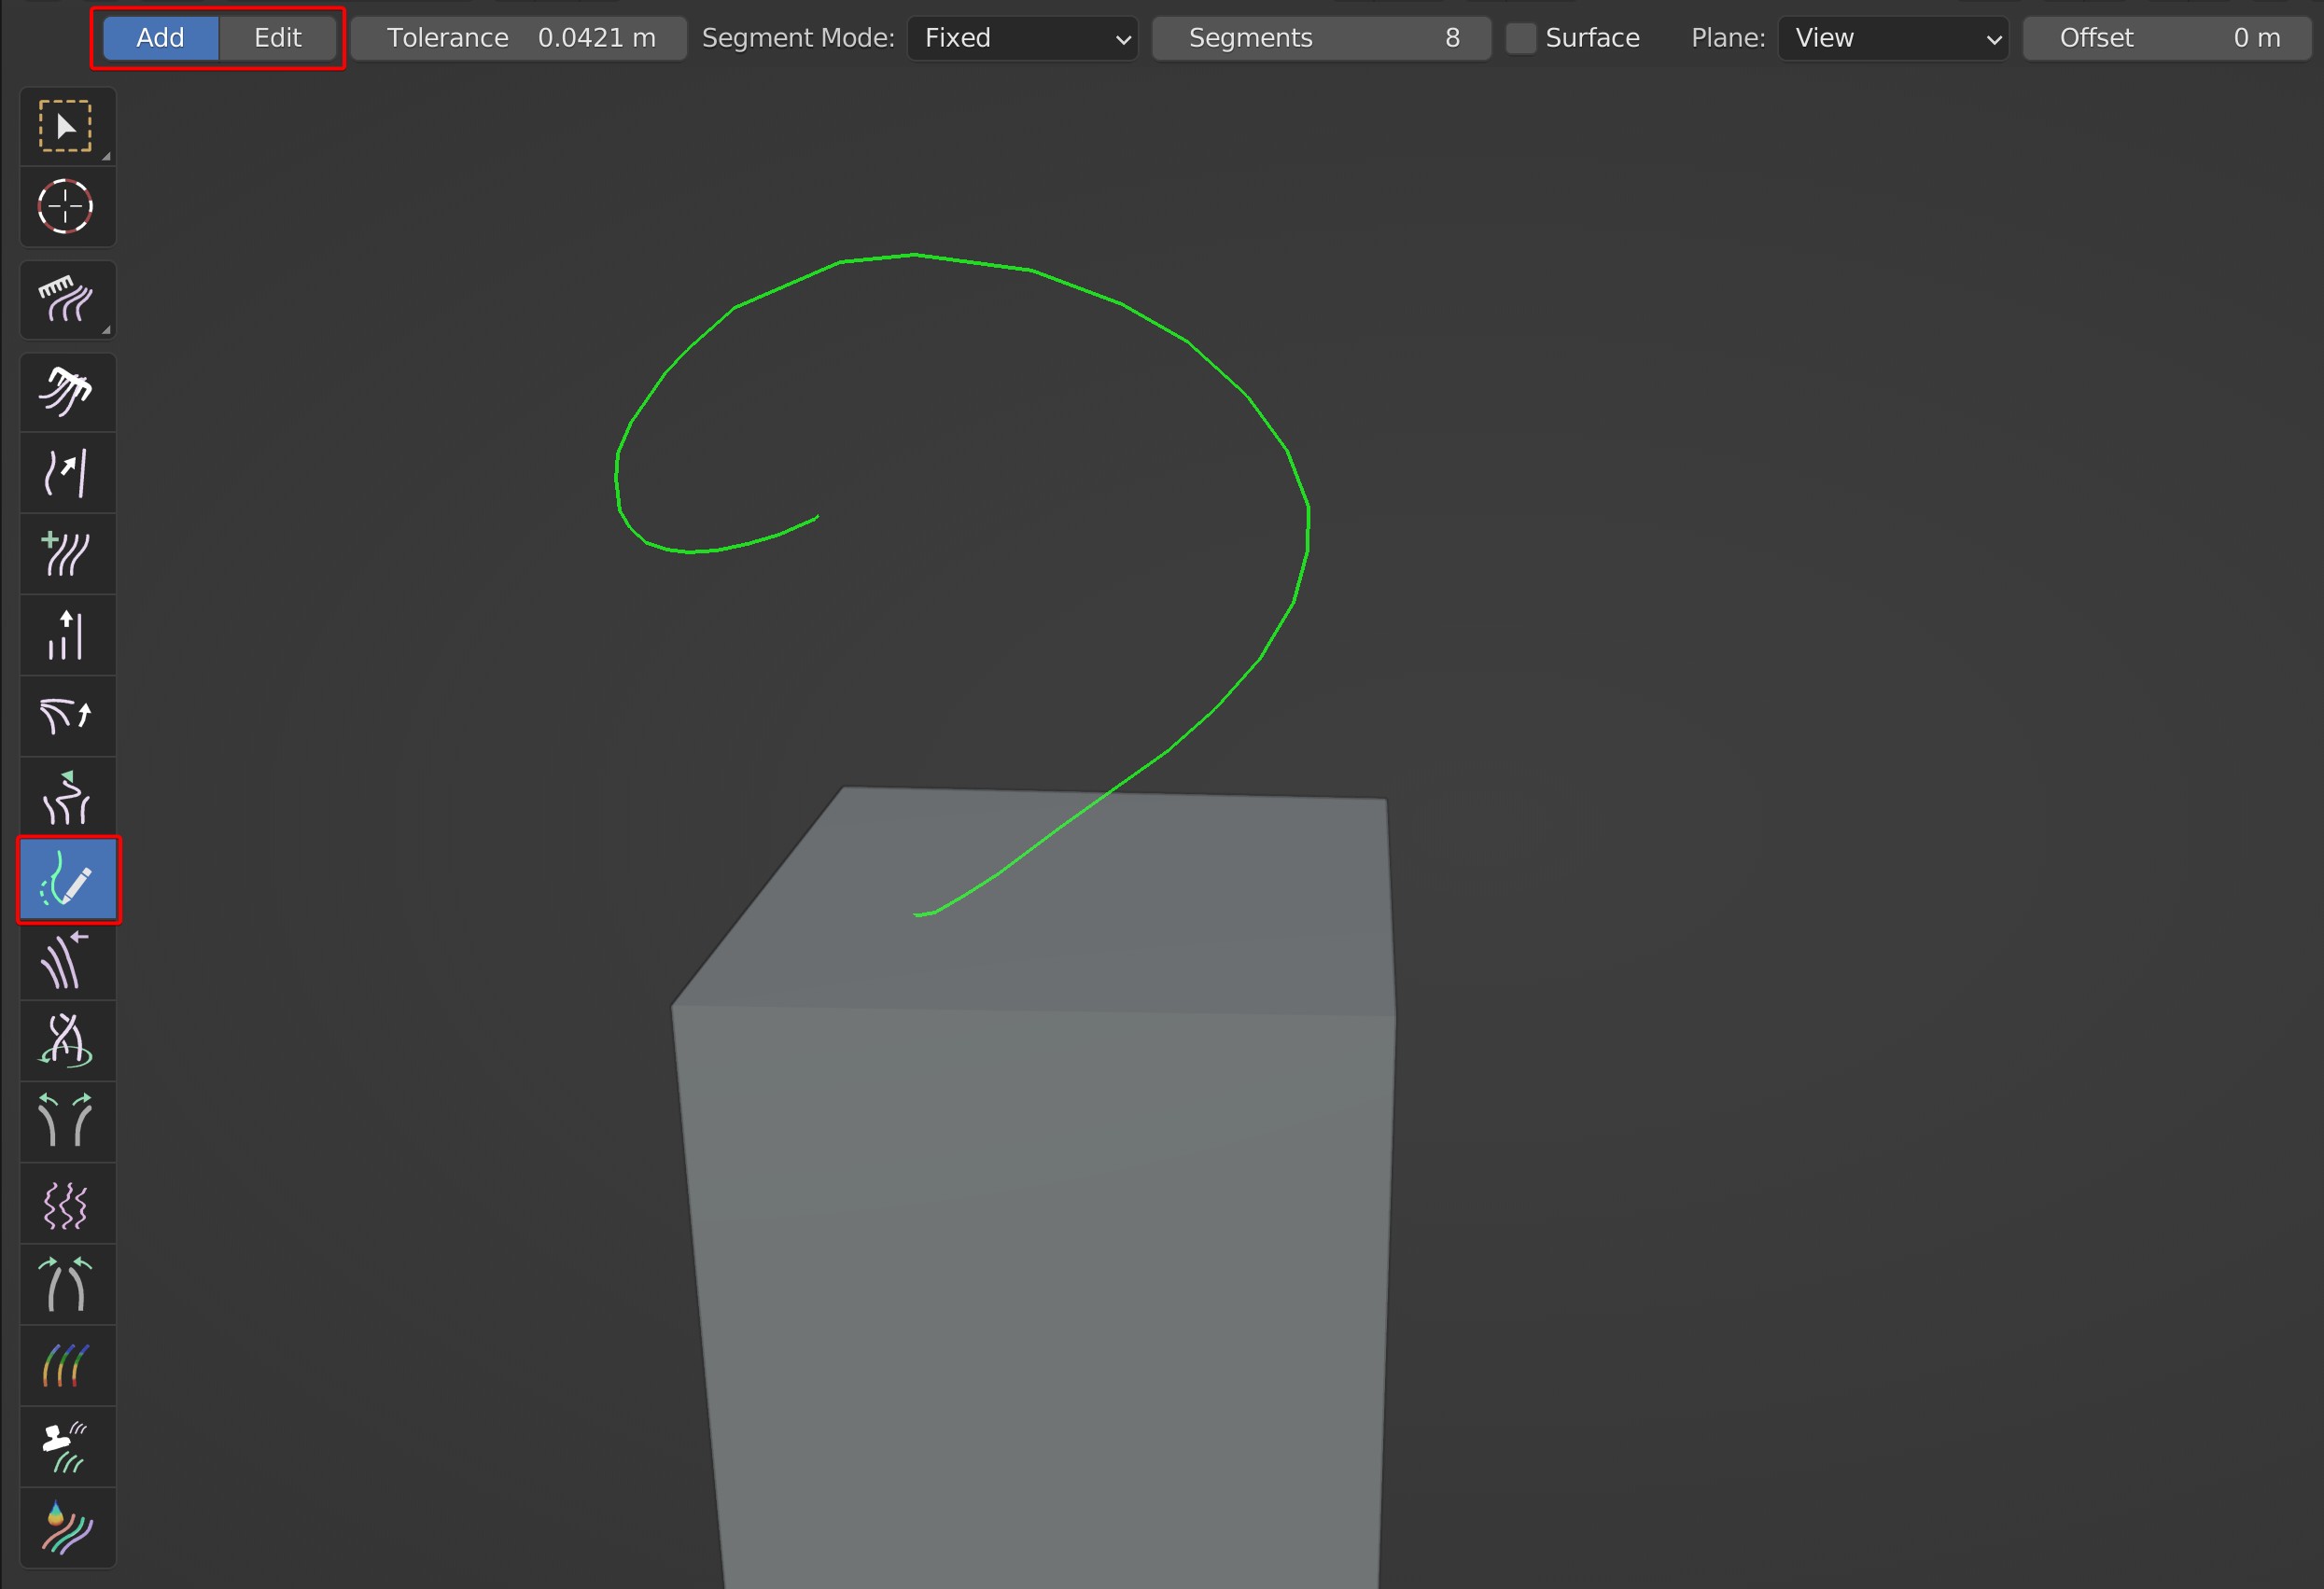
- Edit: Edit the direction of existing guides; Draw guides from a certain point to modify the direction.
Two algorithms are provided for segments: Fixed, Auto
Fixed: The number of segments is determined by a fixed value.
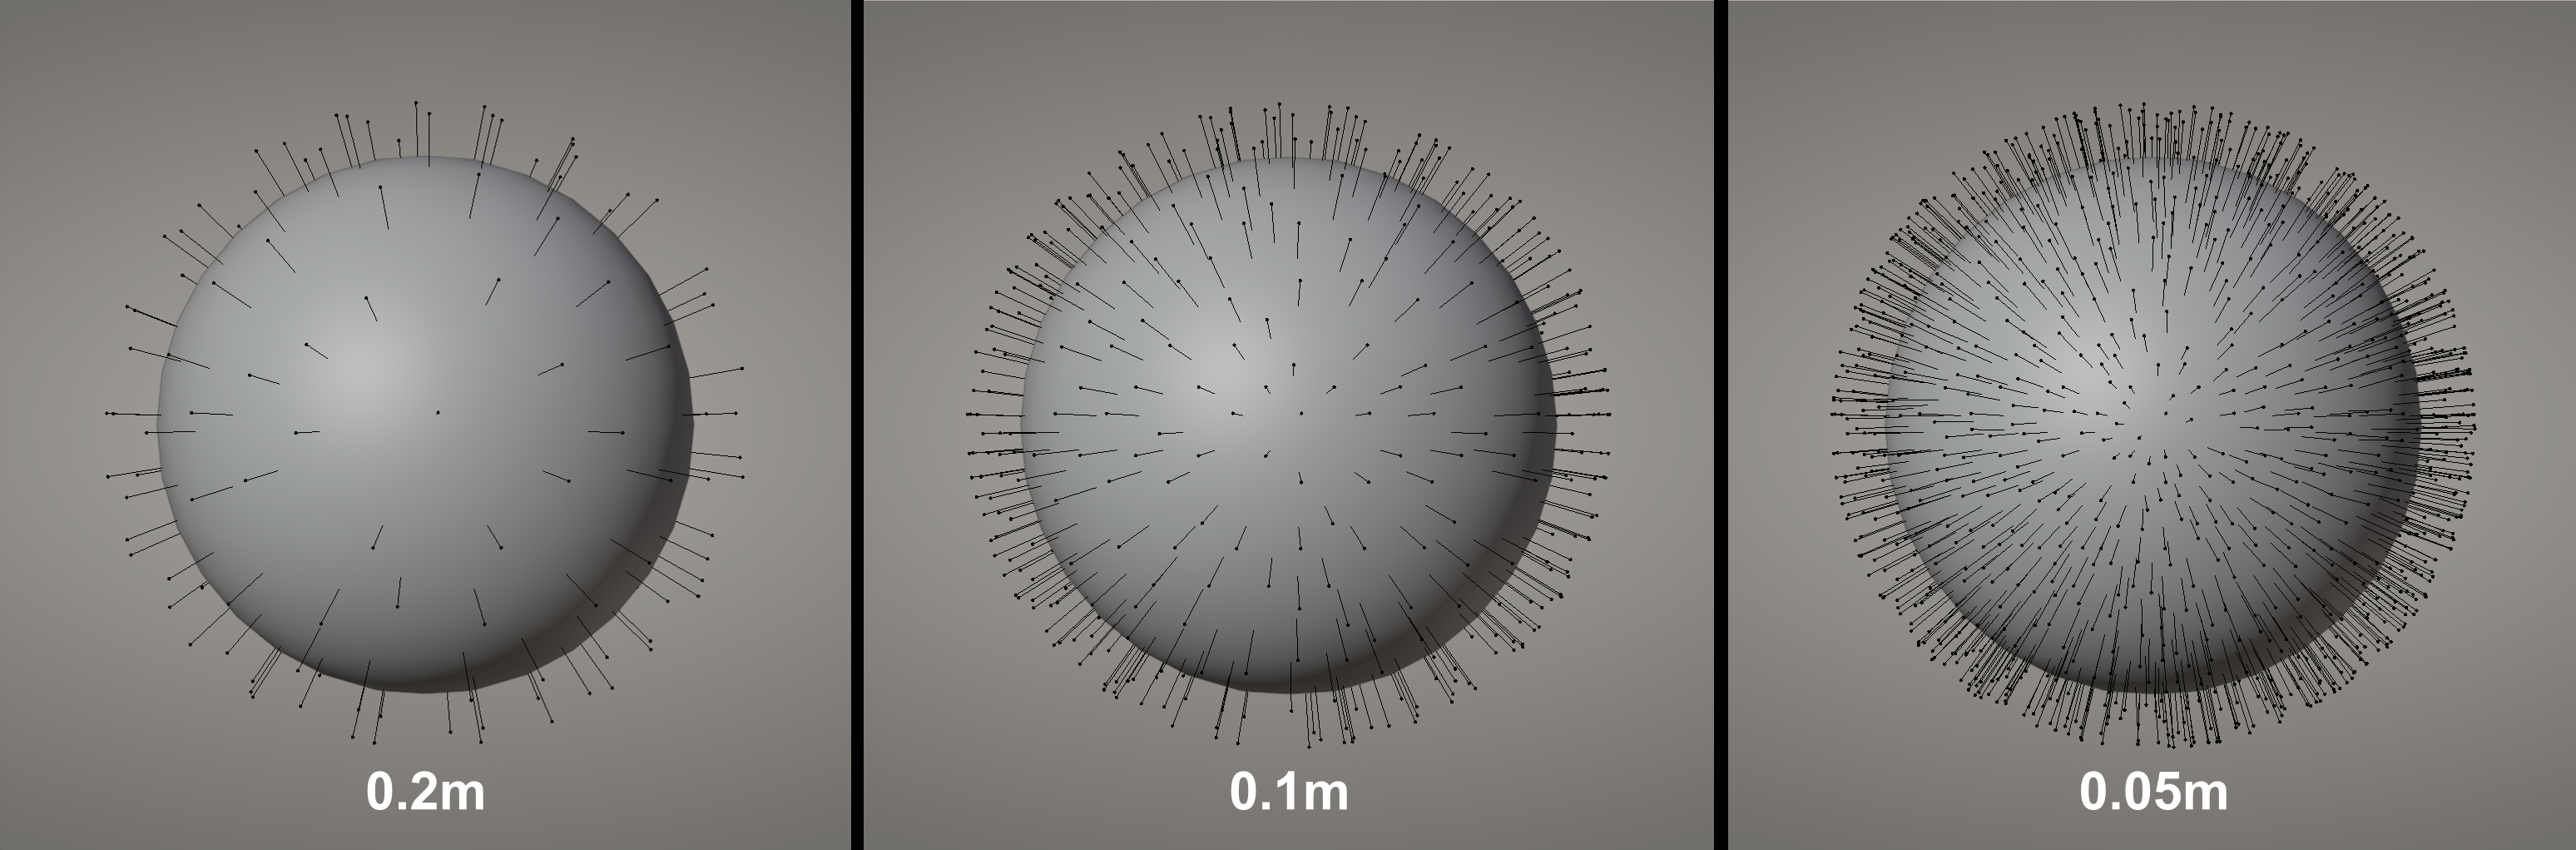
Auto: The number of segments is automatically determined according to Tolerance. The smaller the value is, the higher the number of segments will be.
TIP
The number of segments is fixed no matter how long the guide is when Fixed is selected, And the number of segments is changeable based on the given tolerance.
Surface: Drawing can be automatically projected on the surface.
Two projection ways are provided: View, Normal\View
View: Draw guides in 2D mode.
Normal\View: The roots of the drawn guides are perpendicular to the model surface.
Offset: Controls the distance between the guides and the surface.
Density
Density: Customize the density of guideliens, add or remove guidelines.
Brush Type
Density supports both 2D and 3D modes.
Brush Options

Density Mode
 | Add or remove guidelines according to Distance Min. |
|---|---|
 | Add more guidelines. When the current distance between guidelines is less than Distance Min, the brush will have no effect. |
 | Remove some guidelines. When the current distance between guidelines is larger than Distance Min, the brush will have no effect. |
Distance Min: Distance between the roots of guidelines.
Count Max: The number of guidelines added by the brush. This is determined by Distance Min, when Distance Min is set to 0, the number of guidelines added is equal to Count Max.
Interpolate: Add new guidelines in accord with the direction and length of the current guidelines.
Length: The length of new guidelines. Not available in Interpolate mode.
Keys: The number of segments of new guidelines.